MULTIFUNCTION OVEN MODEL:NWCMBOBPX WARNING: Read the instructions before using the appliance.
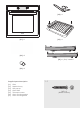
[02] x 1 [01] x 1 [03] x 1 [04] x 2 [05] x 1 (Set) installed [06] x 2 Supplied parts description [01] [02] [03] [04] [05] [06] [07] Oven Handle for tray Grill pan set Oven Shelf Telescopic runner Oven mounting gasket Oven mounting screw 1:1 [07] x 2 (Ø4mm x 25mm)
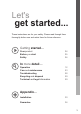
Let's get started... These instructions are for your safety. Please read through them thoroughly before use and retain them for future reference. Getting started… Your product Before you start Safety In more detail… Operation Care and maintenance Troubleshooting Recycling and disposal Technical and legal information 04 05 06 12 23 28 29 29 Appendix...
Getting started... Your product Your product Note! This diagram may be slightly different from the layout of the appliance. B Fig. 2.1 A D C Fig. 2.2 1 2 5 6 3 4 11 12 7 8 10 Key: Fig. 2.1 Key: Fig. 2.2 A. Display 1. ON /OFF 7. Clock 2. Temperature 8. Rapid Heat 3. - Adjustment 9. Duration (Auto) 4. + Adjustment 10. End time (Auto) 5. Light 11. Child lock 6. Function selection 12. Minute minder B. Control C. Tray D.
Things to check before you start To avoid the risks that are always present when you use an electrical appliance it is important that this appliance is installed correctly and that you read the safety instructions carefully to avoid misuse and hazards. Please keep this instruction booklet for future reference and pass it on to any future owners. After unpacking the appliance please check that it is not damaged. If in doubt, do not use the appliance but contact Customer Services on 0333 305 2263.
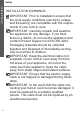
Getting started... Safety 6 INSTALLATION WARNINGS IMPORTANT: Prior to Installation ensure that the local supply conditions (electricity voltage and frequency) are compatible with the requirements of your built-in oven. IMPORTANT: Carefully unpack and examine the appliance for any damage. If you think there is a defect, do not use the appliance and contact Product Support on 0333 305 2263. Packaging materials should be collected together and disposed of immediately as they may be harmful to children.
IMPORTANT : Protect your built-in oven against atmospheric effects. Do not expose your oven to effects such as sun, rain, snow etc. IMPORTANT: The materials surrounding the appliance (cabinets) must be able to withstand a minimum temperature of 100°C. IMPORTANT: When using your oven for the first time your it may give off an un-usual odour from the heating elements and insulation materials. This is normal for cooking appliances.
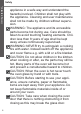
Getting started... Safety 8 appliance in a safe way and understand the hazards involved. Children shall not play with the appliance. Cleaning and user maintenance shall not be made by children without supervision. WARNING: The appliance and its accessible parts become hot during use. Care should be taken to avoid touching heating elements. Children less than 8 years of age shall be kept away unless continuously supervised. WARNING: NEVER try to extinguish a cooking fire with water.
IMPORTANT: When using the grill the oven door must be kept closed. IMPORTANT: Make sure the oven control knobs are all in the off position when not in use. IMPORTANT: If you do not intend to use your built-in oven for a long period of time turn off the electric supply to the oven. Getting started... Safety GENERAL SAFETY WARNINGS IMPORTANT: This appliance has been designed for non-professional, domestic use only. Do not use this oven for commercial use or any other application e.g. room heating.
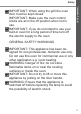
Getting started... Safety IMPORTANT: Your appliance is produced in accordance with all applicable local and international standards and regulations. IMPORTANT: Maintenance and repair work must only be performed by authorised service technicians. Installation and repair work that is carried out by unauthorised technicians is dangerous and could invalidate your guarantee. IMPORTANT: When the door of the oven is open, do not hang or lean anything on it.
WARNING: Do not use harsh abrasive cleaners or sharp metal scrapers to clean the oven door glass since they can scratch the surface, which may result in shattering of the glass. Getting started... Safety TO MAINTAIN THE EFFICIENCY AND SAFETY OF YOUR APPLIANCE, WE RECOMMEND YOU ALWAYS USE OUR AUTHORISED SERVICE AGENTS AND ORIGINAL SPARE PARTS. FOR ASSISTANCE CALL NEW WORLD PRODUCT SUPPORT ON 0333 305 2263.
In more detail... Operation Introduction Note: This multifunction oven combines the advantages of traditional convection ovens with those of the more modern fan assisted models in a single appliance. It is an extremely versatile appliance that allows you to choose easily and safely between different cooking modes. The various features offered by the oven are selected by means of selector knob "B" and thermostat "C" situated on the control panel.
No Function Mode Selected Conventional heat Grill Fan Grill Turbo Grill This function uses the upper and lower heating elements. Natural convection creates a perfect cooking zone in the centre of the oven, ideal for dark fruit cakes and pastries. This function radiates the heat from the grill element and the top element. This fully temperature variable grill is ideal for grilling a family meal. In more detail...
In more detail... Operation Cooking Table The oven control settings and cooking times given in the table below are intended to be used AS A GUIDE ONLY. Individual tastes may require the temperature to be altered to provide a preferred result. Food is cooked at lower temperature in a fan oven than in a conventional oven. When using recipes, reduce the fan oven temperature by 10 °C and the cooking time by 5-10 minutes.
Once the cooker is connected and switched on, the display will start to flash. The clock must be set to the time of day before the oven will work. If the clock time needs to be reset or adjusted, please follow the procedure below. Setting the time Changing the time Step 1. The clock must be set before using the oven. In more detail... Operation Step 1. The clock must be set before using the oven. 00:00 9:00 Press for 3 seconds then press again for 1 second. Step 2. Hour will flash. Step 2.
In more detail... Operation Using the oven Please read the following steps before using the oven. Step 6. Set the temperature - increase. Step 1. Switch on. 9:03 Step 2. Function display will flash. 180c Step 3. Choose a function. 180c Step 4. Confirm function mode. 180c Step 5. Press temperature until display flashes. 180c 16 180c Step 7. Set the temperature - decrease. 80c Step 8. Press the temperature button to start and confirm selection.
Change a function mode Step 1. Press the Function button the display will flash. 180c Step 2. Choose a function. 180c Step 3. Confirm function mode. 180c Change a function temperature Step 1. Press temperature until display flashes. 180c In more detail... Operation Step 2. Set the temperature - increase. 180c Step 3. Set the temperature - decrease. 80c Press for 1 second. Step 4. Press the temperature button to start and confirm selection.
In more detail... Operation To stop the oven at a specific time of day Please set the oven function first. You have set the required temperature and function mode and you would like the oven to automatically stop. This features works by knowing the cooking duration. For example if the time is 13:30 and the food is required to bake for 45 minutes, the oven will stop working at 14:15. The oven will remain active until the programmed cook time elapses. The remaining cook time is shown on the display. Step 1.
To start and stop the oven automatically Please set the oven function first. The timer allows you to automatically start and stop by a combination of the length of the cooking time and the stop time. Giving you the flexibility to cook casseroles etc while you are out. You cannot set the actual start time. For example if the time is 13:30 and the food is required to bake for 45 minutes, the oven will stop working at 14:15.
In more detail... Operation Setting the minute minder The minute minder can only be used when the oven nn has no cook function selected. To set the child lock Step 1. In standby mode press the function and clock Step 1. 0:00 9:00 Press for 1 second. 09.03 Press for 1 seconds. Step 2. Repeat the process to unlock Step 2. 0:15 9:00 Step 3. 0:08 9:00 20 09.03 Press for 1 seconds.
Using Rapid heat Rapid Heat allows you to preheat the oven quickly. Before using this function remove all oven trays. DO NOT put food in the oven when using the rapid heat function. This will effect your cooking process. nn All heating elements are used. Rapid Use with caution as this is an Heat Function intense form of heat. In more detail... Operation DO NOT put food in the oven when using the rapid nn heat function. This will effect your cooking process. Step 1. Switch on. 9:03 Step 2.
In more detail... Operation Setting a memory The memory function can be used to save a frequently used setting. Step 6. Set a frequently used temperature - decrease. Step 1. Switch on. 9:03 Step 2. Function display will flash. 180c Step 3. Choose a frequently used function. 180c 80c Step 7. Firmly press the rapid heat button until a tone is emitted. 210c To recall a memory Step 1. In standby mode press the rapid heat button. 180c Press for 3 seconds. Step 4. Press temperature. 180c Step 2.
In more detail... Care and maintenance Care and maintenance Warning Always switch off the electricity supply before performing maintenance work. In the event of a fault, contact customer services. FUSE OFF Caution Do not use hot water, diluents, petrol, alcohol, kerosene, washing powder, cleanser, alkaline detergent, acid, chemical cloth, etc. for cleaning to not damage the enamel coating and plastic.
How to keep your oven in good condition Before cleaning your oven, or performing maintenance, disconnect it from the power supply. To extend the life of your oven, it must be cleaned frequently, keeping in mind that • • • • • • • In more detail... Care and maintenance The enamelled or stainless steel parts should be washed with luke warm water without using any abrasive powders or corrosive substances which could ruin them. Stainless steel could become stained.
In more detail... Care and maintenance How to remove the oven doors For a more thorough clean, you can remove the oven door. To remove the oven door use the following instructions: 1. Open the door to the full extent. 2. Open the lever A completely on the left hand hinges. A B 3. Open the door to angle as shown. 4. Close the door until the left & right hand levers A are hooked to part B of the as shown in diagram of step 2. 5. Withdraw the hinge hoods for there position following arrow C.
Removing the inner pane of Glass &Cleaning the Glass Door 1. Open door to a position you can view the screws on the edge of oven door. (HJ)LJ 2. Using a screwdriver please remove the two screws as shown in the diagram (eg Fig 1) 3. Remove the bracket from the top of the oven door(eg Fig 2) 4. Now carefully remove the inner glass from the door. 5. Place the glass on a soft flat surface. 6. Clean the glass using non-abrasive products and sponges. Dry with a soft cloth. 7.
In more detail... Care and maintenance • To un-clip the telescopic rail [05] for cleaning or repositioning purposes you must apply outward pressure on the underside of the telescopic rail to release, as shown in Fig 1 (Note: reverse of rail shown). • To re-fit the telescopic rail, locate the clip into the top rail on the shelf guide and push downward, the rail will clip into place.
Troubleshooting What should I do if the oven doesn’t heat up? Check to see if one of the following actions resolves the issue: • The oven may not be switched on. Switch the oven on. • The clock may not be set. Set the clock (see section “Setting the clock”). • Check to see if the required settings have been applied. • A household fuse may have blown or a circuit breaker may have tripped. Replace the fuses or reset the circuit. If this happens repeatedly, call the Service Centre. In more detail...
In more detail... Recycling and disposal Technical and legal information Recycling and disposal Environmental protection Waste electrical products should not be disposed of with household waste. Please recycle where facilities exist. Check with your Local Authority or retailer for recycling advice. The symbol on the product or its packaging indicates that this product cannot be treated as normal household waste.
Installation 01 Only a qualified person in compliance with the instructions provided must install the appliance. The manufacturer declines all responsibility for improper installation, which may harm persons and animals and damage property. Caution The power supply to the appliance must be cut off before any adjustments or maintenance work is carried out.
Electrical connection 02 This appliance must be installed by a qualified electrician to comply with the relevant Institution of Engineering and Technology (I.E.T.) regulations and also the local electricity supply company requirements. This appliance must not be connected to an ordinary domestic power point. The mains terminal is situated on the back of the oven. • • • GREEN AND YELLOW = EARTH BLUE = NEUTRAL BROWN = LIVE. The fuse must be rated not less than 16 Amps.
Fitting on a Power Supply Cable Opening the terminal board: · · Using a screwdriver ,prize the bolt on the side tabs of the terminal board cover ; Using a screwdriver unhooking the no.2 fixing hooks, pull open the cover of the terminal board. To install the cable, proceed as follows: 1. Open the terminal board 2. Remove the wire clamp screw and the three contact screws L-N 3. Fasten the wires beneath the screw heads using the following color scheme : Blue (N) Brown (L) Yellow-Green 4.
03 Fixing the oven Connect to mains power supply ensuring the cable is not bent. Lift oven into housing unit, do not lift the oven with the handle otherwise the glass door might shatter. Note: If the supply cord is damaged, it must be replaced by the manufacturer, its service agent or similarly qualified persons in order to avoid a hazard.
05 Adjusting the shelf position.
Information for domestic ovens - Symbol Value Unit Model identificatio - NWCMBOBPX - Type of oven - Built-in electric oven - Mass of the appliance M 35.2 Kg Number of cavities - 1 - Heat source per cavity (electricity or gas) Electricity - - Volume per cavity V 69 L Energy consumption (electricity) required to heat a standardised load in a cavity of an electric heated oven during a cycle in conventional mode per cavity (electric final energy) EC electric cavity 0.
Help and assistance If you require any technical guidance or find that your washing machine is not operating as intended, a simple solution can often be found in the Troubleshooting section of these instructions or online at www.newworldassist.co.uk If you still require further assistance, call one of our experts on 0333 3052263*. To help give us give you a fast and efficient service please have the following information ready: Model Ref.
Product support Help is always at hand Call us now and activate your 24 month guarantee Thank you for choosing New World. Your new product is guaranteed against faults and breakdowns for 24 months. Don’t forget to register it with us today so we can provide you with our best possible after-sales service and useful updates. www.newworldassist.co.uk 0333 305 2263 Your New World Guarantee This product is guaranteed for 24 months from the date of original purchase.
Contact: www.newworldassist.co.