
User Manual


P a g e | 106
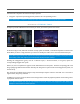
To put this another way, the viewport layout of the Live Desktop’s multiview pane re-arranges itself as
required to make optimal use of the space available.
For example, when tabbed modules (such as the DDRs) at the bottom of the Live Desktop are fully expanded,
the Program and Preview viewports above are stacked one above the other. On the other hand, if the tabbed
modules are minimized, these viewports are side by side.
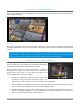
SECTION 10.3 WORKSPACE PRESETS
The basic layout of all multiview monitoring areas is established by assigning a Workspace preset to the
screen. To access these presets, move the mouse pointer over the left-hand end of the Dashboard at the top
of the Live Desktop to reveal the Workspaces menu.
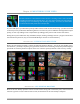
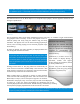
Four presets, labeled A-D, are provided for each connected
Multiview screen. Select a preset and assign a layout to it using the
Load Default menu point. Continue to customize the display options
for the viewports, and recall the entire setup at a moment’s notice by
reselecting it. (To reset a preset, select it again and reload the default
layout.)
Each viewport in any layout offers diverse input or output source
options, as discussed in Section 10.5. The settings you select for
individual monitors will be retained in the current Workspace preset.
Let’s further consider an important Workspace layout option - Scopes.
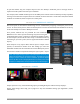
Note: The Display Settings option in the Workspaces menu lets you
choose the Resolution of connected monitors, and apply Proc Amp
settings to them. Select the native resolution of external display
devices for best results. Changing Resolution can cause frames to be
dropped, so modifications during live production are discouraged.
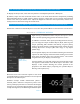
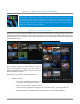
SECTION 10.4 SCOPES
FIGURE 121
Scopes represent a very useful monitoring option, providing Waveform and Vectorscope displays.
Among other things, these help you to judge Proc Amp and LiveMatte settings (see Appendix C, Video
Calibration).
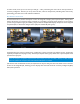
FIGURE 120