INSTRUCTION MANUAL FOR NEXT LEVEL RACING WHEEL STAND LITE For assistance please contact: support@nextlevelracing.com www.nextlevelracing.
Thank-you for purchasing a Wheel Stand LITE If you require any support with your product please contact our friendly team at: support@nextlevelracing.com for a prompt response.
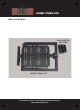
WHEEL STAND LITE What’s In The Box: GEAR SHIFTER ADAPTOR WHEEL STAND LITE For assistance please contact: support@nextlevelracing.com www.nextlevelracing.
WHEEL STAND LITE Step 1: S Hard mount your pedals to pedal plate before beginning assembly Wheel Plate U bolt Pedal Plate Unpack and unfold the wheel stand. Clip on the U-bolt to secure wheel support. Step 2: S If using gear shifter, attach adaptor using bolts supplied. For assistance please contact: support@nextlevelracing.com www.nextlevelracing.
WHEEL STAND LITE Step 3: Bolt to change angle of pedal plate If using pedals in flat position move the bolt position for stronger support. If wanting to adjust angle for pedal plate, remove bolt on both sides of Wheel Stand Lite Step 4: Tip – For quick pedal distance adjustment just loosen the 4 bolts pictured and then slide pedal plate further or closer. Then tighten the 4 bolts to lock in position For assistance please contact: support@nextlevelracing.com www.nextlevelracing.
WHEEL STAND LITE ADJUSTABILITY Step 5: 1. ANGLE 3. PE DA L AD PLAT JU ST E DIS ME TA NT NC E 2. HEIGHT ADJUSTMENT 1. ANGLE 3. PEDAL PLATE DISTANCE ADJUSTMENT For rigidity and having stand strong as possible be sure to go through and tighten all bolts and nuts before use, especially for the steering wheel plate. For assistance please contact: support@nextlevelracing.com www.nextlevelracing.
WHEEL STAND LITE NEED ASSISTANCE? If you require any support with your product please contact our friendly team at: support@nextlevelracing.com for a prompt response. For assistance please contact: support@nextlevelracing.com www.nextlevelracing.
WHEEL STAND LITE CZ Krok 1: Před zahájením montáže pevně připevněte pedály k pedálové desce. Rozbalte a rozviňte stojan kola. Připevněte U-bolt, abyste zajistili podepření kola. Krok 2: Pokud používáte řadicí páku, připojte adaptér pomocí dodaných šroubů. Krok 3: Pokud používáte pedály v rovině, posuňte polohu šroubu pro silnější oporu. Pokud chcete nastavit úhel pro desku pedálu, odstraňte šroub na obou stranách Wheel Stand Lite.
WHEEL STAND LITE NL Stap 1: Bevestig uw pedalen hard op de pedaal voordat u begint met montage Pak de wielstand uit en ontvouw. Klem op de U-bolt om de wielsteun te bevestigen. Stap 2: Als u de versnellingsbak gebruikt, sluit u de adapter aan met de meegeleverde bouten. Stap 3: Als u pedalen in de platte positie gebruikt, verplaats de boutpositie voor een sterkere ondersteuning. Als u de hoek voor de pedaalplaat wilt aanpassen, verwijder u de bout aan beide zijden van de Wheel Stand Lite.
WHEEL STAND LITE FR Étape 1 : Fixez solidement vos pédales à la plaque pour pédalier avant de commencer le montage Déballez et dépliez le support pour volant. Attachez/enfichez le U-bolt pour sécuriser le support pour volant. Étape 2 : Si vous utilisez un levier de vitesse, fixez un adaptateur à l’aide des boulons fournis. Étape 3 : Si vous désirez vous servir de vos pédales bien à plat, changez la position du boulon pour un appui plus solide.
WHEEL STAND LITE IT Passaggio 1: Fissare i pedali alla pedaliera prima di iniziare l’assemblaggio Disimballare ed estrarre il volante. Premere U-bolt per fissare il volante. Passaggio 2: Se si prevede di utilizzare il cambio, fissare l’adattatore con le viti in dotazione. Passaggio 3: Nel caso di utilizzo dei pedali in posizione piatta, spostare la posizione della vite per un maggiore supporto.
WHEEL STAND LITE ES Paso 1: Instale los pedales en la placa de pedales antes de empezar el montaje Desembale y despliegue la base del volante. Enganche el U-bolt para fijar el soporte del volante. Paso 2: Si utiliza un cambio de marchas, instale el adaptador usando los tornillos incluidos. Paso 3: Si utiliza pedales en posición plana, mueva la posición del tornillo para conseguir un soporte más sólido.
WHEEL STAND LITE DE Schritt 1: Befestigen Sie Ihre Pedale mit die Pedal Platte vor der Montage. Entfalten Sie und packen Sie den Rollenständer aus. Klemmen Sie die U-bolt, um die Stahlstützen zu sichern. Schritt 2: Befestigen Sie den Adapter mit den mitgelieferten Schrauben bei Verwendung des Zahnradschalters. Schritt 3: Wenn Sie Pedale in einer weichen Position verwenden, bewegen Sie die Schraubenposition für eine stärkere Stütze.
SHOP THE RANGE WHEEL STAND FLIGHT STAND GTULTIMATE COCKPIT FLIGHT COCKPIT MOTION PLATFORM V3 F1GT COCKPIT For assistance please contact: support@nextlevelracing.com www.nextlevelracing.
ACCESSORIES FLOOR MAT *SEAT ADD ON *GAMING DESKTOP *KEYBOARD STAND *FLIGHT PACK *GTULTIMATE MONITOR STAND *NOT COMPATIBLE WITH WHEEL STAND LITE For assistance please contact: support@nextlevelracing.com www.nextlevelracing.
For assistance please contact: support@nextlevelracing.