
Installation Guide


16
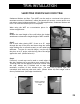
CORNER INSTALLATION
INTERLOCKING OUTSIDE CORNERS
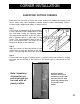
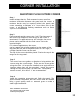
Step 1
After placing the Start Strip, set the outside corner piece
against the corner and down into the strip. Using the screw
guides, place at least 3 screws along the top tongue and 2
screws at the right lap side of the corner where indicated.
(fig. 1)
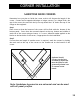
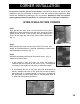
Step 3
Interlock the panels working out from each corner. (fig. 3)
Install from Left to Right.
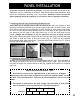
If the length of the wall does not allow the panels to
interlock into the corners at the end of a run, cut the panel
vertically in the middle of the panel to meet the length.
If terminating the run at the right side with alternate trim
pieces, measure the end of the grout line to the accessory
piece and add 1" if sliding behind a trim piece. Straight cut
the panel and fit behind trim piece or cut the panel flush so
it meets the terminating Accessory.
Step 2
Slide the second corner over the top of the first corner and
attach as indicated above. Continue alternating corners until
desired height is reached. (fig. 2)
Figure 1
Figure 2
Figure 3
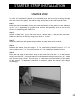
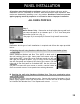
All products must be allowed to acclimate; removed from boxes and stored at the
installation site for a minimum of 48 hours. Heat and moisture cause expansion. Best
results are obtained by installing a cool, dry product. NextStone™ does not warrant
against gapping caused by expansion or contraction due to improper installation.