
Installation Guide


23
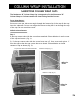
TRIM INSTALLATION
MOUNTING BLOCKS
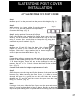
Step 1
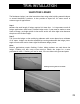
Looking at the back side of the mounting block, measure both the
length and height of the rectangular pre-formed block on either the
Large or Small Mounting Block.
Step 2
Transfer these measurements to the back of the panel needing the cut out and mark.
Mounting blocks can be installed horizontally or vertically.
Step 3
Using the rectangle you drew on the back of the panel as a cutting
guide, cutout the panel. Install the cutout panel using standard
Installation guides.
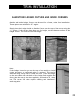
Note:
On the back side of the mounting block you will see a pre-formed area molded into
the block. The Large Mounting Block has a circular area for round outlet boxes. The
Small Mounting Block has a pre-formed areas for plumbing rough-ins, single and
double outlet boxes, and round fixture cutouts.
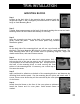
Step 4
Determine which cut out and what size is appropriate. Drill a
hole on the side of the cut out area to use as a starting point.
Cut the pattern on the block using a saber saw. Always cut from
the back of the mounting block to avoid marring the front
surface of the mounting block. If necessary, use a wood rasp to
fine tune the cutout.
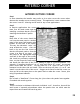
Step 5
Apply caulk and/or adhesive to the back of the mounting block to seal between the
mounting block and the panel. Put the mounting block in place and attach with 3"
screws. Place screws where they will be concealed by the cover plate
of the fixture.
Step 6
Attach electrical boxes to the face of the cover plate as indicated.
Install the fixture and it’s cover plate. Caulk around fixture as
needed.