
Installation Guide


24
SLATESTONE 30" COLUMN WRAP
Step 1
Build out the desired column to be wrapped at no more or less than 13 ⅞" x 13 ⅞" .
Note:
The Slatestone 30" Column Wraps are made up of 4 pieces,
MARKED 1-4, and interlock using the designed finger joints.
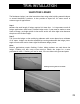
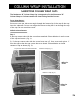
Step 2
Place the first panel, #1, against the column. Be sure to
place all panels with the top arrow pointing up. Slide in
panel #2 and #3 on the right and left side. This will center
panel # 1 around the enclosure. (fig. 1)
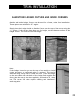
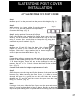
Step 3
Interlock and dry fit all 4 sides at the finger joints.
(fig. 2)
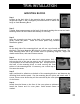
Step 4
Attach each panel starting at the bottom using three (3) 2"
exterior screws. Place the screws in the grout lines to best
hide screw heads and minimize touch up work.
Note:
For additional stability, place screws in the grout line about 15 ½" above the base.
This screws through the inner landing of the panel.
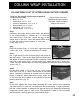
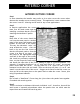
Step 5
To make columns higher than 30", simply stack the next
course using the tongue and groove attachment for the
bottom and the screw hem at the top of the first
column. (fig. 3)
COLUMN WRAP INSTALLATION
Fig. 2
Fig. 2
Figure 1
Figure 2
Figure 3