
Installation Guide


30
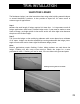
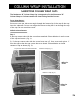
MITERED CORNER
MITERED OUTSIDE CORNER
Step 1
In some situations the installer may prefer to do a miter cut at the corner rather
than use the outside corner accessory pieces. This application is most common when
the corner is not 90°. Mitering can be used for any corner applications.
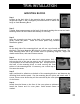
Step 2
In exterior applications the corner
must first be made water-tight by
installing a moisture barrier prior to
installing the NextStone™ panels.
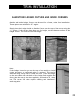
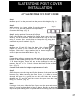
Step 3
Both sides of the corner should be
cut from the same panel or another
panel of the same configuration (the
number on the back is the same).
This way, the individual “rocks” will
wrap around the corner. (You will
have to lay out the first course so
that the last panel used to form the
corner is at least 8" too long.) Cut
the panel at the appropriate angle
(one half of the angle of the corner)
and install as previously explained.
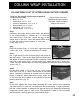
Next, cut the drop at the same angle
and install the other side of the corner making as tight of a joint as possible. For
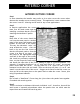
example, if installing NextStone™ on a 7' wide wall with a 90° corner, the second
panel would make the corner. Cut the panel on a 45° miter so that it was 3'
measured on the short side and install. Then cut the drop-off piece (1') at 45° and
install it on the other side of the corner. Stagger each course so that the corner cut
does not fall at the same place on the panel used to make the corner. Secure joint
using Polyurethane Adhesive.
Step 4
Run a bead of NextStone™ Grout along the joint where the panels butt together.
Concealed with touch-up paint.
Step 5
There is variation in thickness within each individual “rock”, therefore, there will be
small areas of exposed polyurethane where the panels were cut which must be
rasped down and coated with touch-up paint.