
Installation Guide


11
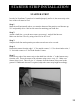
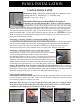
STARTER STRIP INSTALLATION
STARTER STRIP
In order for NextStone™ panels to be installed properly and level, the starter strip at the
base of the wall must be level.
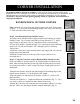
Step 1
Mark the wall horizontally where you want the bottom of the panel to rest. Measure up
2½" and partially drive a nail at one corner for attaching your chalk line.
Step 2
Attach a chalk line: go to the next corner, repeat step 1, and pull the line taut.
Make sure the line is level by using a line level or 48" level.
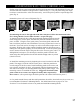
Step 3
Snap the chalk line and repeat the procedure on each area to be covered.
Step 4
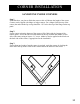
Backset the starter from the edge 1 ¾" for outside corners, 2 ¼" for door/window trim, 3
¾" for inside corners or 2" for Flush Outside Corners.
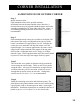
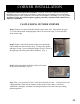
Step 5
Place the top edge of the starter strip on the chalk line with the “v” at the bottom away
from the wall. Screw the starter to the substrate using screws every 16". Make sure
Starter Strip is level. This will give ¾" clearance from the bottom of the panel to the
ground. If additional clearance is required, adjust the starter strip height accordingly.