
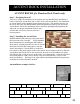
Installation Guide

23
SLATESTONE PANEL INSTALLATION, Cont.
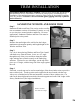
Another Option for paneling a wall with outside corners on the right and left (More skill
required) Working from the left outside corner (OC), seat the 1st panel against the OC
and down against the starter strip, continue as described in section 1. Place the right
OC in place for measurement. Place a weather barrier cleat such as black tar paper,
Tyvek or the equivalent to the substrate behind the joint. Measure the last piece on the
row and cut this panel using the “T”
design for the male tongue. Use an
existing panel as a template. A
carpenter knife and sabre saw is
necessary. Attach against the OC and
secure both pieces. Caulk the joint if
necessary and use touch up paint. Work
the right corner from left to right as
described in section 1. Work the left
OC as described in section 2.
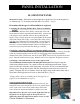
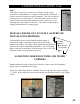
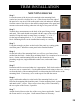
Slatestone panels have 8 unique panel configurations with a number, 1 through 8,
molded into the back of the panel. Avoid racking the panels by placing like numbered
panels next to or on top of each other.
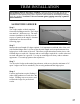
The illustration below shows a random installation using drops from the
previous course to start each new course. If there are no drops, randomly cut the
starting panel to length.
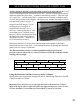
Using the Slatestone Outside Corners to make Columns
Please refer to the instructions on page 40 and 41 when using Slatestone Outside
Corners to make a Column.
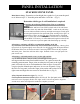
Important: Drive the first screw on the right hand side of the panel at a 45 degree
angle to the left in order to tighten the panel into adjacent the panel, corner or wall.
Visit the NextStone™ classroom at www.NextStone™.com to see on video.
4
4 6 7 3 5
5 8 2 1
4 2 1 4 3 8
8 7 3 2 5