
Installation Guide

25
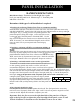
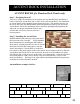
ACCENT ROCKS (for Random Rock Panels only)
Step 1 - Designing the wall
There are 6 unique Accent Rocks to incorporate into any Random Rock installation, 3
colors of the large Accent Rock and 3 colors of the small Accent Rock. The installation
of Accent Rocks can be randomly placed along any course. The installer must lay out
the job to utilize the four Random Rock panel configurations properly plus utilize the
Accent Rocks. While this installation takes a little more planning and preparation the
end result is a unique installation which is more
realistic and effectively conceals joint lines
between panels.
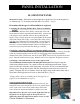
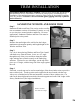
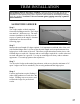
Step 2 - Installing the Accent Rock.
Install Random Rock panels up to the point where
the first accent rock is needed. Follow Random
Rock instructions for installing the full Random
Rock panels. Starting from the left, take an Accent
Rock panel and lock the bottom groove into the
starter strip tongue (if Accent Rock is on the bot-
tom course) or the panel tongue on the course below the one being worked on. Slide the
Accent Rock panel to the left so the accent rock lap locks over the random rock panel
side shiplap joint. Using the screw guide points, screw through the substrate and into a
stud, when practical, with 4 screws for the large Accent Rock and 3 screws for the
small Accent Rock. Working left to right continue installing Random Rock panels un-
til another Accent Rock panel is needed.
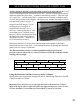
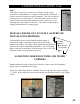
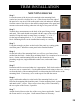
An installation example is below:
ACCENT ROCK INSTALLATION
SA
R
LAR RR-1 RR-4 RR-3 SA
R
RR-2 RR-1
RR-4 SA
R
RR-3 RR-2 LAR RR-1 SA
R
RR-4
RR-2 RR-1 RR-4 LAR RR-2 RR-4 LAR
RR-1 RR-2 SA
R
RR-4 RR-3 LAR RR-2