
Installation Guide

26
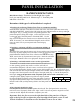
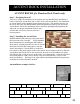
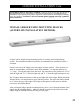
SANDSTONE WINDOW AND DOOR TRIM
Step 1
Sandstone Window and Door Trim can be used as a utility
trim to terminate sections of NextStone™ panels, as a cap,
or as a trim piece around windows and doors. For most
applications, Sandstone Window and Door Trim must be
installed prior to the panels.
Step 2
Measure the total height of the wall before the Ledger
attachment to determine quantity and length/height of the
Window and Door Trim.
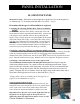
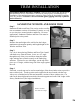
Step 3
Use a level when placing Window and Door Trim. Install
with dado away from the frame. Screw at a 45° angle
through the top of the piece and down along the inside
edge, making sure to attach securely to the underlying
substrate. To miter for use with ledger, cut the top of the
piece on a 15°angle, with the long side of the angle against
the wall.
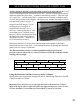
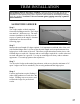
Step 4
If desired, a wood rasp can be used to round edges of the door/window trim to provide a
more realistic look. Touch-up paint can be applied to the area formed with the rasp.
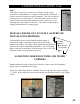
Always use a finished end to start and terminate a section of door window trim. Cut
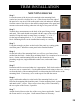
ends can be butted tight and concealed with touch-up paint and caulk. End Ledger with a
factory finished end. (See ledger installation).
TRIM INSTALLATION
All products must be allowed to acclimate; removed fr om boxes and stored flat at
the installation site for a minimum of 48 hours or until properly acclimated prior to
installation. Heat and moisture cause expansion. Best results are obtained by installing
cool, dry product. NextStone™ does not warrant against gapping caused by expansion
and contraction.
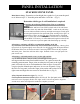
Window and Door
Trim under the Ledger