
Installation Guide

27
TRIM INSTALLATION
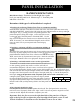
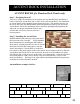
SANDSTONE LEDGER
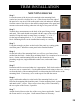
Step 1
The Ledger makes an ideal transition
from other building materials. The Ledger
can attach in 3 different ways: The most
common installation is directly over the
top row of panels at the tongue. Alternate
installations are discussed in the
following pages.
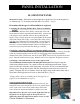
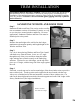
Step 2
Measure the total length of Ledger required. It is important to end both sides of the wall
with finished ledger ends. It is best to take the total length, and cut equal amounts from
ledger pieces in the center of the wall. This allows a tight union between the pieces with
finished edges on each side. Measure and cut each ledger required for a center union and
cut each end square for a good fit. Use rasp to round edges on factory ends to enhance
appearance. Use touch-up paint on the rasped area.
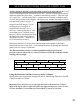
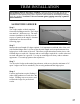
Step 3
Toe Screw the Ledger to the underlying substrate, with screws placed a minimum of 16"
apart. Ledgers can also be attached by toe screwing underneath the ledger piece.
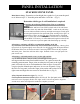
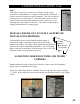
Step 4
Exterior applications require flashing if
other siding products are used above the
ledger. Flashing can cover screws used
to attach the ledger for professional
results.
Screw attachment prior to flashing
All products must be allowed to acclimate; removed fr om boxes and stored flat at
the installation site for a minimum of 48 hours or until properly acclimated prior to
installation. Heat and moisture cause expansion. Best results are obtained by installing
cool, dry product. NextStone™ does not warrant against gapping caused by expansion
and contraction.