
Installation Guide


15
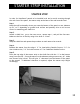
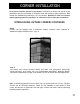
CORNER INSTALLATION
SANDSTONE FLUSH OUTSIDE CORNER
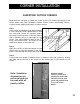
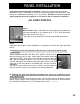
Step 1
Install moisture barrier. Flush mounted corners can allow
moisture infiltration between the panel and the corner. A
moisture barrier may be required behind the panels and
corner extending a minimum of 4" from either side of the
corner. A self-adhering flashing membrane such as Grace
Vycor® is recommended.
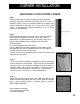
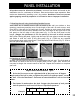
Step 2
Flush mounted outside corners are 4' tall. The placement of
the corners will depend on how the top of the corner is
terminated. For applications over 48" in height, the corner
pieces can be stacked with the final corner cut to the
required height.
For wainscot applications, the corner
can be capped with a ledger attached to the tongue of the
top panel and cut with a compound miter at a 45° angle, or
a Ledger Outside Corner can be used.
The top of the corner should be placed 2" below the top of the
tongue on the top panel.
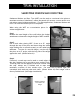
Step 3
The corner has screw guides or dimples to help position the
screws using the correct angle. There are also screw guides
along the sides. All screws are installed at an angle and at a
location where they will be concealed. Install two screws
through the top and at least 4 on each side. Good quality
exterior screws, #6 or #8 x 2 ½" are recommended.
Step 4
Install the remaining accessories and finish the panels. The
joints between the panels and the corner must be caulked
using a good quality caulk or textured grout to make a
water-tight installation.
Note: Sandstone Accessories
are universal and can be used
with all panel profiles