
Installation Guide

15
CORNER INSTALLATION
All products must be allowed to acclimate; r emoved fr om boxes and stored flat at the
installation site for a minimum of 48 hours or until properly acclimated prior to installation.
Heat and moisture cause expansion. Best results are obtained by installing a cool, dry product.
NextStone™ does not warrant against gapping caused by expansion and contraction or
improper installation.
CASTLE ROCK OUTSIDE CORNER
Step 1-Start the 1st course from the outside corner of the wall. Place starter strip top
2 ¾" above the desired starting height of the wall, recess the strip 2" from each side
of the corner edge.
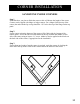
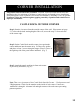
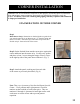
Step 2-Set the Castle Rock outside corner piece against the
corner and down into the starter strip. Use the screw guides
and place at least 3 screws along the tongue. Place 2 screws in
the right lap side of the panel where indicated. (Fig. 7)
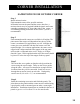
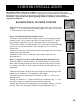
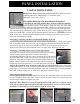
Step 3-Attach the panels working in from each corner
as previously described. (Fig. 8)
Figure 7
Figure 8
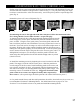
Note: There ar e 4 patter ns of the Castle Rock Outside Corner . 2 Left patterns and
2 Right patterns. Check for the number on the inside of each corner. Corners are
numbered 1 through 4. Alternate left and right corners with each course preventing
pattern repetition.