
Operation Manual


-103-
To enable clients to pull the stream from Niagara Pro, you simply set up a session and begin
broadcasting directly from Niagara Pro. Clients (Windows Media servers or players) can connect to
the stream at any time by using the following one of the following URL formats:
• http://IP_address:port (for Internet connections)
• http://encoding_computer_name:port (for LAN connections)
Niagara Pro supports up to 50 direct connections during a broadcast by default.
NOTE: The greater the numbers of direct connections to Niagara Pro, the more system resources are
required. It is not recommend having players connect directly to Niagara Pro. Streaming servers
should connect to Niagara Pro and, in turn, players should connect to the servers.
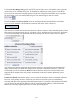
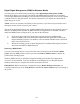
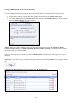
Select the Enable Pull check box. Then enter a port number, which will be used by the server to pull
the stream from Niagara Pro.
NOTE: Be sure to enter a port number not already assigned to another encoder. If two encoders are
starting that use the same port number, one or both encoders will fail to start.
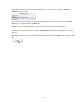
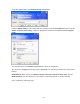
Select Enable Push and enter a port number not assigned to another encoder. Then enter the server
name or IP address, Alias (optional), user name, and password.
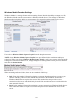
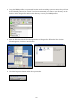
You can also choose to output to file at the same time you are streaming to a server. However, you
can set the server to archive the file and streaming, allowing Niagara Pro to reserve its system
resource for encoding. Refer to the Windows Media Server documentation for details.
If you check Index the file, viewers will be able to direct access any point within the Windows
Media file using the Windows Media player. Indexing is also required for editing the Windows
Media file using Microsoft Windows Media Utilities.
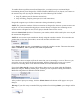
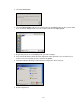
After you have input your settings, click the Submit button at the bottom of the page to save your
changes.
Warning: If you click away to another Web page without first clicking Submit, your changes will be
lost.