
Operation Manual


-11-
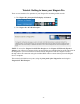
Press this button to select and continue.
Press this button to cancel and exit.
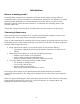
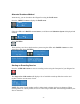
The next menu offers you the choice to enable DHCP for the network interface.
Using the <UP> and <DOWN> buttons, you can toggle the selection from the No to the Yes option.
After you make your selection, press the <ENTER> button to input the change. Niagara Pro will
confirm you wish to change this setting.
Press <ENTER> to confirm your choice. Niagara Pro will return to the menu to select another
individual setting to modify.
To input a static address for the IP address and/or Gateway, select either from the menu and press
the <ENTER> button.
Using the <UP> and <DOWN> arrow keys to increment numerical value, enter a static IP address.
Press the <STREAM> button to move to the next field. When you have correctly entered the IP
address or Gateway address, press <ENTER> to input the data into Niagara Pro. When setting a
static IP address, a screen will appear that will allow you to set the subnet address.
If you wish to remove a static IP address and/or Gateway previously set on Niagara Pro, simply
enable DHCP by using the method described directly above. Any previously entered static address
will be removed.