
Operation Manual


-20-
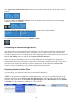
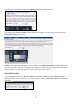
The Niagara Pro LCD readout displays the list of encoders and shows the current status of each
session.
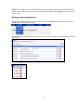
Using the <UP> and <DOWN> buttons, move the pointer to the position next to the encoding
session you want to terminate.
Press the <STOP> button again and the encoder session selected will terminate.
To return to the main menu, press the <MENU> button.
Connecting an external storage device
The Niagara Pro rear panel provides two USB ports. You can connect almost any standard USB
flash device to one or both of these ports. This allows you to export any AV files you may have
created on Niagara Pro’s local storage drive. The local storage drive is the D drive when you use the
Save to File setting while you employ the Niagara SCX Web Interface.
When you insert a USB flash device in one of the USB ports on the Niagara Pro, Niagara Pro
automatically detects the removable storage device, and assigns a random drive letter to the device.
This device can capture files directly or can be employed to use the Niagara Pro Export File
function, which is available for access when using the front panel menu.
Exporting Captured Video Files
You can export your captured video files to an external USB device.
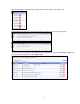
NOTE: To export files to a USB device from Niagara Pro, you must set a default location for the
captured video files via the Niagara Pro SCX Web Interface, and place those files in that default
location. This can be done on the System Configuration page of the Web Interface at the *Default
AV Folder box. By default, this folder is set to D:\AVFiles.