! ! PRO Series 8CH Elite Series 8CH
Contents Chapter 1: FCC Radiation Norm ............................................................ 6 Chapter 2: Package Contents ................................................................ 7 Chapter 3: System Requirements .......................................................... 8 Chapter 4: Safety Instructions ................................................................ 9 Chapter 5: Troubleshooting ..................................................................
Contents 14.2.1 Date/Time Menu ....................................................... 29 14.2.2 DST Menu ................................................................. 30 14.3 Display Menu ....................................................................... 31 14.3.1 Display Menu ............................................................ 31 14.3.1.1 Mask Screen .................................................. 32 14.3.1.2 Color Screen .................................................. 33 14.
Contents 15.2.3 Port Menu ................................................................. 53 15.2.4 Sub-Stream Menu ..................................................... 54 15.3 COMM Menu ........................................................................ 55 15.3.1 DDNS Menu .............................................................. 55 15.3.2 E-Mail Menu .............................................................. 56 15.3.3 UPnP Menu..............................................................
Contents Chapter 23: DDNS Registration ........................................................... 86 23.1 Registering a Free Domain Name ........................................ 86 23.2 Adding your New Domain Name to your DVR ...................... 88 Chapter 24: Internet Viewing ................................................................ 89 24.1 Setting ActiveX Controls....................................................... 89 24.2 DVR Login ...........................................................
Chapter 1: FCC Radiation Norm FCC This equipment has been tested and found to comply with limits for Class B digital devices pursuant to Part 15 of Federal Communications Commission (FCC) rules. FCC Compliance Statement These limits are designed to provide reasonable protection against frequency interference in residential installation.
Contents2: Package Contents Chapter Your DVR Security Kit includes the following items.
Chapter 3: System Requirements Please be sure the computer that you will use with the DVR Security Kit complies with the following specifications: • Windows® XP,VISTA, 7, or 8 • Mac® OS 10.
Chapter Contents4: DVR Safety Instructions • Use the provided power adapter. Do not use this product with a power source that applies more than the specified voltage. • Never insert metal into the DVR case or its openings. Inserting metal into the DVR case may cause electric shock. • Do not operate in wet or dusty area. Avoid placing the DVR in areas such as a damp basement or dusty attic. • Do not expose the DVR to rain or use near water.
Chapter 4: DVR Safety Instructions • Do not attempt to remove the top cover. If you observe any abnormal operation, unplug the DVR immediately and contact technical support. Do not attempt to open the DVR to diagnose the cause of the problem. (WARNING: You may be subjected to severe electrical shock if you remove the cover of the DVR.) • Handle the DVR carefully. If you drop the DVR on any hard surface, it may damage the device.
Chapter 5: Troubleshooting If a problem occurs, you may be able to easily correct it yourself. The following table describes the most common problems and their solutions. Please refer to the table before calling Night Owl Technical Support.
Chapter 5: Troubleshooting 12 14
Chapter 6: DVR Components 6.
Chapter 6: DVR Components 6.
Chapter 6: DVR Components 6.3 Mouse You can use a mouse instead of the remote control to navigate through your DVR’s menus. Connect the included mouse to the USB port on the back of the DVR. Use the mouse buttons to perform the following: 1. Left Button: Click to select a menu option. During live viewing in split-screen view, double-click on a channel to see the selected channel in full-screen view; double-click the channel again to return to split-screen view. 2.
Chapter 6: DVR Components 6.4 Remote Control Use the remote control to navigate through the DVR’s menus. Button Function Select channels / Input 1-0 numbers in currently selected field ALL Display all channels MENU Enter / Exit Menu Up Down SEL Select Rewind Play Fast Forward Record Pause / Playback Stop Allows you to view cameras in Quad view. PTZ Controls PTZ camera. MUTE Enable or disable Sound ! Please keep in mind a PTZ camera is not included in your security kit.
Chapter 6: 7: DVR Components Installation 7.1 Connecting the Power Supply 1. Plug the included power adapter cable into the back of the DVR. 2. Plug the other end of the power adapter cable into an available wall outlet (or, if you are using an uninterruptable power supply, plug the adapter cable into one of its output sockets).
Chapter 7: DVR Installation 7.2 Connecting the DVR to a TV or Monitor Using the supplied HDMI connector: 1. Connect the HDMI connector to the back of the DVR’s HDMI port. 2. Connect the other end of the cable to an available HDMI input on your TV or monitor. 3. Select the appropriate video input channel on your TV or monitor to view the DVR. Note: If your TV does not have an HDMI port, you will need to purchase a VGA or a BNC-to-RCA video cable.
Chapter 6: DVR Components 8: Camera Installation 8.1 Connecting Cameras to the DVR 1. Your DVR system comes with one 60-ft. coaxial cable per camera. Connect each cable to a camera using the BNC connectors (yellow connector) and the DC connectors (red connector). 2. Plug the other end of the cables into the Video Input ports on the back panel of the DVR. 3. Connect the provided four-way power splitter cable into the DC connectors of the cables. 4.
Chapter 8: Camera Installation 8.2 Mounting the Cameras 1. Choose a location: Decide where you would like to mount the camera. 2. Indicate screw positions: Mark three holes on the surface where you plan to mount the camera, using the holes in the camera base as a guide. 3. Anchor screws: Using a drill bit slightly smaller than the included screw anchors, drill into the mounting surface using the guide marks you placed in the previous step. Insert the screw anchors. 4.
Chapter 9: DVR Start-up 9.1 System Initialization After you plug in the power adapter, the DVR will automatically start up and display the Night Owl logo on your TV while initializing. After initialization, your screen will display the Startup Wizard.
Chapter 9: DVR Start-up 9.2 On-Screen Display The on-screen display will show the following information: • Date & Time: Displays the date and time on the system. • Channel Title/Number: Displays the channel name, which you can set in the Camera Menu. By default, passwords are disabled on the system.
Chapter 10: Startup Wizard Use the Startup Wizard to enter the security system’s basic settings, network settings, record settings, and HDD settings. The Startup Wizard will open when the DVR is powered on. Refer to the Startup Guide for step-by-step instructions on using the Startup Wizard.
Chapter 11: Login Screen Before you can access any menus, you must log in. • Remote ID: This number should match the number in parentheses to the right of the field. • User Name: Enter the user name you created in the Startup Wizard or the User Menu. If you have not created a user name, leave this setting as “admin.” • Password: Enter the password that you created in the Startup Wizard or the User Menu.
Chapter 12: Main Menu Opens the menu interface. Allows you to check one channel at a time to enlarge the selected channel to a full-screen view. Allows you to enter into Quad-screen view. Allows you to enter into Octad-screen view. Allows you to start/stop an auto sequence. This will display the cameras as a slide show. Opens the color settings menu to adjust the colors of the camera.
Chapter 13: Menu Icons When you open the Main Menu you will see a line of icons at the top of the screen. Each icon represents a different menu. The menu names are listed below.
Chapter 14: Basic Menu Basic Menu Use the Basic Menu to access the System, Date/Time, Display, Record, and User menus. Be sure to Apply all changes you make in the menus. If you do not apply the changes, they will not be saved. You can also select the Default button on any page to restore the DVR’s default settings.
Chapter 14: Basic Menu 14.1 System Menu The System Menu allows you to change the language, output resolution, logout time, and turn the Startup Wizard on/off. It is recommended that you leave the Device Name and Remote ID fields at their default values. To access the System Menu, select the Basic button, and then select System from the list on the left side of the screen. • Device Name: Displays the DVR you are using.
Chapter 14: Basic Menu 14.2 Date/Time Menu You should set the date and time when first setting up your system. You can also configure Daylight Saving Time (DST) settings. To access the Date/Time Menu, select the Basic button, and then select Date/Time from the list on the left side of the screen. • Date/Time: Input the current date using the date format that has been selected, and input the current time using the time format that has been selected.
Chapter 14: Basic Menu 14.2.2 DST Menu Use the DST Menu to configure Daylight Saving Time settings. To access the DST Menu, select the Basic button, select Date/Time from the list on the left side of the screen, and then select DST. • Enable: Select this box if you would like to enable the Daylight Saving Time settings. • Mode: Depending on the Daylight Saving Time settings, you can choose between the exact date and the week.
Chapter 14: Basic Menu 14.3.1 Display Menu Use the Display Menu to configure channel name, channel masking, color, and time/name settings. To access the Display Menu, select the Basic button and then select Display from the list on the left side of the screen. • CH: Indicates the channel that you will be configuring. • Name: Give each channel a descriptive name if you wish (for example, Warehouse).
Chapter 14: Basic Menu 14.3.1.1 Mask Screen Use the Mask Screen to block out certain areas of a channel screen. To access the Mask Screen, select the Basic button, and then select Display from the list on the left side of the screen. Select the Settings button in the Mask column. • CH: Indicates the channel that you will be configuring. • Once you have selected the channel, left-click the mouse on the screen.
Chapter 14: Basic Menu 14.3.1.2 Color Screen Use the Color Screen to adjust the colors of a channel that is being recorded. To access the Color Screen, select the Basic button and then select Display from the list on the left side of the screen. Select the Settings button in the Color column. • CH: Indicates the channel that you will be configuring.
Chapter 14: Basic Menu 14.3.1.3 Time/Name Screen The Time/Name Screen is used to show/remove the date/time and a channel name displayed on the screen. To access the Time/Name Screen, select the Basic button and then select Display from the list on the left side of the screen. Select the Settings button in the Time/Name column. • CH: Indicates the channel that you will be configuring.
Chapter 14: Basic Menu 14.3.2 Auto SEQ Menu Use the Auto SEQ Menu to adjust the channels and time that will be displayed when you start the auto sequence. To access the Auto SEQ Menu, select the Basic button, select Display from the list on the left side of the screen, and then select Auto SEQ. • Auto Sequence: Allows you to choose between Stencil 1x1, Stencil 2x2, and Custom. Stencil 1x1 and Stencil 2x2 show each channel in numeric order, one by one.
Chapter 14: Basic Menu 14.4.1 Record Menu Use the Record Menu to enable recording, set audio preferences, and specify how you would like to record on each channel. To access the Record Menu’s basic functions, select the Basic button, select Record from the list on the left side of the screen, and then select Basic. • CH: Indicates the channel that you will be configuring. • Record: Check this box to enable recording on the channel.
Chapter 14: Basic Menu 14.4.2 Bit Rate Menu The Bit Rate Menu allows you to set the quality of the recorded video. To access the Bit Rate Menu, select the Basic button, select Record from the list on the left side of the screen, and then select Bit Rate. • CH: Indicates the channel that you will be configuring.
Chapter 14: Basic Menu 14.4.3 Resolution Choose between 960H (960x480), WHD1 (960x240), D1 (704x480), HD1 (704x240), WCIF (480x240) or CIF (352x240) resolutions to record videos To help maximize the DVR’s hard drive space, use the lowest resolution. 960H Resolution (960x480 pixels): • The highest resolution. • This is the best option if you would like to see details. • Uses the most space on the hard drive.
Chapter 14: Basic Menu 14.4.4 Schedule Menu The Schedule Menu allows you to schedule recordings. To access the Schedule Menu, select the Basic button, select Record from the list on the left side of the screen, and then select Schedule. • CH: Indicates the channel that you will be configuring. Select All to set one recording schedule for all channels, or select individual channels to set different recording schedules.
Chapter 14: Basic Menu 14.5 User Menu The User Menu allows you to add users and permissions for those users. To access the User Menu, select the Basic button, select Record from the list on the left side of the screen, and then select User. • User Name: Displays the names that you assign to users. To make changes to a user, double-click on the user’s name.
Chapter 14: Basic Menu 14.5.1 User Management Menu Basic Tab The User Management Menu allows you to add users and assign permissions to those users. To access the User Management Menu’s Basic Tab, select the Basic button, select Record from the list on the left side of the screen, select User, and then select Add User or double-click an existing user.
Chapter 14: Basic Menu 14.5.1 User Management Menu Authority Tab To access the User Management Menu’s Authority Tab, select the Basic button, select Record from the list on the left side of the screen, select User, and then select Add User or double-click an existing user. You will need to select the Authority Tab to limit access to certain menus for the user.
Chapter 15: Advanced Menu Advanced Menu Use this menu to access the Alarm, Network, Comm, and PTZ menus. Be sure to Apply all changes made to the menus. If you do not apply the changes, they will not be saved. You can select the Default button on any page to restore the DVR’s original settings.
Chapter 15: Advanced Menu 15.1 Alarm Menu 15.1.1 Motion Menu The Motion Menu allows you to configure the motion settings on your DVR. To access the Motion Menu, select the Advanced button, select Alarm from the list on the left side of the screen, and then select Motion. • CH: Indicates the channel that you will be configuring. • Enable: Allows you to activate motion detection. It is recommended that you keep this checked.
Chapter 15: Advanced Menu 15.1.1.1 Area Screen The Area Screen allows you to see areas that will and will not detect motion. To access the Area Screen, select the Advanced button, select Alarm from the list on the left side of the screen, and then select Motion. Select Settings in the Area column for the channel you are customizing. 45 • The green boxes show all active areas that will detect motion.
Chapter 15: Advanced Menu 15.1.1.2 Schedule Screen The Schedule Screen allows you to choose when to record. To access the Motion Menu’s Schedule Screen, select the Advanced button, select Alarm from the list on the left side of the screen, and then Motion. Select Settings in the Schedule column for the channel you are customizing. • Days and Times: Allows you to choose times to record and how you would like to record.
Chapter 15: Advanced Menu 15.1.1.3 Trigger Screen The Trigger Screen allows you see what has triggered an alarm. To access the Trigger Screen, select the Advanced button, select Alarm from the list on the left side of the screen, and then select Motion. Select Settings in the Trigger column for the channel you are configuring. • Record: Instructs the DVR to start recording when motion. • Snapshot: Saves a picture of what has triggered the alarm.
Chapter 15: Advanced Menu 15.1.2 Video Loss Menu The Video Loss Menu allows you to configure the video loss settings on your DVR. To access the Video Loss Menu, select the Advanced button, select Alarm from the list on the left side of the screen, and then select Video Loss. • CH: Indicates the channel that you will be configuring. • Enable: Allows you to activate the video loss alarm.
Chapter 15: Advanced Menu 15.1.3 Others Menu The Others Menu allows you to configure the settings on your DVR for different alarm features. To access the Others Menu, select the Advanced button, select Alarm from the list on the left side of the screen, and then select Others. • Disk Error: If you enable this option, you will be alerted if the hard drive fails. • Disk Full: If you enable this option, you will be alerted if the hard drive becomes full.
Chapter 15: Advanced Menu • IP Address Conflict: If you enable this option, you will be alerted if the IP address of the DVR matches another device on the same network.
Chapter 15: Advanced Menu 15.2 Network Menu 15.2.1 LAN Menu The LAN Menu allows you to configure the IP address for your DVR. Make sure that the DVR is plugged directly into your internet router. To access the LAN Menu, select the Advanced button, select Network from the list on the left side of the screen, and then select LAN. • The IP address/DNS server information can automatically be obtained by the DVR if it is connected to a router/modem that is connected to the internet.
Chapter 15: Advanced Menu 15.2.2 PPPoE Menu The PPPoE Menu allows you to configure the DVR using broadband dialup network access. To access the PPPoE Menu, select the Advanced button, select Network from the list on the left side of the screen, and then select PPPoE. • You will need to use this option if you are using broadband dial-up network access. You will have to enter a user name and password that are provided by your Internet service provider.
Chapter 15: Advanced Menu 15.2.3 Port Menu The Port Menu allows you to view your DVR through the Internet, software, and mobile phones. To access the Port Menu, select the Advanced button, select Network from the list on the left side of the screen, and then select Port. • Media Port: This needs to be set to 9000.
Chapter 15: Advanced Menu 15.2.4 Sub-Stream Menu The Sub-Stream Menu allows you to configure the network settings. To access the Sub-Stream Menu, select the Advanced button, select Network from the list on the left side of the screen, then select Sub-Stream. • CH: Indicates the channel that you will be configuring. • Resolution: Choose WCIF, WQCIF, CIF or QCIF resolution. • Frame Rate: Allows you to allocate the FPS per channel.
Chapter 15: Advanced Menu 15.3.1 DDNS Menu The DDNS Menu allows you to configure DDNS setup after you have registered for a free domain name at http://www.nightowldvr.com. To access the DDNS Menu, select the Advanced button, select COMM, and then select DDNS from the list on the left side of the screen. • DDNS: This should be set to Enable if you are using a DDNS service. • Server: This should be set to NightOwl when using Night Owl’s free domain name service.
Chapter 15: Advanced Menu 15.3.2 E-Mail Menu The E-Mail Menu allows you to configure email alert settings. To access the E-Mail Menu, select the Advanced button, select COMM, and then select E-Mail from the list on the left side of the screen. • E-mail: Allows you to enable/disable email alerts. If you have the DVR set to Motion, you will receive an email alert with an attached image of the object that triggered the alarm.
Chapter 15: Advanced Menu 15.3.3 UPnP Menu The UPnP Menu allows you to enable the UPnP (Universal Plug and Play) setting of the DVR. To access the UPnP Menu, select the Advanced button, select COMM, and then select UPnP from the list on the left side of the screen. • UPnP: Choose Enable to allow the DVR to use UPnP.
Chapter 15: Advanced Menu 15.4 PTZ Menu The PTZ Menu allows you to configure settings on your DVR to control a PTZ (Pan Tilt Zoom) camera. (PTZ camera not included.) To access the PTZ Menu, select the Advanced button and then select P.T.Z. from the list on the left side of the screen. Refer to your PTZ camera’s documentation for proper settings. • CH: Indicates the channel that you will be configuring. • Enable: Allows you to enable/disable the PTZ controls.
Chapter 16: Record Search Menu Record Search Menu Use this menu to find, play back, and back up recorded video. Be sure to Apply all changes made to the menus. If you do not apply the changes, they will not be saved. You can also select the Default button on any page to restore the DVR’s original settings.
Chapter 16: Record Search Menu The Calendar lets you select the dates of recorded video you wish to play back. To access the Record Search Menu, select the Record Search button. The Calendar appears on the left. Calendar • Left / Right Arrows: Switch between months and years. • Start Time: Select the time of day that you would like to begin the search. • End Time: Select the time of day that you would like to end the search. • Record Type: Select the type of recording you will be searching.
Chapter 16: Record Search Menu The File List shows a list of recordings. To access the Record Search Menu, select the Record Search button. The File List is on the right. File List • CH: Indicates the channel that was recorded. • Start Time: Indicates the time that the recording began. • End Time: Indicate the time that the recording ended. • Type: Indicates the type of recording (Alarm or Normal). • Status: Indicates whether the file has been locked or unlocked.
Chapter 16: Record Search Menu When you play back a recorded file, a number of controls are available. Use the Calendar, File List, and Playback button to playback recorded files. The playback screen has the following buttons: Rewinds the recorded video. Pauses/plays the recorded video. Pauses the recorded video. Plays back the recorded video in slow motion. Select repeatedly to access different playback speeds. Fast-forwards the recorded video.
Chapter 17: FilesMenu to AVI 16: Converting Record Search Converting the .246 files to AVI format allows you to play back the recorded files on most multimedia players. AVI conversion involves selecting a file and then converting. • Download and install the AVI Generator from www.NightOwlSP.com. • Launch the program and select Open to browse to the .264 recording you would like to convert, and then select Open again.
Chapter 18: Disk Management Menu Disk Management Menu The Disk Management menu allows you to view and manage recordings on your DVR’s hard disk drive (HD). Be sure to Apply all changes made to the menus. If you do not apply the changes, they will not be saved. You can also select the Default button on any page to restore the DVR’s original settings.
Chapter 18: Management Menu 16: Disk Record Search Menu To access the Disk Management menu, select the Disk Management button. • Status: Indicates whether the HD is working (recording) or not working (no disk). • Capacity Total/Free: Shows the total HD space available and how much free space is on the HD. The maximum HD capacity is 2 terabytes. • Format: Check this box to enable the HD to be formatted.
Chapter 19: Information Menu Information Menu Use this menu to access the Device, Network, Online, and Record Information menus. Be sure to Apply all changes made to the menus. If you do not apply the changes, they will not be saved. You can also select the Default button on any page to restore the DVR’s original settings.
Chapter 19: Information Menu 19.1 Device Menu The Device Menu allows you to view the MAC Address, serial number and the firmware version of your DVR. To access the Device Menu, select the Information button and then select Device. • Device Name: The DVR’s name. • Remote ID: The ID of the DVR if there are multiple DVRs in one location. • Serial No.: The serial number of the DVR. • Firmware Version: The DVR’s firmware version.
Chapter 19: Information Menu 19.2.1 LAN Menu The LAN Menu allows you to information about your Local Area Network (LAN). To access the LAN Menu, select the Information button, select Network, and then select LAN. • Network Status: Indicates whether the DVR is properly connected to the internet. • IP Address(LAN): The identification of the DVR when it is connected to a network. • Subnet Mask: This should always be set to 255.255.255.000.
Chapter 19: Information Menu 19.2.2 PPPoE Menu The PPPoE (Point-to-Point Protocol over Ethernet) Menu allows you to view information about your network. To access the PPPoE Menu, select the Information button, select Network, and then select PPPoE. • Network Status: Shows whether the DVR is properly connected to the internet. • IP Address: The identification of the DVR when it is connected to a network.
Chapter 19: Information Menu 19.3 Online Menu The Online Menu allows you to view the computers that are currently connected to the DVR. To access the Online Menu, select the Information button and then select Online. • User Name: The name of the computer that is accessing the DVR. • IP Address: The identification of the device that is accessing the DVR. • Login Time: The time that the user logged in to the DVR.
Chapter 19: Information Menu 19.4 Record Menu The Record Menu allows you to view the configured recording resolution of the DVR. To access the Record Menu, select the Information button and then select Record. • CH: Indicates the channel. • Resolution: Shows the recording resolution of each channel. • Frame Rate: Shows the frames per second of the channels when recording.
Chapter 20: Maintenance Menu Maintenance Menu Use this menu to access the Basic Maintenance Settings and Settings menus. Be sure to Apply all changes made to the menus. If you do not apply the changes, they will not be saved. You can also select the Default button on any page to restore the DVR’s original settings.
Chapter 20: Maintenance Menu 20.1 Basic Menu The Basic Menu allows you to perform firmware upgrades and maintain the DVR’s performance. To access the Basic Menu, select the Maintenance button and then select Basic. • Auto Maintain: Allows you to choose when you would like your system to automatically reboot. The DVR will reboot automatically on a specified schedule to help prevent system and hard drive failure and to preserve the life your DVR.
Chapter 20: Maintenance Menu 20.1.1 Firmware Upgrade Your system will periodically need a firmware upgrade to ensure optimal performance. Visit www.NightOwlSP.com to see if upgrades are available for your system. To upgrade firmware: 1. Download and save the latest firmware upgrade for your system from www.NightOwlSP.com to your desktop. 2. Once you have saved the firmware to your computer, insert an empty USB flash drive into the computer. 3.
Chapter 20: Maintenance Menu 20.2 Settings Menu The Settings Menu allows you to import or export the DVR’s settings. To access the Settings Menu, select the Maintenance button and then select Settings. • Export Settings: Allows you to copy all of the settings on the DVR to a flash drive. • Import Settings: Allow you download all of the settings from a flash drive to the DVR. • Load Factory Default: Allows you to set the default settings for the entire DVR.
Chapter 21: Remote Access This chapter will show you how to connect your DVR to the internet. You will learn how to properly connect your DVR to your router/modem and set up port configurations, internet configurations, Mobile configurations, and DDNS registration. You will need to have the following in order to be able to successfully connect the DVR to the internet.
Chapter 21: Remote Access 21.1 Connecting the DVR and Router/Modem Use this section to learn how to connect the DVR to your router/modem. DVR 1. Make sure that your DVR is connected to a power outlet. 2. Connect the DVR directly to the router through an open Ethernet port with the included Ethernet cable. 3.
Chapter 21: Remote Access 21.2 Windows Network Configuration In this section you will determine basic information about your network Make sure that the DVR is properly connected to the router/modem and that you have a Windows computer connected to the same router. Follow these steps to determine the basic information about your network: 1. Press the Windows key and the R key at the same time on your computer’s keyboard. Type cmd and press the Enter key.
Chapter 21: Remote Access 4. Change the last three digits to 150. You will need this new number in a later step. (Example: Say you wrote down the IP Address 192.168.0.104. When the last digits are changed, the IP address will be 192.168.0.150.) 5. Write down this number. You will use this number as the IP address of your DVR in the next section. 6. Find the Default Gateway. 7. Write down the Default Gateway number. This is the IP address of your router.
Chapter 21: Remote Access Changing the Network Settings on the DVR For the following steps, use the information that you just wrote down. To access the LAN Menu, select the Advanced button, select Network from the list on the left side of the screen, and then LAN. • You can manually enter the IP address/DNS server information into the DVR by selecting Use the following IP address.
Chapter 21: Remote Access 21.3 Apple (Mac) Network Configuration Follow the steps in this section to configure remote access for an Apple Macintosh computer. Make sure that the DVR is properly connected to the router/modem and that you have a Macintosh computer connected to the same router/modem. Follow these steps to determine basic information about your network: 1. Select the Airport icon on your computer screen. 2.
Chapter 21: Remote Access Use the information that you just wrote down for the next steps. To access the LAN Menu select Advanced button, select Network from the list on the left side of the screen, and then select the LAN tab. • You can manually enter the IP address/DNS server information into the DVR by selecting Use the following IP address.
Chapter 21: Remote Access After you have configured the Network Settings, you will need to forward the necessary ports to be able to view the DVR over the Internet from anywhere in the world. Refer to your router’s documentation to see how port forwarding works for that device. This process may be called the Port Forwarding, Port Mapping, or Virtual Server. Below are some general considerations to keep in mind to make sure that the appropriate ports are forwarded: 1.
21: Port Remote Access Chapter 22: Forwarding 5. You will need to enter a new port forwarding entry for each port that your DVR uses: Media Port (9000), Web Port (2051). Repeat the steps below for each entry. 6. When entering the port numbers and IP address into your router’s port forwarding section, you will need to do away with the leading zeros (e.g., 09000 becomes 9000, 192.168.000.150 becomes 192.168.0.150, and so on). 7.
Chapter 22: Port Forwarding 22.1 Checking the Ports After Port Forwarding Once you have forwarded the necessary ports on your router, you should check to make sure they have been correctly forwarded. 1. Go to http://www.yougetsignal.com/tools/open-ports/. 2. Type in port 9000 and select the Check button to see if the port tests as open or closed. 3. Type in port 2051 and select the Check button to see if the port tests as open or closed. 4.
Chapter 23: DDNS Registration 23.1 Registering a Free Domain Name (DDNS) This option allows you to set up a free website address that will point back to the DVR regardless of whether the IP Address changes. If you do not have a static IP Address, you should use this option. Follow the steps below to register a free domain name (DDNS) 1. Go to http://www.nightowldvr.com. 2. Select the Registration button located at the top left corner of the page.
Chapter 23: DDNS Registration 4. Create a domain name. 5. If the domain name that you have chosen is available, you will see a window that tells you that your domain was successfully created. (If the domain name is taken, try again until you find an available name.) Write this information in the Information Log at the end of the manual.
Chapter 23: DDNS Registration 23.2 Adding your New Domain Name to your DVR Use the DDNS Menu to configure DDNS setup after you have registered for a free domain name. To access the DDNS Menu, select the Advanced button, select COMM, and then select DDNS from the list on the left side of the screen. • DDNS: This should be set to Enable. • Server: This should be set to NightOwl. • Host Name: This should be set to the domain name that you created during DDNS registration. An example is shown above.
Chapter 24: Internet Viewing Use the Nightowl View or Control Management Software to access your DVR remotely over the Internet or within your local area network. Make sure that you have completed the steps in Chapters 21 and 22 of this manual before trying to access the DVR using this software. 24.1 Setting ActiveX Controls Before you can access the DVR using an Internet browser, you will need to configure the ActiveX Controls. Follow the below steps for configuration (Windows only). 1.
Chapter 24: Internet Viewing 24.2 DVR Login • User Name: Type in the user name that you created in the Password Menu of the DVR. • Password: Enter the password that was assigned to the User. • Language: If you would like the information to be displayed in another language, you can change it to English, French, or Spanish. • Remember Me: Check this box for the User Name to be saved on the computer.
Chapter 24: Internet Viewing 24.3 Using Nightowl View You can use Internet Explorer to access one or more DVRs. It allows you to view live and recorded video over the internet. Channel Information The channel names, date, and time will be indicated on every channel in real time. Menu Bar The Menu Bar gives you access to the Live Viewing, Playback, and Configure settings.
Chapter 24: Internet Viewing Play Control • Takes a snapshot of the video. • Starts/stops recording on all channels. • Stops/plays the live video feed. • Enables Main-Stream on all channels. This requires a fast network for transmission. • Enables Sub-Stream on all channels. This requires a normal network for transmission and is the default for all channels. This setting may display poor image quality.
Chapter 24: Internet Viewing PTZ Control These control settings can only be used for cameras that have Pan, Tilt, and Zoom features. (A PTZ camera is not included.) Arrows: Move the camera manually in the direction of the arrow. Allows you to clean the camera lens if your camera has a wiper function. Allows you to fill in the light if your camera has this function.
Chapter 24: Internet Viewing Playback This screen lets you search, play back, and back up recorded videos. To access this menu, select the Playback button from the Menu Bar. • Calendar: Shows days with recordings in bold numbers. Select a date to view a file list. • Refresh: Refreshes the file list when a day is selected. • Ch: Allows you to sort the file list by a particular channel.
Chapter 24: Internet Viewing Playback (continued) Use the bottom control panel for various video controls. Plays the video. Pauses the video. Stops the video. Slows down the video. Speeds up the video. Shows each frame during playback. Captures an image. Allows you to configure the timeline to show hours. Adjusts the volume on channels with audio. Displays the screen as a quad view. Allows you to switch between pages of videos.
Chapter 24: Internet Viewing Backup This screen allows you to back up files to your computer. To access this screen, select the Playback tab from the Menu Bar and then select the Record List button on the left side of the screen. • CH: Shows the channel that recorded the file. • Start Time: Shows the time the recording started. • End Time: Shows the time the recording ended.
Chapter 24: Internet Viewing Remote Setting This screen allows you to access all of the DVR setting menus. To access the Remote Setting screen, select the Remote Setting button from the Menu Bar. • Information: Refer to Chapter 19 of this guide for details. • Date/Time: Refer to Chapter 14.2 for details on configuration. • Display: Refer to Chapter 14.3 for details on configuration.
Chapter 24: Internet Viewing 24.4 Using Control Management Software (CMS – Nightowl View) You can use the CMS software to access one or more DVRs remotely over the Internet or within your local area network. Make sure that you have completed the Remote Access chapter of this manual before trying to access the DVR using this software. The CMS software can be downloaded from www.NightOwlSP.com or from the installation CD that was included with your DVR system.
Chapter 24: Internet Viewing Starting the CMS You will have to register as an administrator when starting the CMS. • Type: Choose between Local and Server. Local allows you to configure DVRs. Server allows you to enter a server address. For example, the Night Owl DDNS Server. • Server: This will be left blank if you chose Local. If you chose Server you will need to enter the name of the server, such as Night Owl Server.
Chapter 24: Internet Viewing Device List This menu shows all DVRs that have been added to the CMS. Device List: Lists all DVRs that have been added to the CMS. Allows you to refresh devices. Allows you to add groups. Allows you to delete devices.
Chapter 24: Internet Viewing Device Tab To add a device you must first add a group by selecting the plus (+) sign in the navigation pane. Next, right-click your mouse on the group that you would like to add the device to, and then select Add a Device. Once you have selected Add a Device you will need to configure the settings: • Group: Indicates the group you are adding the device to.
Chapter 24: Internet Viewing Channel Group Tab To configure a Channel Group, select the plus (+) sign in the navigation pane. 1. Make sure that your DVRs are properly added to the software. 2. Give the Channel Group a name (e.g. Front Doors). 3. Expand the DVR by selecting the plus sign (+) next to the DVR so that you can view all of the channels on the DVRs. 4. Right-click your mouse on the channel you would like to add to the Channel Group.
Chapter 24: Internet Viewing Patrol Tab To configure a patrol group you must select the plus (+) sign in the navigation pane. This allows the Channel Groups to rotate. 1. Make sure that you have created Channel Groups. 2. Give the Patrol Group a name. 3. Select the amount of time in which you would like the channel groups to rotate. 4.
Chapter 24: Internet Viewing Panel Options You can view live video on the DVRs, play back recorded video, and configure the setting of the DVRs. Allows you to view the channels live. Allows you to play back recorded videos. Allows you to set the location for saved files. Allows you configure all of the settings on the DVRs. Allows you to view a list of all of the activity of the DVRs.
Chapter 24: Internet Viewing Live View While viewing live video, you can change the viewing options, capture images, turn audio on/off, configure the color of the channels, and control a PTZ camera. Play Control Allows you to change the way that the channels are displayed. You can view up to 64 channels on one screen. Switches the viewing pages.
Chapter 24: Internet Viewing PTZ Control Allows you to move the camera manually in the direction of the arrows. Focuses the camera. Allows you to adjust the type of lens to get the best picture in different lighting conditions. Zooms the camera in and out.
Chapter 24: Internet Viewing Live View Color Settings Adjusts the color of the image by changing the levels of red, green, blue, and yellow. Adjusts the brightness of the image. Adjusts the contrast of the colors. Adjusts the dominance of the hues.
Chapter 24: Internet Viewing Playback This screen allows you to search, play back, and back up recorded videos. You must select the DVR from the Device List to view the recorded videos. Calendar: Shows the days with recordings in bold numbers. Select a date to view a file list. Displays the calendar. The days that have recorded videos are highlighted in red. Displays the playback screens. Plays the video.
Chapter 24: Internet Viewing System Setting This screen allows you set the location that the files will saved to. • System: Allows you set the location the image captures will saved to. • Record: Allows you set the location the videos will saved to. • Permission Settings: Allows you set authorizations for users of the CMS software.
Chapter 24: Internet Viewing Remote Setting This screen allows you to access the DVR setting menus. You must select the DVR from the Device List to view the settings. • Information: Refer to Chapter 19 for details on configuration. • Date/Time: Refer to Chapter 14.2 for details on configuration. • Display: Refer to Chapter 14.3 for details on configuration. • Record: Refer to Chapter 14.4 for details on configuration. • User: Refer to Chapter 14.
Chapter 24: Internet Viewing Event This screen displays a list of all of the activity of the DVR. • Log Type: Allows you to choose the operation log or the alarm log. • Operation Type: Shows the type of action that occurred in the DVR (e.g., logging in or opening a video). • Start Time: Allows you to choose the beginning date and time you would like to search for activity on the DVR.
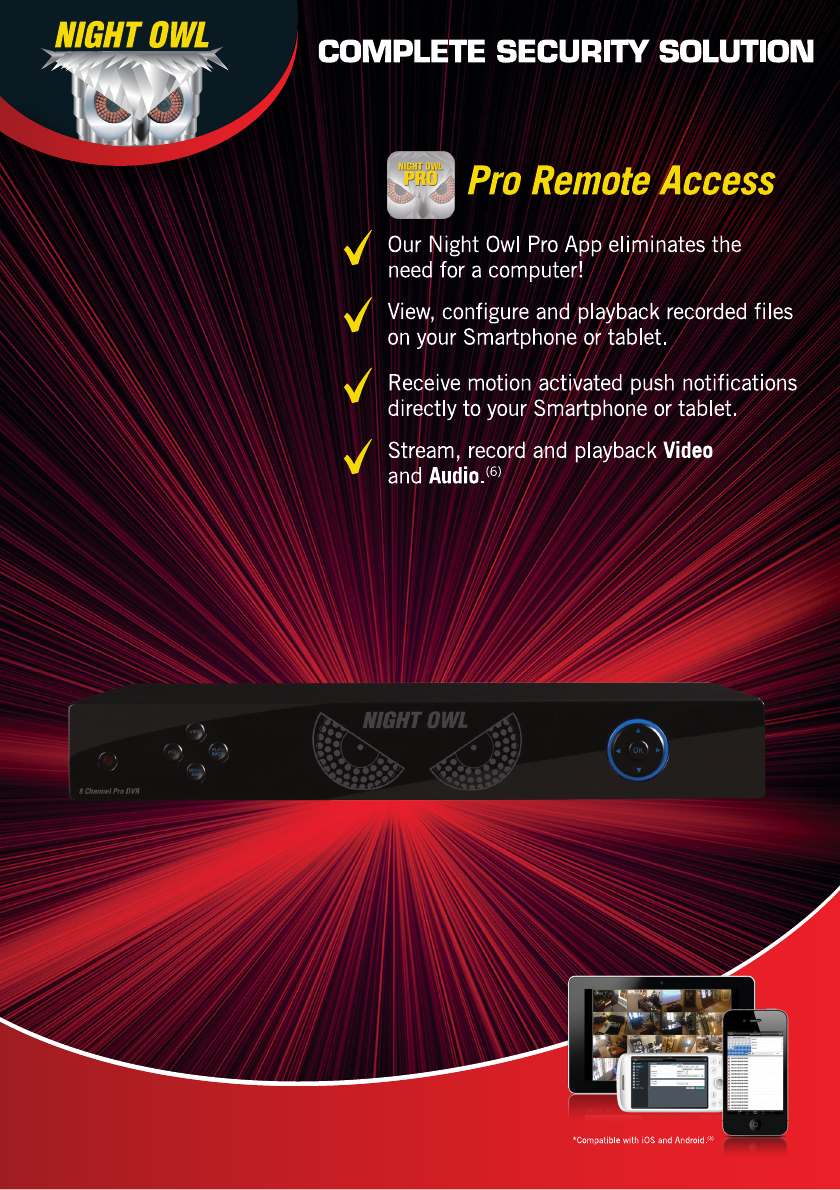
Chapter 25: Night Owl Pro Mobile Application The Night Owl Pro mobile application (available online) lets you access your DVR remotely using a tablet or Smartphone. Search for Night Owl Pro from your Apple or Android device and download the free application. • • Apple Android Night Owl Pro offers the following features: • Live video streaming of your DVR(s) • Add multiple DVR systems to this application (e.g.
Chapter 25: Night Owl Pro Mobile Application Device Page This page allows you to add, edit, and delete devices. Make sure that you have completed Chapters 21 and 22 of this manual before trying to access the DVR using this application. Displays a screen that allows you to add a DVR. Allows you to edit the settings for a device or delete a device from the application.
Chapter 25: Night Owl Pro Mobile Application Adding/Editing a Device This screen allows you to add or edit a device based on information that was gathered in Chapter 21. • Name: Names the DVR in the application. • IP: This is the public IP address of the domain that you created. • Media Port: This is the port that was configured in the Port Menu.
Chapter 25: Night Owl Pro Mobile Application Live View Live View lets you perform different functions during live viewing on a mobile device. You can view up to 16 channels on one screen. Displays all of the configured devices. Select a device to enable live viewing. Enables PTZ camera functions if a PTZ (Pan, Tilt, Zoom) camera is connected. Starts/stops recording.
Chapter 25: Night Owl Pro Mobile Application Playback The Playback screen lets you control several playback operations from your mobile device. • Remote Playback: Allows you to search and play back DVR recordings remotely. • Event Playback: Allows you to view all of the recordings that were trigged by an alarm.
Chapter 25: Night Owl Pro Mobile Application Settings This screen allows you to configure the settings of a device. • Information: Refer to Chapter 19 for details on configuration. • Date/Time: Refer to Chapter 14.2 for details on configuration. • Display: Refer to Chapter 14.3 for details on configuration. • Record: Refer to Chapter 14.4 for details on configuration. • User: Refer to Chapter 14.5 for details on configuration. • Alarm: Refer to Chapter 15.
Chapter 25: Night Owl Pro Mobile Application More This screen allows you to view help functions, configure push notifications, and set the permissions. • System: Allows you to change the speed of a PTZ camera when it rotates, set a permission for the application to work only in WiFi networks, and save snapshots taken during live view to a photo album on your phone.
Chapter 26: DVR Specifications 119
Chapter 27: 25: Information Night Owl Pro Mobile Application Chapter Log Be sure to write down all of the important information below and place it in a secure location.
Chapter 28: Warranty NIGHT OWL, LLC (“Night Owl”) provides the following warranty to the original retail purchaser only (the “Purchaser”) with respect to this product (the “Product”): For a period of one (1) year after the date of sale, the Product shall be free from manufacturing defects in material and workmanship. In the event that the Product is defective, the Purchaser must return the Product at Purchaser’s cost (no CODs) to the address below, with the original proof of purchase receipt.
Chapter 28: Warranty Except as otherwise prohibited by law, this warranty is in lieu of other warranties, express or implied, and Night Owl neither assumes nor authorizes any person to assume for it any other obligation or liability in connection with the sale or service of the Product.
Disclaimer Certain uses, publication and/or distribution of video/audio recordings from security cameras and/or audio devices are prohibited or restricted by federal, state and local laws. When enabling and/or using audio recording features with your hidden security camera, be sure to comply with the laws in your country, state and locality. CUSTOMER SERVICE Email: Website: Support@NightOwlSP.com www.NightOwlSP.
Chapter 28: Warranty 123