
Full Product Manual


46 HDA Series Users Manual
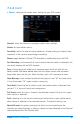
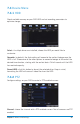
Channel: select the channel to configure the recording schedule.
Normal Record: select this option to set the schedule for continuous recording.
Once selected, highlight the boxes corresponding to the day and times that the
channel should be recording. Click and drag to highlight multiple boxes green.
Motion Record: select this option to set the schedule for motion-activated
recording. Once selected, highlight the boxes corresponding to the day and times
that the DVR should record when motion is detected. By default, motion recording
is always on.
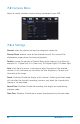
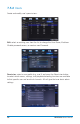
c. Mainstream: configure or adjust the video settings to best optimize for your
connection.
Resolution: choose between WD1 (960 x 576), WHD1 (960 x 288), WCIF (480 x
240), 720p (1280 x 720) or 1080p (1920 x 1080) resolutions based on your TV
or monitor capabilities.
FPS: increase or decrease the frames per second of the streaming video depending
on your connection speed. A higher FPS will result in better video quality but will
require a faster network. If experiencing lag or stutter, lower the FPS.
Bitrate Control: select CBR (constant bit rate, or a fixed encoding speed) or VBR
(variable bit rate, or an average encoding speed); if using VBR, you must select the
desired quality of video.
Bitrate Mode: select Predefined to auto-select bitrate or User-Defined to set bitrate manually.
Bitrate: adjust the amount of data transferred while streaming. The default setting
is sufficient for most networks.
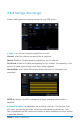
Audio: click the box to record sound if your camera is audio enabled. Audio
enabled cameras are only included in certain kit models. Audio enabled cameras
will have a white RCA plug to transmit the audio signal.
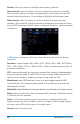
Channel: select channel to edit