
Digital Camera User Manual


Table Of Contents
- Getting the Most from Your Camera
- Table of Contents
- For Your Safety
- Notices
- Introduction
- Still Image Mode
- Smart Photo Selector Mode
- Movie Mode
- Motion Snapshot Mode
- More on Photography
- More on Playback
- Connections
- The Playback Menu
- The Shooting Menu
- Reset Shooting Options
- Exposure Mode
- Image Quality
- Image Size
- Continuous
- Shutter Type
- Frame Rate
- Movie Settings
- Metering
- White Balance
- ISO Sensitivity
- Picture Control
- Custom Picture Control
- Color Space
- Active D-Lighting
- Long Exposure NR
- High ISO Noise Reduction
- Fade in/Fade Out
- Movie Sound Options
- Interval Timer Shooting
- Vibration Reduction
- AF-Area Mode
- Face-Priority AF
- Built-in AF Assist
- Flash Control
- Flash Compensation
- The Setup Menu
- Reset Setup Options
- Format Memory Card
- Slot Empty Release Lock
- Welcome Screen
- Display Brightness
- Grid Display
- Sound Settings
- Auto Power Off
- Remote on Duration
- Assign AE/AF-L Button
- Shutter Button AE Lock
- Video Mode
- Flicker Reduction
- Reset File Numbering
- Time Zone and Date
- Language
- Auto Image Rotation
- Battery Info
- Firmware Version
- Technical Notes
93
Q
Selected JPEG images can be printed on a PictBridge printer
connected directly to the camera.
Connecting the Printer
Connect the camera using the supplied USB cable.
1
Turn the camera off.
2
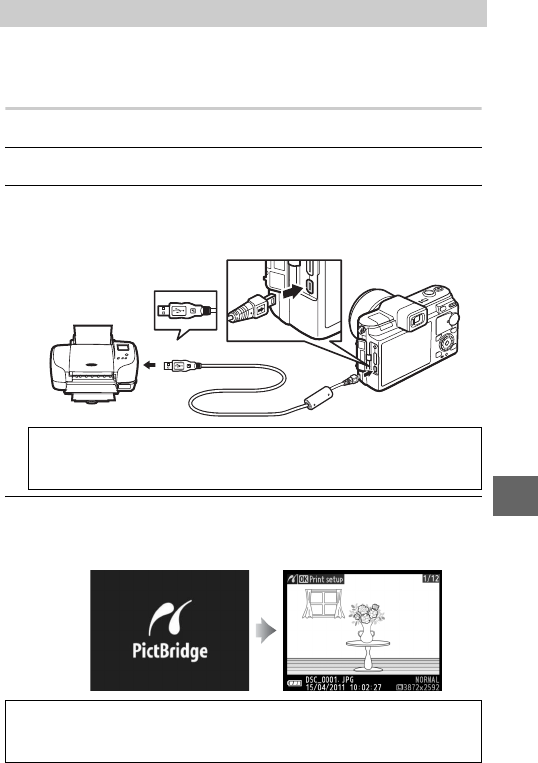
Connect the USB cable.
Turn the printer on and connect the USB cable as shown. Do
not use force or attempt to insert the connectors at an angle.
3
Turn the camera on.
A welcome screen will be displayed in the monitor, followed
by a PictBridge playback display.
Printing Photographs
A
USB Hubs
Connect the camera directly to the printer; do not connect the
cable via a USB hub.
qw
A
Printing Via Direct USB Connection
Be sure the EN-EL15 battery is fully charged or use an optional EH-5b
AC adapter and EP-5B power connector.