
Digital Camera User Manual


Table Of Contents
- Getting the Most from Your Camera
- Table of Contents
- For Your Safety
- Notices
- Introduction
- Still Image Mode
- Smart Photo Selector Mode
- Movie Mode
- Motion Snapshot Mode
- More on Photography
- More on Playback
- Connections
- The Playback Menu
- The Shooting Menu
- Reset Shooting Options
- Exposure Mode
- Image Quality
- Image Size
- Continuous
- Shutter Type
- Frame Rate
- Movie Settings
- Metering
- White Balance
- ISO Sensitivity
- Picture Control
- Custom Picture Control
- Color Space
- Active D-Lighting
- Long Exposure NR
- High ISO Noise Reduction
- Fade in/Fade Out
- Movie Sound Options
- Interval Timer Shooting
- Vibration Reduction
- AF-Area Mode
- Face-Priority AF
- Built-in AF Assist
- Flash Control
- Flash Compensation
- The Setup Menu
- Reset Setup Options
- Format Memory Card
- Slot Empty Release Lock
- Welcome Screen
- Display Brightness
- Grid Display
- Sound Settings
- Auto Power Off
- Remote on Duration
- Assign AE/AF-L Button
- Shutter Button AE Lock
- Video Mode
- Flicker Reduction
- Reset File Numbering
- Time Zone and Date
- Language
- Auto Image Rotation
- Battery Info
- Firmware Version
- Technical Notes
117
i
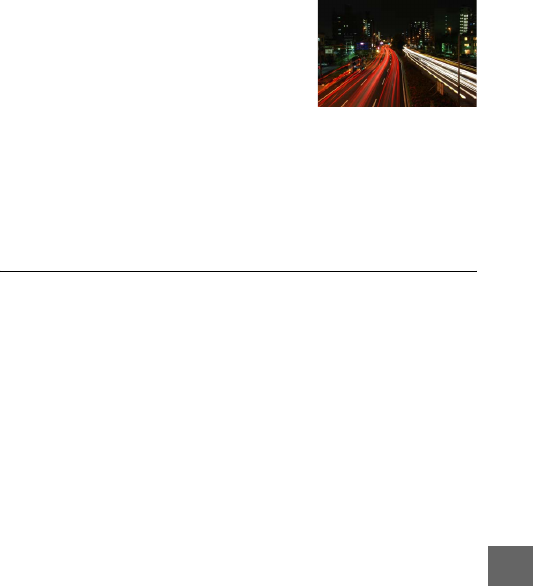
❚❚ Long Time-Exposures (Manual Exposure Mode Only)
Select the following shutter speeds for
long time-exposures of moving lights,
the stars, night scenery, or fireworks.
• Bulb: The shutter remains open while
the shutter-release button is held down.
To prevent blur, use a tripod.
• Time: Requires an optional ML-L3
remote control (0 163). Start the expo-
sure by pressing the ML-L3 shutter-
release button. The shutter remains
open until the button is pressed a sec-
ond time.
1
Ready the camera.
Mount the camera on a tripod or place it on a stable, level sur-
face. To prevent loss of power before the exposure is com-
plete, use a fully charged EN-EL15 battery or an optional
EH-5b AC adapter and EP-5B power connector. Note that
noise (bright spots, randomly-spaced bright pixels, or fog)
may be present in long exposures; before shooting, choose
On for Long exposure NR in the shooting menu (0 140).