
Digital Camera User Manual


Table Of Contents
- Getting the Most from Your Camera
- Table of Contents
- For Your Safety
- Notices
- Introduction
- Still Image Mode
- Smart Photo Selector Mode
- Movie Mode
- Motion Snapshot Mode
- More on Photography
- More on Playback
- Connections
- The Playback Menu
- The Shooting Menu
- Reset Shooting Options
- Exposure Mode
- Image Quality
- Image Size
- Continuous
- Shutter Type
- Frame Rate
- Movie Settings
- Metering
- White Balance
- ISO Sensitivity
- Picture Control
- Custom Picture Control
- Color Space
- Active D-Lighting
- Long Exposure NR
- High ISO Noise Reduction
- Fade in/Fade Out
- Movie Sound Options
- Interval Timer Shooting
- Vibration Reduction
- AF-Area Mode
- Face-Priority AF
- Built-in AF Assist
- Flash Control
- Flash Compensation
- The Setup Menu
- Reset Setup Options
- Format Memory Card
- Slot Empty Release Lock
- Welcome Screen
- Display Brightness
- Grid Display
- Sound Settings
- Auto Power Off
- Remote on Duration
- Assign AE/AF-L Button
- Shutter Button AE Lock
- Video Mode
- Flicker Reduction
- Reset File Numbering
- Time Zone and Date
- Language
- Auto Image Rotation
- Battery Info
- Firmware Version
- Technical Notes
39
y
❚❚ Taking Photographs During HD Movie Recording
Press the shutter-release button all the
way down to take a photograph without
interrupting HD movie recording. Photo-
graphs taken during movie recording
have an aspect ratio of 16 : 9.
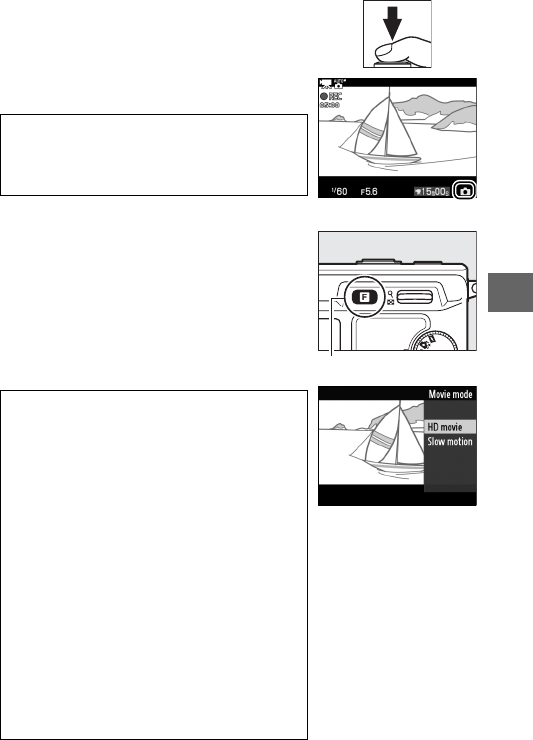
❚❚ Choosing the Movie Type
To choose between high definition and
slow motion recording, press & and use
the multi selector and J button to
choose from the following options:
• HD movie: Record movies in HD.
• Slow motion: Record slow-motion mov-
ies (0 40).
A
Taking Photographs During Movie Recording
Up to 20 photographs can be taken with each
movie shot. Please note that photographs
can not be taken with slow-motion movies.
D
Recording Movies
Flicker, banding, or distortion may be visible
in the displays and in the final movie under
fluorescent, mercury vapor, or sodium lamps
or if the camera is panned horizontally or an
object moves at high speed through frame
(flicker and banding can be reduced in HD
movies by choosing a Flicker reduction
option that matches the frequency of the
local AC power supply; 0 157). Bright light
sources may leave after-images when the
camera is panned. Jagged edges, color fring-
ing, moiré, and bright spots may also appear.
When recording movies, avoid pointing the
camera at the sun or other strong light
sources. Failure to observe this precaution
could result in damage to the camera’s inter-
nal circuitry.
& button