
Owner's Manual
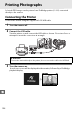
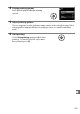
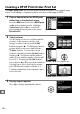
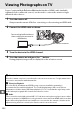
Table Of Contents
- Quick Start Guide
- Camera User Manual
- Restoring Default Settings
- Q&A Index
- Table of Contents
- For Your Safety
- Notices
- Supplied Accessories
- Parts & Controls
- Getting to Know the Camera
- Camera Menus
- First Steps
- Basic Photography and Playback
- Live View Photography
- Movie Live View
- P, S, A, and M Modes
- User Settings: U1 and U2 Modes
- Release Mode
- Image Recording Options
- Focus
- ISO Sensitivity
- Exposure
- White Balance
- Image Enhancement
- Flash Photography
- Other Shooting Options
- More on Playback
- Connections
- Menu Guide
- Navigating the Menus
- The Playback Menu: Managing Images
- The Shooting Menu: Shooting Options
- Custom Settings: Fine-Tuning Camera Settings
- The Setup Menu: Camera Setup
- The Retouch Menu: Creating Retouched Copies
- My Menu/Recent Settings
- Technical Notes
- Troubleshooting
- Error Messages
- Specs
- Index
- Lens User Manual
- Scan of CD-ROM
- Warranty

195
Q
6 Click Start Transfer.
At default settings, all the pictures on the memory card
will be copied to the computer (for more information on
using Nikon Transfer 2, start ViewNX 2 or Nikon Transfer 2
and select ViewNX 2 Help from the Help menu).
7 Turn the camera off and disconnect the USB cable when transfer ends.
Nikon Transfer 2 will close automatically when transfer is complete.
A Camera Control Pro 2
Camera Control Pro 2 software (available separately; 0 298) can be used to control the
camera from a computer.
When Camera Control Pro 2 is used to capture photographs and
movies directly to the computer, the PC connection indicator (c) will appear in the control
panel.
Start Transfer