
Owner's Manual
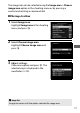
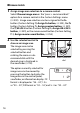
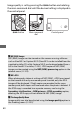
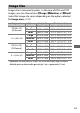
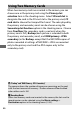
Table Of Contents
- D810 Camera Users Manual
- For Your Safety
- Compatible Lenses
- Approved Memory Cards
- Table of Contents
- Supplied Accessories
- Parts & Controls
- Introduction
- First Steps
- Camera Menus
- Basic Photography and Playback
- Live View Photography
- Movie Live View
- Image Recording Options
- Focus
- Release Mode
- ISO Sensitivity
- Exposure
- White Balance
- Image Enhancement
- Flash Photography
- Other Shooting Options
- More About Playback
- Connections
- Menu Guide
- Defaults
- The Playback Menu: Managing Images
- The Shooting Menu: Shooting Options
- Custom Settings: Fine-Tuning Camera Settings
- Custom Settings
- Custom Settings Bank
- a: Autofocus
- a1: AF-C Priority Selection
- a2: AF-S Priority Selection
- a3: Focus Tracking with Lock-On
- a4: AF Activation
- a5: Focus Point Illumination
- a6: AF Point Illumination
- a7: Focus Point Wrap-Around
- a8: Number of Focus Points
- a9: Store by Orientation
- a10: Built-in AF-assist Illuminator
- a11: Limit AF-Area Mode Selection
- a12: Autofocus Mode Restrictions
- b: Metering/Exposure
- c: Timers/AE Lock
- d: Shooting/Display
- d1: Beep
- d2: CL Mode Shooting Speed
- d3: Max. Continuous Release
- d4: Exposure Delay Mode
- d5: Electronic Front-Curtain Shutter
- d6: File Number Sequence
- d7: Viewfinder Grid Display
- d8: ISO Display and Adjustment
- d9: Screen Tips
- d10: Information Display
- d11: LCD Illumination
- d12: MB-D12 Battery Type
- d13: Battery Order
- e: Bracketing/Flash
- f: Controls
- f1: LCD Illuminator Switch
- f2: Multi Selector Center Button
- f3: Multi Selector
- f4: Assign Fn Button
- f5: Assign Preview Button
- f6: Assign AE-L/AF-L button
- f7: Shutter Spd & Aperture Lock
- f8: Assign BKT Button
- f9: Customize Command Dials
- f10: Release Button to Use Dial
- f11: Slot Empty Release Lock
- f12: Reverse Indicators
- f13: Assign Movie Record Button
- f14: Live View Button Options
- f15: Assign MB-D12 AF-ON
- f16: Assign Remote (WR) Fn Button
- f17: Lens Focus Function Buttons
- g: Movie
- Custom Settings
- The Setup Menu: Camera Setup
- The Retouch Menu: Creating Retouched Copies
- My Menu/Recent Settings
- Technical Notes
- Compatible Lenses
- Optional Flash Units (Speedlights)
- Other Accessories
- Caring for the Camera
- Caring for the Camera and Battery: Cautions
- Exposure Program
- Troubleshooting
- Error Messages
- Specifications
- Approved Memory Cards
- Memory Card Capacity
- Battery Life
- Lenses That May Block the Built-in Flash and AF-Assist Illuminator
- Index
- Troubleshooting
- Error Messages
- Specs
- Index
- AF-S Nikkor 35mm f/1.8G ED Lens Users Manual
- AF-S Nikkor 50mm f/1.8G Lens Users Manual
- AF-S Nikkor 85mm f/1.8G Lens Users Manual
- Atomos Ninja-2 Quick Start Guide
- Atomos Ninja-2 User Manual
- Table of Contents
- Warranty
- Introduction
- Supplied Accessories
- What Else is Needed
- Mounting disks in the Master Caddy
- Connecting the Ninja-2 and powering up
- Ninja-2 connections
- Other physical features
- Using the Ninja-2
- Monitoring and Recording
- Timecode
- Pulldown
- Playback & Playout
- Connecting and Editing
- Using Ninja-2 with external power supplies
- Using Ninja-2 with Atomos Connect Converters
- Software updates
- Specs

85
❚❚ NEF (RAW) Images
When recording photographs in NEF
(RAW) format, you can choose from sizes
of o Large and p Small using the
NEF (RAW) recording > Image size
option in the shooting menu. Small-size
images are about half the size of their
large-size counterparts.
An asterisk (U)
appears in the control panel when
p Small is selected.
D NEF (RAW) Images
Image size for NEF (RAW) photographs can not be selected using the
T button and command dials.
Small-size NEF (RAW) images are
recorded in uncompressed 12-bit format, regardless of the options
selected for NEF (RAW) compression and NEF (RAW) bit depth in the
NEF (RAW) recording menu, and can not be retouched (0 384).
Control panel