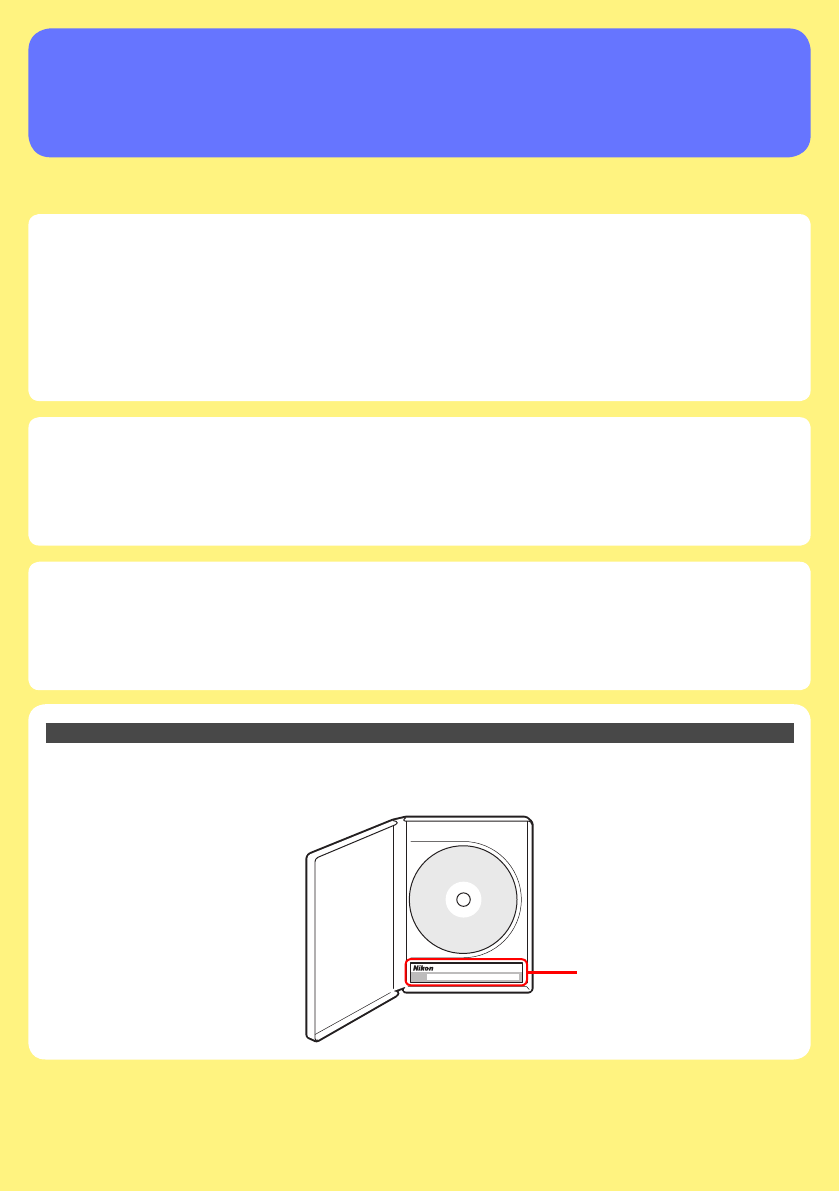
Camera Control Pro 2 Reference Manual Overview This section describes the structure of this manual, outlines the main functions of Camera Control Pro 2, and gives the system requirements and installation instructions. Using Camera Control Pro 2 This section describes how to use Camera Control Pro 2. Appendices This section lists preferences and describes how to uninstall the software. Important Information on the Product Key The product key may be found on the CD-ROM case. Do not lose this key.
Overview Using Camera Control Pro Appendices Overview Introduction 3 About This Manual 6 System Requirements Windows 7 Macintosh 8 Installing Camera Control Pro 9 Windows 10 Macintosh 16 Getting Started Starting and Exiting Camera Control Pro 21 Getting Help 28 Software Updates 29 Click a page number to view.
Overview Using Camera Control Pro Appendices Introduction 1/3 This manual has been written to help you take advantage of the many features included in Camera Control Pro 2. Be sure to read this manual thoroughly, and to keep it handy when using Camera Control Pro 2. Conventions This manual assumes basic knowledge of cameras and Windows or Finder operations. Refer to the documentation provided with your computer or camera for more information.
Overview Using Camera Control Pro Introduction Appendices 2/3 Camera Control Pro Changes made to settings in the Camera Control Pro window only apply to photographs taken after the changes are made, not to photographs that have already been taken. Camera Control Pro can not be used to modify existing photographs. The controls in the Camera Control Pro window vary with the type of camera connected. More information on camera settings may be found in the documentation provided with your camera.
Overview Using Camera Control Pro Introduction Appendices 3/3 Customer Support To link to a Nikon customer support website, click Link to Nikon in the Camera Control Pro 2 installer window and click the link for your region. Click here for more information. Notices • No part of the manuals included with this product may be reproduced, transmitted, transcribed, stored in a retrieval system, or translated into any language in any form, by any means, without Nikon’s prior written permission.
Overview Using Camera Control Pro Appendices About This Manual How to Use This Manual The pages of this manual are structured as shown here: 6TJOH $BNFSB $POUSPM 1SP 0WFSWJFX $BNFSB $POUSPMT "QQFOEJDFT 5IF &YQPTVSF 5BC 5IF GPMMPXJOH TFUUJOHT DBO CF BEKVTUFE GSPN UIF &YQPTVSF UBC 'PDVT 1PJOU 'PDVT "SFB .FUFSJOH .PEF 'MBTI 4ZOD .
Overview Using Camera Control Pro Appendices System Requirements Windows Before installing Camera Control Pro, be sure that your system meets the following requirements: CPU Intel Celeron, Pentium 4, or Intel Core series processor with a clock speed of 1 GHz or faster recommended OS Preinstalled versions of Windows Vista (32-bit Home Basic/Home Premium/Business/Enterprise/Ultimate editions), Windows XP (Home Edition/ Professional), Windows 2000 Professional Hard-disk space 50 MB required for insta
Overview Using Camera Control Pro Appendices System Requirements Macintosh Before installing Camera Control Pro, be sure that your system meets the following requirements: CPU PowerPC G4 or G5 model, Intel Core, or Intel Xeon with a clock speed of 1 GHz or faster recommended OS Mac OS X version 10.3.9 or 10.4.
Overview Using Camera Control Pro Appendices Installing Camera Control Pro Before installing Camera Control Pro: • Confirm that the computer satisfies the sy system stem requirements for Camera Control Pro. • Exit any other applications that may be running, including anti-virus software.
Overview Using Camera Control Pro Installing Camera Control Pro Appendices Windows 1/6 Use an account with administrator privileges when installing Camera Control Pro. Camera Control Pro 2 Install Options To display install options for Camera Control Pro: 1 2 Insert the installer CD in a CD-ROM drive. Windows Vista An AutoPlay dialog will be displayed; click Run Welcome.exe. A “User Account Control” dialog will be displayed; click Allow.
Overview Using Camera Control Pro Installing Camera Control Pro Appendices Windows 2/6 Easy Install: Install the minimum software needed to run Camera Control Pro. Custom Install: Install selected software (not displayed in Windows Vista). Link to Nikon: Download ViewNX or trial versions of Nikon software or visit Nikon technical support websites (Internet connection required). Quit: Close this dialog. Instruction Manual: Open the “Manuals” folder, which contains software instruction manuals.
Overview Using Camera Control Pro Installing Camera Control Pro Appendices Windows 3/6 Follow the steps below to install Camera Control Pro: 1 Click Easy Install. 2 Click Next.
Overview Using Camera Control Pro Installing Camera Control Pro 3 Appendices Windows 4/6 After reading the license agreement ( ), select I accept the terms of the license agreement ( ) and click Next ( ) to proceed with installation. A “ReadMe” file will be displayed. Take a moment to read this file, which may contain information that could not be included in this manual, and then click Next. 4 Personalize your copy of Camera Control Pro ( ) and click Next ( ).
Overview Using Camera Control Pro Installing Camera Control Pro 5 6 Appendices Windows 5/6 The destination folder for Camera Control Pro will be displayed under “Install Camera Control Pro to.” Click Next to install Camera Control Pro to this folder, or click Change… to select another destination. Click Install.
Overview Using Camera Control Pro Installing Camera Control Pro Appendices Windows 6/6 7 Click Finish. 8 Click Yes and remove the installer CD from the CD-ROM drive. If a dialog is displayed directing you to restart the computer, follow the onscreen instructions. This completes installation of Camera Control Pro.
Overview Using Camera Control Pro Installing Camera Control Pro Appendices Macintosh 1/5 Use an account with administrator privileges when installing Camera Control Pro. Camera Control Pro 2 Install Options To display install options for Camera Control Pro: 1 2 3 Insert the installer CD in a CD-ROM drive. Double-click the Camera Control Pro CD-ROM icon ( ) on the desktop and then double click the Welcome ( ) icon.
Overview Using Camera Control Pro Installing Camera Control Pro Appendices Macintosh 2/5 Easy Install: Install the minimum software needed to run Camera Control Pro. Link to Nikon: Download ViewNX or trial versions of Nikon software or visit Nikon technical support websites (Internet connection required). Quit: Close this dialog. Instruction Manual: Open the “Manuals” folder, which contains software instruction manuals. Double-click INDEX.pdf to view a region selection screen.
Overview Using Camera Control Pro Appendices Installing Camera Control Pro Macintosh 3/5 Follow the steps below to install Camera Control Pro: 1 2 Click Easy Install. After reading the license agreement ( ), click Accept ( ).
Overview Using Camera Control Pro Appendices Installing Camera Control Pro 3 4 Macintosh 4/5 Click Install. Personalize your copy of Camera Control Pro ( ) and click OK ( ). 5 Click Yes.
Overview Using Camera Control Pro Installing Camera Control Pro Appendices Macintosh 5/5 6 Click Quit. 7 Click OK and remove the installer CD from the CD-ROM drive. This completes installation of Camera Control Pro.
Overview Using Camera Control Pro Appendices Starting and Exiting Camera Control Pro 1/7 Starting Camera Control Pro 1 Turn the camera off and use the interface cable to connect the camera to the computer as described in the camera manual. If you are using a D1-series camera, choose “PC” as the operating mode. If you are using a D100, choose P, S, A, or M mode. Users of D3, D2-series, D300, and D200 cameras can select any mode other than M-UP (mirror up).
Overview Using Camera Control Pro Appendices Starting and Exiting Camera Control Pro 2 2/7 Turn the camera on. If Nikon Transfer or PictureProject Transfer starts, click the close button. USB Connection to Windows Vista/XP Computers When a camera with USB interface is connected to a Windows XP computer, an AutoPlay dialog may be displayed. Select the Camera Control Pro option to start Camera Control Pro.
Overview Using Camera Control Pro Appendices Starting and Exiting Camera Control Pro 3 3/7 Start Camera Control Pro. Windows Method 1: Double-click the Camera Control Pro 2 shortcut on the desktop. Method 2: Click Start and select Camera Control Pro 2 in the program list. Macintosh Method 1: Click the Camera Control Pro 2 icon in the Dock (if available). Method 2: Open the “Nikon Software/Camera Control Pro 2” folder in the “Applications” folder and double-click the Camera Control Pro 2 icon.
Overview Using Camera Control Pro Appendices Starting and Exiting Camera Control Pro 4 4/7 The Camera Control Pro window will be displayed.
Overview Using Camera Control Pro Appendices Starting and Exiting Camera Control Pro 5/7 Product Key If prompted to supply a product key, key enter the key found on the product packaging and click OK. Users of the trial version will see a dialog listing the time remaining in the thirty-day trial period; click Trial to use the trial version or Buy (if available) to visit a website where you can purchase a product key (Internet connection required).
Overview Using Camera Control Pro Appendices Starting and Exiting Camera Control Pro 6/7 Exiting Camera Control Pro Windows Select Exit from the File menu. Macintosh Select Quit Camera Control Pro from the application menu.
Overview Using Camera Control Pro Appendices Starting and Exiting Camera Control Pro 7/7 Disconnecting the Camera To disconnect the camera: • USB (PTP or MTP/PTP)/IEEE 1394 (FireWire): Turn the camera off and disconnect the interface cable.
Overview Using Camera Control Pro Appendices Getting Help To view help on Camera Control Pro, select Camera Control Pro Help from the Help menu.
Overview Using Camera Control Pro Appendices Software Updates Camera Control Pro is equipped with an automatic update function known as Nikon Message Center. Nikon Message Center checks for updates to a variety of Nikon digital products, including Camera Control Pro. If the computer is connected to the Internet, Nikon Message Center will automatically check for updates when Camera Control Pro starts. You can also check for updates by selecting Check for Software Updates… from the Help menu.
Overview Using Camera Control Pro Appendices Using Camera Control Pro Screen Layout 31 Capturing Photographs to Disk 33 Viewing Captured Photographs 39 Time Lapse Photography 42 Live View 46 The Camera Control Pro Window 50 Camera Controls 54 Saving and Loading Camera Control Settings 72 The Camera Menu 73 Custom Settings 77 Return to first page Camera Control Pro 2 30
Overview Using Camera Control Pro Appendices Screen Layout 1/2 Camera Control Pro screen layout is described below using the D3 as an example. Windows Menu bar Connection status status: Shows the status and name of any cameras connected. / : View or hide camera controls. Camera controls can also be displayed or hidden by selecting Show/Hide Camera Control Panels in the Tools menu. Camera control tabs: Click to view the associated camera controls.
Overview Using Camera Control Pro Appendices Screen Layout Macintosh 2/2 Menu bar Connection status status: Shows the status and name of any cameras connected. / : View or hide camera controls. Camera controls can also be displayed or hidden by selecting Show/Hide Camera Control Panels in the Tools menu. Camera control tabs: Click to view the associated camera controls.
Overview Using Camera Control Pro Capturing Photographs to Disk Appendices 1/6 If Camera Control Pro is running when a supported camera connected, pictures taken with the camera will be stored on your computer hard disk, not the camera memory card. 1 Start Camera Control Pro. 2 Select Download Options… in the Tools menu to display download options.
Overview Using Camera Control Pro Appendices Capturing Photographs to Disk 3 2/6 Adjust capture options: Folder for images downloaded from the camera Select the folder to which photographs will be downloaded as they are taken. Next file name to be used Shows how images download to the computer will be named. To change how files are named, click Edit.... The dialog shown at below will be displayed.
Overview Using Camera Control Pro Appendices Capturing Photographs to Disk 3/6 When a new image is received from camera Choose the application that will be used to display captured photographs after they are saved to disk. • Do nothing: Photographs are not displayed after being saved to the computer hard disk. • Show it with Viewer: Photographs are displayed in the viewer window.
Overview Using Camera Control Pro Appendices Capturing Photographs to Disk 4/6 Attach IPTC Information Check this option to add IPTC information to captured images and enable the Copy Shooting Data to IPTC Caption option. IPTC Information… Clicking this button displays a dialog where you can select the IPTC information, including keywords and captions, that will be added to images as they are captured.
Overview Using Camera Control Pro Appendices Capturing Photographs to Disk 4 5/6 After adjusting options as described in Step 3, click OK to exit the dialog and apply settings to subsequent photographs.
Overview Using Camera Control Pro Appendices Capturing Photographs to Disk 5 6/6 Take pictures using the camera shutter-release button or the AF and Shoot or Shoot buttons in the Camera Control Pro window. The Status dialog shown below will be displayed. Close button Triangle To display a histogram of the current image, click the triangle at the bottom of the Status dialog.
Overview Using Camera Control Pro Appendices Viewing Captured Photographs 1/3 If Show it with Viewer is selected for When a new image is received from camera in the “Download Options” dialog dialog, pictures will automatically be displayed in the “Viewer” window after capture. The “Viewer” window can also be started by selecting Show Viewer from the Tools menu.
Overview Using Camera Control Pro Viewing Captured Photographs Appendices 2/3 The Toolbar The toolbar contains the following items: Item Name Description Click this button or press the left arrow on the keyboard to Back select the next image to the left in the thumbnail area. Click this button or press the right arrow on the keyboard to Next select the next image to the right in the thumbnail area. Choose the size of the thumbnails displayed in the thumbnail Thumbnail slider area.
Overview Using Camera Control Pro Viewing Captured Photographs Appendices 3/3 The Thumbnail Area Lists the images in the folder selected for Folder for images downloaded from the camera in the “Download Options” dialog, sorted by date of modification with the most recent images on the right. The Image Area Shows the image currently selected in the thumbnail list.
Overview Using Camera Control Pro Time Lapse Photography Appendices 1/4 Using Camera Control Pro, you can take a series of photographs automatically at a time interval you select. 1 Select Time Lapse Photography… from the Camera menu. The Time Lapse Photography dialog will be displayed.
Overview Using Camera Control Pro Appendices Time Lapse Photography 2 2/4 Before shooting starts, adjust the following settings: Autofocus before each shot If this option is checked, the camera will perform an autofocus operation before each shot. If the selected focus mode is AF-A (D80, D50, and D40-series cameras) or single-servo AF, an autofocus operation will be performed even when the check box is off.
Overview Using Camera Control Pro Time Lapse Photography 3 4 5 Appendices 3/4 Use the Shots box to choose a number of shots from 2 to 9,999. This option is not available when Keep shooting until cancelled is selected. The delay between shots can be set to any value between 00:00:01 (one second) and 99:59:59 (ninety-nine hours, fifty-nine minutes, and fifty-nine seconds). Click Start.
Overview Using Camera Control Pro Appendices Time Lapse Photography 6 7 4/4 Follow the progress of time lapse photography in the progress dialog. Click Stop Shooting to end time lapse photography at any time. If a number of shots was specified in the “Time Lapse Photography” dialog, shooting will end when the specified number of shots has been taken. Once the specified number of shots has been taken, the Stop Shooting button will change to Shooting Complete.
Overview Using Camera Control Pro Appendices Live View 1/4 When a camera that supports live view is connected, Live View (Hand-Held) and Live View (Tripod) options are available in the Camera menu. Selecting either of these options opens the “Live View” window. Camera controls can not be used while the “Live View” window is displayed; the “Live View” window will close automatically if the camera is disconnected.
Overview Using Camera Control Pro Live View Appendices 2/4 The image area shows the view through the camera lens, updated in real time, with the current focus point superimposed. The other controls in the “Live View (Handheld)” window are described below: Item Start/Stop Live View Focus Point Description Click to start or stop live view. Click the arrows to move the focus point.
Overview Using Camera Control Pro Appendices Live View 3/4 Live View (Tripod) The following window is displayed when Live View (Tripod) is selected in the Camera menu.
Overview Using Camera Control Pro Live View Appendices 4/4 The image area shows the view through the camera lens, updated in real time, with the focus point for contrast-detect AF superimposed. Click anywhere in the image area to move the focus point to that spot. The other controls in the “Live View (Tripod)” window are described below: Item Start/Stop Live View Description Click to start or stop live view.
Overview Using Camera Control Pro Appendices The Camera Control Pro Window 1/4 The Camera Control Pro window shows current camera settings, which may be viewed by clicking the five page selection tabs. Camera settings can be altered using the controls in each tab as in “Camera Camera Controls Controls.” The other settings in this window are described below.
Overview Using Camera Control Pro The Camera Control Pro Window The / Appendices 2/4 Button Click this button to view or hide camera controls. Simulated LCD Panel This panel shows the information displayed in the camera’s viewfinder, with the exception of camera errors. Clicking on an indicator in the panel opens the Camera Control Pro window to the tab that controls the selected option, where adjustments can be made.
Overview Using Camera Control Pro The Camera Control Pro Window Appendices 3/4 Shoot Buttons Click either of these buttons to take a photograph at current settings. If a D3, D2-series, D300, D200, D80, D70-series, D50, or D40-series camera is connected, photos can be taken in continuous shooting mode; in this case, the AF and Shoot and Shoot buttons will instead be labeled AF and Start and Start.
Overview Using Camera Control Pro Appendices The Camera Control Pro Window 4/4 Camera Settings That Can Not Be Adjusted from Camera Control Pro The following operations can only be performed using the controls on the camera body: Status not displayed Operation Burst photography (continuous shooting mode) Continuous servo autofocus Pressing the shutter-release button halfway to check focus Autofocus-only operation (use AF and Shoot to perform autofocus) Manual aperture adjustment using the lens apertu
Overview Using Camera Control Pro Appendices Camera Controls 1/18 Camera controls are described below using the D3 as an example: The Exposure 1 Tab The following settings can be adjusted from the Exposure 1 tab: Exposure Mode Shutter Speed Aperture Choose an exposure mode.
Overview Using Camera Control Pro Camera Controls Appendices 2/18 The Exposure 1 Tab Exposure compensation is useful when shooting subjects containing sharp lighting contrasts, or on other occasions when you want to modify the exposure value determined by the camera. Exposure compensation is available in all exposure modes. Exposure Comp. Flash Comp. D300 D200 D100 D80 D70 series D50 This option is used to adjust the level of the camera’s built-in Speedlight.
Overview Using Camera Control Pro Appendices Camera Controls 3/18 The Exposure 2 Tab The following settings can be adjusted from the Exposure 2 tab. Focus Point Focus Area Metering Mode Flash Sync Mode The focus point and focus area can be selected using the arrow buttons; see the camera manual for details. For information on AF-area mode and focus mode, see “The Mechanical Tab.” The metering mode can be selected from this menu (D3, D2 series, D300, D200, D80, D70 series, D50, and D40 series only).
Overview Using Camera Control Pro Appendices Camera Controls 4/18 The Exposure 2 Tab ISO sensitivity can be raised when taking photographs in low light conditions. See the user’s manual provided with your camera for details. ISO Sensitivity Auto ISO Sensitivity Auto Control D3 D2 series D200 D100 D300 D80 D70 series D50 D40 series When this option is checked, the camera will adjust ISO sensitivity automatically.
Overview Using Camera Control Pro Camera Controls Comment D3 D2 series D300 D200 Return to first page Appendices 5/18 The Exposure 2 Tab This field lists the comments for all white balance presets. Clicking Edit… when Preset is selected for white balance displays the dialog shown at right, where the comments for each of the white balance presets can be edited. Click OK to copy the comments to the camera.
Overview Using Camera Control Pro Appendices Camera Controls 6/18 The Storage Tab The following settings can be adjusted from the Storage tab: Data Format Color D1 series Image area D3 Return to first page Choose from the file types supported by the camera (see the camera manual for details). This setting determines pixel bit depth and file size.
Overview Using Camera Control Pro Camera Controls Image Size NEF RAW Compression NEF (RAW) recording D3 D2 series D1X D1H D300 D200 High-speed crop Return to first page D3 D2 series Appendices 7/18 The Storage Tab Choose image size. See the camera manual for details. Choose bit depth (D3 and D300 only) and compression settings for NEF (RAW) images. These options are only available when an option that includes NEF (RAW) is selected Data Format. Select this option to enable high-speed crop.
Overview Using Camera Control Pro Appendices Camera Controls 8/18 The Mechanical Tab The following settings can be adjusted from the Mechanical tab: Sets the shooting mode for D1-series cameras connected in PC mode to Single or Continuous. Changes to this setting also apply to Custom Setting 30. The shooting mode for D80, D70-series, D50, or D40 series cameras can be selected from Single and Continuous.
Overview Using Camera Control Pro Camera Controls Shots D3 D2 series D300 D200 D80 D70 series D50 D40 series Appendices 9/18 The Mechanical Tab Use the arrows to choose the maximum number of shots that can be taken in a single burst in continuous mode, or enter a value directly in the text box.
Overview Using Camera Control Pro Camera Controls Lens Edit… D3 D2 series D300 D200 Main Battery Level Clock Battery Level D1 series Appendices 10/18 The Mechanical Tab Displays the focal length and maximum aper ture of the lens currently attached to the camera. Depending on the lens type, some information may not be displayed. If the lens focal length or maximum aperture have been specified manually, an asterisk will appear next to these values.
Overview Using Camera Control Pro Appendices Camera Controls 11/18 D100 ) Continuous Mode (All Models Except D1 series The amount of memory remaining in the camera memory buffer is displayed at the right edge of the simulated LCD panel. This information is updated at regular intervals, but temporary discrepancies may exist between the display and the actual amount of memory remaining in the buffer.
Overview Using Camera Control Pro Appendices Camera Controls 12/18 The Image Processing Tab (D3/D300) The following settings can be adjusted from the Image Processing tab: Choose a Picture Control (see the camera manual for details), or click Edit… to modify the selected Picture Control. Control Manage Picture Control Select, rename, or delete custom Picture Controls. Controls Color space Choose a color space. See the camera manual for details. Active D-lighting Choose active D-lighting options.
Overview Using Camera Control Pro Camera Controls Appendices 13/18 Editing Picture Controls Clicking Edit… in the Image Processing tab displays options for the selected Picture Control (monochrome controls are shown at right, other controls at left). Select this option and drag the slider to the left or right to reduce or exaggerate the effect of the selected Picture Control. Select this option to make separate adjustments to the settings listed below.
Overview Using Camera Control Pro Camera Controls Appendices 14/18 Editing Picture Controls Click this button to save settings as a new custom Picture Control. The following dialog will be displayed; name the new control and click Save. Save as a new Custom Picture Control OK Reset Cancel Save changes and exit. Undo any changes to the selected Picture Control. Custom Picture Controls are reset to the values in effect when the Picture Control was first created. Exit without saving changes.
Overview Using Camera Control Pro Camera Controls Appendices 15/18 The “Custom Picture Control” Dialog Clicking Manage Picture Control… in the Image Processing tab displays the dialog shown below. Custom Picture Control Select a custom Picture Control. Rename the selected custom Picture Control. The following dialog will be displayed; rename the control and click OK. Rename… Delete… Close Return to first page Delete the selected custom Picture Control. Close the “Custom Picture Control” dialog.
Overview Using Camera Control Pro Camera Controls Appendices 16/18 The “Edit Camera Curves” Dialog Clicking Edit… when User Custom Curve is selected in the Picture Control settings dialog displays the dialog shown below.
Overview Using Camera Control Pro Appendices Camera Controls 17/18 The Image Processing Tab (Other Cameras) The following settings can be adjusted from the Image Processing tab: Image Optimize D200 D80 D50 D70 series D40 series Choose how much the camera sharpens outlines. See the camera manual for details. Adjust contrast. See the camera manual for details. Selecting “Custom“ or “Custom 1–3 “ (D2Xs only) and clicking Edit will display “Edit Camera Curves Curves““ dialog dialog.
Overview Using Camera Control Pro Camera Controls Appendices 18/18 The Image Processing Tab Color Mode D2 series D1X D1H D200 D100 D80 D70 series D50 D40 series D80 D70 series Choose a color mode. See the camera manual for details. With the D1, colors are optimized for the NTSC color space, regardless of the option chosen.
Overview Using Camera Control Pro Appendices Saving and Loading Camera Control Settings The Camera Control Pro option in the Settings menu is used to save Camera Control Pro settings and to load and apply previously saved settings. Select this item to load camera settings previously saved using Save Control Settings… (see below).
Overview Using Camera Control Pro The Camera Menu Appendices 1/4 The Camera menu contains the following options: Custom Settings… Selecting this option opens the Custom Settings dialog dialog, where camera Custom Settings can be adjusted. Set Date and Time… Selecting this option opens the dialog shown at right, where you can set the camera’s clock calendar to the current date and time. To view the current time and date settings, click Use Current Date/Time.
Overview Using Camera Control Pro Appendices The Camera Menu 2/4 D3 D300 ) Edit Camera Curves… (all cameras except This option is used to create a custom tone compensation curve and download it to the camera, where it applies when “Custom” is selected for the camera tone compensation option.
Overview Using Camera Control Pro Appendices The Camera Menu 3/4 Measure White Balance… Use this option to measure preset white balance. If the camera currently connected supports multiple values for preset white balance, the setting that will be used to store the measured value can be chosen from the pop-up menu at the top of the dialog. Adjust camera settings as described in the section on preset white balance in the camera user’s manual and click OK to measure a value for white balance.
Overview Using Camera Control Pro Appendices The Camera Menu 4/4 D3 D2 series D300 D200 Select Shooting Settings Bank… Selecting this option displays the dialog shown at right, where you can choose the shooting menu bank in which changes to settings will be stored while the camera is controlled from Camera Control Pro. See the camera manual for details. The D3, D2 series, D300, and D200 allow a descriptive comment to be added to the name of each shooting menu bank.
Overview Using Camera Control Pro Custom Settings Appendices 1/4 Most of the custom settings stored in camera memory can be viewed and adjusted from the Custom Settings window in Camera Control Pro. For more information on Custom Settings, see the documentation provided with your camera. 1 Select Custom Settings… from the Camera menu. The Custom Settings dialog for the current camera will be displayed.
Overview Using Camera Control Pro Custom Settings 2 3 Appendices 2/4 Choose a Custom Settings bank (Custom Settings set) from the pop-up menu at the top right corner or the Custom Settings dialog (see the camera manual for details). After making any changes to Custom Settings, click OK to save changes in the camera Custom Settings bank and exit the Custom Settings dialog. Custom Settings Custom Settings can not be saved to a separate file.
Overview Using Camera Control Pro Appendices Custom Settings 3/4 Custom Settings for D1-Series and D100 Cameras Custom Settings for D1-series and D100 cameras are divided among three tabs: Page 1, Page 2, and Page 3. See the camera manual for details. Custom Settings for D70-Series and D50 Cameras Custom Settings for the D70 series and D50 are divided among three tabs: Basic, Advanced 1, and Advanced 2. See the camera manual for details.
Overview Using Camera Control Pro Custom Settings Appendices 4/4 Custom Settings for D3, D2-Series, D300, and D200 Cameras Custom Settings in each bank are divided into six groups. The group can be chosen from the group menu or by clicking the Next and Prev. buttons. Group menu Prev./ Next buttons A descriptive comment can be added to the name of each Custom Settings bank. Clicking Edit… displays an “Edit Custom Settings Comment” dialog, where the comments for each bank can be edited.
Overview Using Camera Control Pro Appendices Appendices Camera Control Pro Preferences 82 The General Tab 83 The Color Management Tab Windows 84 The Color Management Tab Macintosh 86 Windows 88 Macintosh 89 Uninstalling Camera Control Pro RGB Color Space Profiles 90 Device Registration 92 Customer Support Return to first page Windows XP 93 Windows 2000 97 105 Camera Control Pro 2 81
Overview Using Camera Control Pro Appendices Camera Control Pro Preferences 1/6 To view the Preferences (Options) dialog for Camera Control Pro, select Options… from the Tools menu (Windows) or select Preferences… from the application menu (Macintosh). Windows Macintosh The Preferences dialog contains General and Color Management tabs.
Overview Using Camera Control Pro Camera Control Pro Preferences Appendices 2/6 The General Tab The General tab contains the following items: Choose how long the exposure meters remain on when the camera is operated on battery power. This setting only takes effect when a D1-series camera is connected While and powered on with Camera Control Pro running, and takes precedence over the Camera auto meter off option chosen using camera Custom Settings.
Overview Using Camera Control Pro Camera Control Pro Preferences Appendices 3/6 The Color Management Tab (Windows) The Color Management tab is where you specify the color management profiles used for displaying images on your monitor and for editing and saving RGB images. To choose a display profile, click Change Display Profile…. The Windows Change Display “Display Properties” dialog will be displayed; open the Settings tab and click Profile Advanced… to open the display adapter properties dialog.
Overview Using Camera Control Pro Appendices Camera Control Pro Preferences 4/6 Multiple Displays In a multiple display environment, choose a single profile suited to all displays. Default Display Profile The default Windows display profile is “NKMonitor_win.icm.“ This profile is equivalent to sRGB. Supported Color Profiles See “RGB RGB Color-Space Profiles” les for a list of the RGB color-space profiles supplied with Camera Control Pro.
Overview Using Camera Control Pro Camera Control Pro Preferences Appendices 5/6 The Color Management Tab (Macintosh) The Macintosh version displays the following options. ColorSync Default Profiles for Documents Device Profiles Lists the ICC color-space profile used to display images. Default RGB color space: Choose the output color-space profile used when working with RGB images.
Overview Using Camera Control Pro Camera Control Pro Preferences Appendices 6/6 Input Profiles If an input profile is selected for the default RGB color space, images will be displayed in the sRGB color space. Supported Color Profiles See “RGB RGB Color-Space Profiles” les for a list of the RGB color-space profiles supplied with Camera Control Pro. The Color Management Tab Changes to the display profile apply system wide.
Overview Using Camera Control Pro Appendices Uninstalling Camera Control Pro Windows Use an account with administrator privileges to perform the uninstall. 1 Click Start and select Camera Control Pro 2 > Camera Control Pro 2 Uninstall from the program list. 2 Click Yes to begin removing Camera Control Pro and all of its components. 3 4 If the uninstaller encounters read-only files or components shared by another application, a confirmation dialog will be displayed.
Overview Using Camera Control Pro Appendices Uninstalling Camera Control Pro Macintosh Use an account with administrator privileges to perform the uninstall. 1 Open the “Applications : Nikon Software : Camera Control Pro 2” folder and double-click the Camera Control Pro 2 Uninstaller icon. 2 Enter the administrator name and password and click OK. 3 Click Yes. 4 Click Quit to exit the uninstaller once Camera Control Pro has been removed.
Overview Using Camera Control Pro RGB Color Space Profiles Appendices 1/2 Profiles with a Gamma Value of 1.8 Profile Windows Macintosh Description This profile is used in desk-top publishing applications and in Nikon Adobe Photoshop versions 4.0 or earlier, and is the typical RGB Apple NKApple.icm Apple RGB profile for Macintosh monitors. The corresponding RGB setting RGB 4.0.0.3000 in Adobe Photoshop is “Apple RGB.” This profile is suitable for working with images displayed on the Macintosh.
Overview Using Camera Control Pro RGB Color Space Profiles Profile Windows Appendices 2/2 Description A color-space profile defined in Adobe Photoshop 5.0. It has a wider gamut than sRGB and includes the colors found in most Adobe Nikon Adobe CMYK gamuts, making it suitable for users involved in desktop NKAdobe. RGB RGB (1998) publishing. The corresponding RGB setting in Adobe Photoicm (1998) 4.0.0.3000 shop 5.0 is “SMPTE-240M,” the corresponding setting in Adobe Photoshop 5.5 or later “Adobe RGB (1998).
Overview Using Camera Control Pro Appendices Device Registration If D1-series cameras are not recognized by the computer to which Camera Control Pro is installed, the camera or IEEE 1394 (FireWire) board may not be correctly registered with the Windows Device Manager. To check whether a device is registered with the Device Manager, click on the links below. Windows XP Professional/Home Edition Windows 2000 Professional Opening the Device Manager Devices are registered with the Windows Device Manager.
Overview Using Camera Control Pro Appendices Device Registration Windows XP 1/4 Registering the IEEE 1394 Interface Board Confirm that the OHCI-compliant IEEE 1394 interface board or card has been correctly registered with the system. 1 Open the Device Manager Manager. If the camera has been correctly registered with the system, the controller for your camera should appear under “1394 Bus Controller.
Overview Using Camera Control Pro Device Registration Appendices Windows XP 2/4 Registering the Device Driver Follow the instructions below to check that the camera has been correctly registered with the system. 1 Open the Device Manager and confirm that “Nikon 1394 Protocol Device” and the camera is listed. If the camera is listed under “Other devices,” reinstall the device drivers drivers.
Overview Using Camera Control Pro Appendices Device Registration Windows XP 3/4 Reinstalling the Device Driver If the camera is listed under “Other devices,” reinstall the device drivers as instructed below. 1 Double-click the listing for the camera that appears under “Other devices.” 2 Open the “General” tab and click Reinstall Driver…. 3 Select No, not this time and click Next.
Overview Using Camera Control Pro Device Registration 4 5 6 Appendices Windows XP 4/4 Pressing the shift key to prevent the language-selection dialog from opening automatically, insert the Camera Control Pro CD (if the language-selection dialog appears, click Quit). Select Install the software automatically and click Next. Click Finish. Confirm that “This device is working properly” appears under “Device status” in the “General” tab of the camera “Nikon Digital Camera D1 Series Properties” dialog.
Overview Using Camera Control Pro Device Registration Appendices Windows 2000 1/8 Registering the IEEE 1394 Interface Board Confirm that your OHCI-compliant IEEE 1394 interface board or card has been correctly registered with the system. 1 Open the Device Manager Manager. If the camera has been correctly registered with the system, the controller for your camera should appear under “1394 Bus host Controller.
Overview Using Camera Control Pro Device Registration Appendices Windows 2000 2/8 Registering the Device Driver Follow the instructions below to check that the camera has been correctly registered with the system. 1 Open the Device Manager and confirm that “Nikon 1394 Protocol Device” and the camera are listed. If the camera is listed under “Other devices,” reinstall the device drivers drivers.
Overview Using Camera Control Pro Device Registration Appendices Windows 2000 3/8 Reinstalling the Device Driver If the camera is listed under “Other devices,” reinstall the device drivers as instructed below. 1 Double-click the listing for the camera that appears under “Other devices.” 2 Open the “General” tab and click Reinstall Driver. 3 Click Next.
Overview Using Camera Control Pro Device Registration 4 5 6 Appendices Windows 2000 4/8 Select the search option and click Next. Pressing the shift key to prevent the language-selection dialog from opening, insert the Camera Control Pro CD (if the language-selection dialog appears, click Quit). Select CD-ROM drives and click Next. Click Next.
Overview Using Camera Control Pro Device Registration 7 8 Appendices Windows 2000 5/8 Click Finish. Confirm that “This device is working properly" appears under "Device status” in the “General” tab of the “Nikon Digital Camera D1 Series Properties” dialog.
Overview Using Camera Control Pro Device Registration Appendices Windows 2000 6/8 Updating the Device Driver If you are already using the D1 with Nikon View DX or Nikon Capture, you will need to update the camera drivers. 1 Open the Device Manager Manager. Expand the “Nikon 1394 Device” entry and double-click Nikon Digital Camera D1. 2 Open the “Driver” tab and click Update Driver…. 3 Click Next.
Overview Using Camera Control Pro Device Registration 4 5 6 Appendices Windows 2000 7/8 Select the search option and click Next. Pressing the shift key to prevent the language-selection dialog from opening, insert the Camera Control Pro CD (if the language-selection dialog appears, click Quit). Select CD-ROM drives and click Next. Select Install one of the other drivers and click Next.
Overview Using Camera Control Pro Device Registration Appendices Windows 2000 8/8 7 Select Nikon Digital Camera D1 Series and click Next. 8 Click Finish. 9 Confirm that “This device is working properly” appears under “Device status” in the “General” tab of the “Nikon Digital Camera D1 Series Properties” dialog.
Overview Using Camera Control Pro Appendices Customer Support 1/2 Nikon User Support Information If you are in need of technical assistance with the installation or operation of your Nikon product(s), please do not hesitate to contact one of the following Nikon representatives. When calling support, you will be asked to supply the serial and/or version number(s) of your Nikon software. For efficient communication, it is highly recommended that you have your Nikon product in front of you.
Overview Using Camera Control Pro Appendices Customer Support 2/2 Asia, Oceania, Middle-East and Canada AU Australia CA Canada Nikon Canada Inc. 1366 Aerowood Drive, Mississauga, Ontario L4W 1C1 Tel: +1-(0)905-625-9910 Fax: +1-(0)905-625-6446 China CN Nikon Imaging (China) Sales Co., Ltd. Tel: 4008-20-1665 (within the Chinese mainland) Tel: +86-(0)21-3428-4634 (from other countries and regions) Nikon Square (Shanghai) Rm.102B, Tian An Center, No.