
Quick Start Guide


18
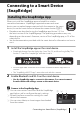
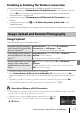
Connecting to a Smart Device (SnapBridge)
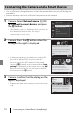
Remote Photography
You can tap the A tab in the SnapBridge app M Remote photography to release
the camera shutter using a smart device.
• Follow the instructions in the SnapBridge app to switch to a Wi-Fi connection. In
iOS, a dialog related to Wi-Fi connections may be displayed. In such a case, see “If a
Dialog Related to Wi-Fi Connections Is Displayed in iOS” (A18).
If a Dialog Related to Wi-Fi Connections Is Displayed in
iOS
The SnapBridge app normally connects the camera and smart device via Bluetooth.
However, switch to a Wi-Fi connection when using Download pictures or remote
photography. Depending on the iOS version, you must switch the connection
manually. In such a case, use the following procedure to set the connection.
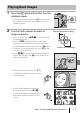
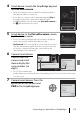
1 Write down the camera SSID (camera name at
default) and password displayed in the smart
device, and then tap View options.
• You can change the SSID or password by using Network
menu M Wi-Fi M Network settings in the camera. To
protect your privacy, we recommend that you change the
password regularly. Disable the wireless connection when
changing the password (A17).
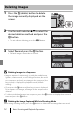
2 Select the SSID you wrote down in step 1 from
the list of connections.
• When you connect for the first time, input the password
you wrote down in step 1 while taking note of uppercase
and lowercase characters. Inputting the password is
unnecessary after the first time connecting.
• The Wi-Fi connection is complete when G is displayed
next to the camera SSID as shown in the screen on the
right. Return to the SnapBridge app and operate the app.