%N 4HE .
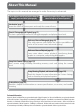
About This Manual The topics in this manual are arranged in order from easy to advanced. These chapters cover all you need to know for simple, “point-and-shoot” photography Read these chapters for a complete description of all aspects of camera operation Introduction (page 1) Learn the names of camera parts and ready the camera for use. Tutorial: Photography and Playback (page 17) The basic operations involved in taking photographs and playing them back.
Introduction Tutorial Photography and Playback Reference More on Photography More on Playback Setup Basic Camera Settings: The Setup Menu Shooting Options: The Shooting Menu Playback Options: The Playback Menu Custom Settings: The Custom Settings Menu Technical Notes i
For Your Safety To prevent damage to your Nikon product or injury to yourself or to others, read the following safety precautions in their entirety before using this equipment. Keep these safety instructions where all those who use the product will read them.
• Batteries are prone to leakage when fully discharged. To avoid damage to the product, be sure to remove the battery when no charge remains. • When the battery is not in use, attach the terminal cover and store in a cool place. • Immediately after use, or when the product is used on battery power for an extended period, the battery may become hot. Before removing the battery, turn the camera off and allow the battery to cool.
Notices • No part of the manuals included with this • Nikon will not be held liable for any damages product may be reproduced, transmitted, tran- resulting from the use of this product. scribed, stored in a retrieval system, or translated • While every effort has been made to ensure into any language in any form, by any means, that the information in these manuals is acwithout Nikon’s prior written permission.
Symbol for Separate Collection in European Countries This symbol indicates that this product is to be collected separately. The following apply only to users in European countries: • This product is designated for separate collection at an appropriate collection point. Do not dispose of as household waste. • For more information, contact the retailer or the local authorities in charge of waste management.
Table of Contents For Your Safety .................................................................................................................................... Notices ................................................................................................................................................... Introduction ............................................................................................................ Getting to Know the Camera.........................................
Reference: More on Playback ................................................................................ 9 98 8 Viewing Photographs....................................................................................................................... 98 Single-Image Playback .................................. 98 Taking a Closer Look: Playback Zoom.. 103 Photo Information ........................................... 99 Protecting Photographs Viewing Multiple Images: from Deletion..........................
Take Test Shots Before taking pictures on important occasions (for example, at weddings or before taking the camera with you on a trip), take a test shot to ensure that the camera is functioning normally. Nikon will not be held liable for damages or lost profits that may result from product malfunction.
Introduction Introduction Thank you for your purchase of a Nikon D200 single-lens reflex (SLR) digital camera with interchangeable lenses. This manual has been written to help you enjoy taking pictures with your Nikon digital camera. Read this manual thoroughly before use, and keep it handy when using the product. The documentation for this product also includes the manuals listed below. Please be sure to read all instructions thoroughly to get the most from the camera.
Getting to Know the Camera Introduction—Getting to Know the Camera Take a few moments to familiarize yourself with camera controls and displays. You may find it helpful to bookmark this section and refer to it as you read through the rest of the manual.
AF-assist illuminator: [Self-timer lamp: [Red-eye reduction lamp: 58 83] 77] Eyelet for camera strap: 9 Depth-of-field preview button: 62 170 FUNC.
Camera Body (continued) Viewfinder eyepiece cup Introduction—Getting to Know the Camera Viewfinder eyepiece: 83, 90, 181 [ Diopter adjustment control: 16, 181 (delete) button: 22, 105 (format) button: 14] Metering selector: 61 (AE / AF lock) button: 56, 70 Main command dial: 170 (bracketing) button: 43, 73 (playback) button: 22, 98 (AF-ON) button: 52 (menu) button: 24 Focus selector lock: 53 (thumbnail) button: 102 Memory card slot cover: 14 (protect ) button: 104 [ ? (help) button: 24] Memory car
Control Panel 1 2 17 3 16 15 5 14 6 13 7 12 11 8 9 10 1 Color temperature indicator ........................38 2 Shutter speed ..............................................62–69 Exposure compensation value ..................72 Flash compensation value ............................80 ISO sensitivity ........................................................33 White balance fine-tuning, color temperature, or preset number .......37–42 Number of shots in bracketing sequence ..........................
The Viewfinder Display Introduction—Getting to Know the Camera 1 6 2 3 4 When the battery is totally exhausted, the display in the viewfinder will dim. The viewfinder display will return to normal when a fullycharged battery is inserted. 7 5 8 9 10 19 20 1 Framing grid (displayed when On is selected for Custom Setting d2 (Grid Display) ................................................................158 2 8-mm (0.31-in.) reference circle for center-weighted metering ...................................
Owing to the characteristics of this type of viewfinder display, you may notice fine lines radiating outwards from the selected focus area, or that the display in the viewfinder turns red when the selected focus area is highlighted. These phenomena are normal and do not indicate a malfunction. The Viewfinder Display The focus-area and grid-line displays in the viewfinder (advanced focusing screen display) tend to brighten at high temperatures and to darken and exhibit slower response times at low temperatures.
First Steps Attaching a Lens Introduction—First Steps Care should be taken to prevent dust from entering the camera when the lens is removed. 1 After confirming that the camera is off, remove the rear lens cap and camera body cap. 2 Keeping the mounting index on the lens aligned with the mounting index on the camera body, position the lens in the camera’s bayonet mount. Being careful not to press the lens-release button, rotate the lens counter-clockwise until it clicks into place.
Attaching the Camera Strap Attach the strap as shown below. Introduction—First Steps The Monitor Cover A clear plastic cover (the BM-6 LCD monitor cover) is provided with the camera to keep the monitor clean and protect it when the camera is not in use. To attach the cover, insert the projection on the top of the cover into the matching indentation above the camera monitor (햲), then press the bottom of the cover until it clicks into place (햳).
Charging and Inserting the Battery The supplied EN-EL3e battery is not charged at shipment. Charge the battery using the supplied MH-18a quick charger as described below. Introduction—First Steps 1 Charge the battery 1.1 Connect the power cord to the charger and plug it in. 1.2 Place the battery in the charger. The CHARGE lamp will blink as the battery charges. About two and a quarter hours are required for an exhausted battery to fully charge. 1.
2 Insert the battery 2.1 After confirming that the camera is off, open the battery chamber cover. Introduction—First Steps 2.2 Insert a fully charged battery as shown at right. Close the battery chamber cover.
Basic Setup The language option in the setup menu is automatically highlighted the first time menus are displayed. Choose a language and set the time and date. Introduction—First Steps 1 2 Turn camera on and press button. 3 Display language menu. 4 Select language. 5 Return to setup menu. 6 Highlight World Time. 7 Display options. 8 Highlight Time Zone. Display map of world time zones. 10 9 Select local time zone.* Return to WORLD TIME menu.
11 12 Display DATE menu. † If daylight saving time is in effect in local time zone, highlight Daylight Saving Time and press multi selector right. Press multi selector down to highlight On and press multi selector right. Time will automatically be advanced one hour. 13 Press multi selector left or right to select item, up or down to change. 14 Introduction—First Steps Highlight Date.† 15 Return to WORLD TIME menu. 16 Highlight Date Format. 17 Display options.
Inserting Memory Cards Photographs are stored on CompactFlash memory cards (available separately). Introduction—First Steps 1 Insert a memory card 1.1 Turn the camera off before inserting or removing memory cards. Unlatch (햲) and open (햳) the memory card cover. 2 1 1.2 Insert the card as shown at right. The eject button will pop up and the memory card access lamp will light for about a second. Close the memory card slot cover.
Removing Memory Cards 1 Confirm that the access lamp is off. 3 Press the eject button to partially eject the card (햲). The card can then be removed by hand (햳). Do not push on the memory card while pressing the eject button. Failure to observe this precaution could damage the camera or memory card. 2 1 Illustrations In illustrations throughout this manual, indicators in the control panel and viewfinder relevant to the explanation in the accompanying text are shown in black.
Adjusting Viewfinder Focus Photographs are framed in the viewfinder. Before shooting, make sure that the display in the viewfinder is in clear focus. Introduction—First Steps 1 Remove the lens cap and turn the camera on. 2 Rotate the diopter adjustment control until the focus brackets are displayed in sharp focus when the shutter-release button is pressed halfway. When operating the diopter adjustment control with your eye to the viewfinder, be careful not to put your fingers or fingernails in your eye.
Tutorial: Photography and Playback Basic Photography This section describes how to take pictures at default settings. Turn the camera on 1.1 Remove the lens cap and turn the camera on. The control panel will turn on and the display in the viewfinder will light. The monitor remains off during shooting. 1.2 Check the battery level in the viewfinder or control panel. Control Viewpanel finder Description — Battery fully charged. — Tutorial—Basic Photography 1 Battery partially discharged. Low battery.
2 Adjust camera settings This tutorial describes how to take photographs at the default settings listed in the table below, using a type G or D lens. See the “Reference” section for information on when and how to change settings from their default values.
2.3 Rotate the focus-mode selector until it clicks into place pointing to S (single-servo autofocus). At this setting, the camera will focus automatically when the shutter-release button is pressed halfway. Pictures can only be taken when the camera is in focus. 3 Tutorial—Basic Photography 2.4 Rotate the metering selector to (matrix metering). Matrix metering uses information from all areas of the frame to determine exposure, producing optimal results for the entire frame.
4 Tutorial—Basic Photography Focus Press the shutter-release button halfway to focus. If the camera is able to focus on the subject in the center focus area, a beep will sound and the in-focus indicator (●) will appear in the viewfinder (if the focus indicator blinks, the camera was unable to focus using autofocus). Focus will lock while the shutter-release button is pressed halfway. If the subject is dark, the AF-assist illuminator may light to assist the focus operation.
6 Tutorial—Basic Photography Take the photograph Smoothly press the shutter-release button the rest of the way down to release the shutter and record the photograph. The access lamp next to the card slot cover will light. Do not eject the memory card or remove or disconnect the power source until the lamp has gone out and recording is complete.
Basic Playback Press the button to view photographs. The most recent photo will be displayed in the monitor; additional pictures can be displayed by pressing the multi selector left or right. Tutorial—Basic Playback To end playback and return to shooting mode, press the shutter-release button halfway. Deleting Unwanted Photographs To delete the photograph currently displayed in the monitor, press the button. A confirmation dialog will be displayed.
Reference This section builds on the Tutorial to cover more advanced shooting and playback options.
Using Camera Menus Most shooting, playback, and setup options can be accessed from the camera menus. To view the menus, press the button. Choose from playback, shooting, Custom Settings, and setup menus (see below) Slider is displayed if more options are available in current menu View recent settings Current setting for each option is shown by icon Reference—Using Camera Menus If “?” icon is displayed, help for current item can be viewed by pressing button.
To modify menu settings: 1 2 Display menus Highlight icon for current menu 3 4 5 Position cursor in selected menu 6 Highlight menu item 7 Display options 8 Make selection Reference—Using Camera Menus Select menu Highlight option • Menu items that are displayed in gray are not currently available. • When formatting memory cards and in other cases in which user confirmation is required, a selection can only be made with the center of the multi selector or by pressing the button.
Reference: More on Photography Choosing a Shooting Mode Shooting mode determines how the camera takes photographs: one at a time, in a continuous sequence, with a timed shutter-release delay, or with the mirror raised to enhance shutter response and minimize vibration. Mode Reference—Choosing a Shooting Mode Description Camera takes one photograph each time shutter-release button is pressed.
Buffer Size The number of images that can be stored in the memory buffer at current settings is shown in the exposure-count displays in the viewfinder and control panel while the shutter-release button is pressed (at image qualities of JPEG Fine, JPEG Normal, and JPEG Basic, the display will show 25 when the buffer contains space for 25 or more images). This number is updated as photographs are transferred to the memory card and more memory becomes available in the buffer.
Image Quality and Size Together, image quality and size determine how much space each photograph occupies on the memory card.
The Image Quality Menu 1 Highlight Image Quality in the shooting menu and press the multi selector to the right. 2 Highlight the desired option and press the multi selector to the right. The shooting menu will be displayed. RAW FINE RAW BASIC NORM RAW NORM BASIC RAW FINE File Names Photographs are stored as image files with names of the form “DSC_nnnn.
The JPEG Compression Menu The JPEG compression menu offers the following options for JPEG images: Mode Description Size Priority Images are compressed to produce relatively uniform file size. Quality (default) varies with scene recorded. Optimal Quality Optimal image quality. File size varies with scene recorded. The effects of these options are most pronounced with high ISO sensitivity ( complex scenes, basic-quality JPEG images, or heavy sharpening ( 46).
The RAW Compression Menu The following options are available for NEF (RAW) images: Mode NEF (RAW) (default) Comp. NEF (RAW) Description NEF images are not compressed. NEF images are compressed by about 40–50 % with little drop in quality. Recording time is reduced. Highlight RAW Compression in the shooting menu and press the multi selector to the right. 2 Highlight the desired option and press the multi selector to the right. The shooting menu will be displayed.
Image Size Image size is measured in pixels. Smaller sizes produce smaller files, making them suited to distribution via e-mail or inclusion in web pages. Conversely, the larger the image, the larger the size at which it can be printed without becoming noticeably “grainy.” Choose image size according to the space available on the memory card and the task at hand. Image size Large (3872 × 2592/10.0 M) Medium (2896 × 1944/5.6 M) Small (1936 × 1296/2.
ISO Sensitivity “ISO sensitivity” is the digital equivalent of film speed. The higher the ISO sensitivity, the less light needed to make an exposure, allowing higher shutter speeds or smaller apertures. ISO sensitivity can be set between values roughly equivalent to ISO 100 and ISO 1600 in steps equivalent to / EV. Where high sensitivity is a priority, ISO sensitivity can be further increased up to 1 EV over ISO 1600.
Noise The higher the ISO sensitivity, the more likely pictures are to be subject to “noise” in the form of randomly-spaced, brightly-colored pixels. Photos taken at ISO sensitivities over ISO 1600 will likely contain appreciable amounts of noise. High ISO NR ( 131) This option can be used to reduce noise at ISO sensitivities of 400 or more (this reduces the capacity of the memory buffer).
White Balance The color of light reflected from an object varies with the color of the light source. The human brain is able to adapt to changes in the color of the light source, with the result that white objects appear white whether seen in the shade, direct sunlight, or under incandescent lighting. Unlike the film used in film cameras, digital cameras can mimic this adjustment by processing images according to the color of the light source. This is known as “white balance.
White balance can be set using the White Balance option in the shooting menu or by pressing the WB button and rotating the main command dial. The White Balance Menu Reference—White Balance 36 1 Highlight White Balance in the shooting menu and press the multi selector to the right. 2 Highlight the desired option and press the multi selector to the right. Selecting Choose Color Temp.
Fine-Tuning White Balance At settings other than (Choose Color Temp.) and PRE (White Balance Preset), white balance can be “fine tuned” to compensate for variations in the color of the light source or to introduce a deliberate “warm” or “cold” cast into an image.
Choosing a Color Temperature Choose a setting of (Choose Color Temp.) to select the color temperature from thirty-one predetermined values ranging from 2,500 K to 10,000 K in increments of roughly 10 mired (note that the desired results will not be obtained with flash or fluorescent lighting). Color temperature can be selected in the white-balance menu or with the WB button and sub-command dial. Reference—White Balance The White Balance Menu Selecting Choose Color Temp.
Preset White Balance Preset white balance is used to record and recall custom white balance settings for shooting under mixed lighting or to compensate for light sources with a strong color cast. Two methods are available for setting preset white balance: Method Direct measurement Copy from existing photograph Description Neutral gray or white object is placed under lighting that will be used in final photograph and white balance is measured by camera ( 40).
Measuring a Value for White Balance White balance can be measured with reference to a neutral gray object. The new value for white balance is automatically stored in preset d-0. Reference—White Balance 1 Place a neutral gray or white object under the lighting that will be used in the final photograph. A standard gray card can be used as a reference in studio settings. 2 Press the WB button and rotate the main command dial until is displayed in the control panel.
5 If the camera was able to measure a value for white balance, will flash in the control panel and the viewfinder will show a flashing for about three seconds before the camera returns to shooting mode. If lighting is too dark or too bright, the camera may be unable to measure white balance. A flashing will appear in the control panel and viewfinder for about three seconds. Return to Step 4 and measure white balance again.
Preset White Balance Options Selecting White Balance Preset in the White Balance menu ( 35) displays the menu of white-balance presets shown in Step 1. To display options for a selected preset: 1 2 Highlight desired preset.* View options for highlighted preset.† Reference—White Balance * To set white balance to the value for the highlighted preset and return to shooting mode without completing Step 2, press button.
White Balance Bracketing White balance bracketing creates multiple images each time the shutter is released, “bracketing” the current white balance setting ( 35). Only one shot is required to complete the bracketing sequence. White balance bracketing is recommended when shooting under mixed lighting or experimenting with different white balance settings. White balance bracketing is not available at whitebalance settings of (Choose Color Temp.
4 Compose a photograph, focus, and shoot. Each shot will be processed to create the number of copies specified in the bracketing program, and each copy will have a different white balance. Modifications to white balance are added to the white balance adjustment made with white balance finetuning.
Optimizing Images The options in the Optimize Image menu can be used to optimize photographs according to how the picture will be used or the type of scene. Sharpening, contrast, color reproduction, saturation, and hue can also be customized individually to match the user’s creative intent. N Option Normal (default) Description Recommended for most situations. Softens outlines, producing natural images suitable for portraits or retouching on a computer.
To select an image optimization option: Reference—Optimizing Images 1 Highlight Optimize Image in the shooting menu ( 124) and press the multi selector to the right. 2 Highlight the desired option and press the multi selector to the right. If Custom is selected, a menu of custom options will be displayed ( 49). In all other cases, the shooting menu will be displayed.
Adjusting Contrast: Tone Compensation As photographs are saved to the memory card, they are processed to adjust the distribution of tones in the image, enhancing contrast. Tone compensation is performed by means of tone curves that define the relationship between the distribution of tones in the original image and the compensated result. The Tone Compensation menu controls the type of curve used.
Controlling Vividness: Saturation Saturation controls the vividness of colors. Option Auto Normal (default) Description Camera automatically adjusts saturation according to subject. For best results, use type G or D lens. Normal vividness. Recommended for most situations. Reduced vividness. Use when taking pictures that will later be retouched by computer. Increased vividness. Use for vivid, photoprint effect when taking picEnhanced tures that will be printed “as is,” without further modification.
Choosing Custom Image Optimization Options Choosing Custom in the Optimize Image menu ( shown in Step 1. 1 45) displays the menu 2 Highlight optimization option. 4 Highlight option. 5 Make selection. Repeat steps 1–4 to adjust other options. 6 Highlight Done. Reference—Optimizing Images 3 Display sub-menu. Return to shooting menu.
Color Space The options in the Color Space menu determine the gamut of colors available for color reproduction. Choose a color space according to how photographs will be processed on leaving the camera. Option sRGB (default) Description Choose for photographs that will be printed or used “as is,” with no further modification. Color mode II is not available ( 47).
Focus This section describes the options that control how your camera focuses: focus mode, focus-area selection, and AF-area mode. Focus Mode Option Description Camera focuses when shutter-release button is pressed halfway. Focus S locks when in-focus indicator (●) appears in viewfinder, and remains locked Single- while shutter-release button is pressed halfway (focus lock). At default setservo AF tings, shutter can only be released when in-focus indicator is displayed (focus priority).
The AF-ON Button For the purpose of focusing the camera, pressing the AFON button has the same effect as pressing the shutter-release button halfway. Predictive Focus Tracking In continuous-servo AF, the camera will automatically initiate predictive focus tracking if the subject moves while the shutter-release button is pressed halfway or the AF-ON button is pressed. In predictive focus tracking, the camera will track focus while attempting to predict where the subject will be when the shutter is released.
Focus Area Selection At default settings, the D200 offers a choice of eleven focus areas that together cover a wide area of the frame. The focus area can be selected manually, allowing photographs to be composed the main subject positioned almost anywhere in the frame, or automatically to ensure that the subject closest to the camera is always in focus regardless of where it is the frame (closest-subject priority; 54).
AF-Area Mode AF-area mode determines how the focus area is selected in autofocus mode. To select the AF-area mode, rotate the AF-area mode selector. The selected mode is shown by an icon in the control panel (see below). Mode Single-area AF Reference—Focus Dynamic-area AF Group dynamic- AF Dynamic-area AF with closest subject priority Icon Description User selects focus area using multi selector; camera focuses on subject in selected focus area only.
Focus Zone Selection When (single-area AF) or (dynamic-area AF) is selected for AF-area mode ( 54), the user can select from normal or wide focus areas (only normal focus areas are available when group dynamic-area or closest subject priority AF is selected for AF-area mode).
5 6 Highlight option. Make selection. To choose focus zone size using the FUNC. button and sub-command dial: Reference—Focus 1 Select Focus Area Frame for Custom Setting f4 (FUNC. Button; 170). 2 Press the FUNC. button and rotate the sub-command dial. Wide focus zones are used when WIDE is displayed in the control panel. Focus Lock Focus lock can be used to change the composition after focusing, making it possible to focus on a subject that will not be in a focus area in the final composition.
2 Check that the in-focus indicator (●) appears in the viewfinder. Single-servo AF Focus will lock automatically when the in-focus indicator appears, and remain locked until you remove your finger from the shutter-release button. Focus can also be locked by pressing the AE-L/AF-L button (see below). 3 Recompose the photograph and shoot. Reference—Focus Continuous-servo AF Press the AE-L/AF-L button to lock both focus and exposure.
The AF-Assist Illuminator The built-in AF assist illuminator enables the camera to focus even when the subject is poorly lit. The camera must be in focus mode S (single-servo autofocus), an AF-Nikkor lens must be attached, and the center focus area or focus area group must be selected or closest subject priority in effect. If these conditions are met and the subject is poorly lit, the illuminator will light automatically to assist the autofocus operation when the shutter-release button is pressed halfway.
Under the conditions described above, the optional SB-800 and SB-600 Speedlights and SU-800 wireless Speedlight commander will provide active AF illumination for the following focus areas: AF lens focal length Normal frame (11 areas) Wide frame (7 areas) 23–34 mm 35–70 mm 71–105 mm Getting Good Results with Autofocus Autofocus does not perform well under the conditions listed below.
Manual Focus Manual focus is available for lenses that do not support autofocus (non-AF Nikkor lenses) or when autofocus does not produce the desired results ( 59). To focus manually, set the focus-mode selector to M and adjust the lens focusing ring until the image displayed on the clear matte field in the viewfinder is in focus. Photographs can be taken at any time, even when the image is not in focus. Reference—Focus The Electronic Range Finder If the lens has a maximum aperture of f/5.
Exposure Metering The metering method determines how the camera sets exposure: Method Centerweighted Spot Reference—Exposure 3D color matrix II/ Color matrix II/ Color matrix Description 1,005-pixel RGB sensor sets exposure based on variety of information from all areas of frame. With type G or D lens, camera uses 3D color matrix metering II for natural results even when frame is dominated by bright (white or yellow) or dark (black or dark green) colors.
Exposure Mode Exposure mode determines how the camera sets shutter speed and aperture when adjusting exposure. Four modes are available: programmed auto (P), shutter-priority auto (S), aperture-priority auto (A), and manual (M). Reference—Exposure Depth-of-Field Preview To preview the effects of aperture, press and hold the depth-of-field preview button.
P: Programmed Auto In this mode, the camera automatically adjusts shutter speed and aperture according to a built-in program ( 195) for optimal exposure in most situations. This mode is recommended for snapshots and other situations in which you want to leave the camera in charge of shutter speed and aperture. Adjustments can be made using flexible program, exposure compensation ( 72), and auto exposure bracketing ( 73). Programmed auto is only available with CPU lenses.
S: Shutter-Priority Auto In shutter-priority auto, you choose the shutter speed while the camera automatically selects the aperture that will produce the optimal exposure. Shutter speed can be set to values between 30 s and / s. Use slow shutter speeds to suggest motion by blurring moving objects, high shutter speeds to “freeze” motion. Shutter-priority auto is only available with CPU lenses.
Non-CPU Lenses Exposure mode A (aperture-priority auto) is automatically selected when a non-CPU lens is attached. The exposure mode indicator (S) will blink in the control panel and A will be displayed in the viewfinder. Changing from Mode M to Mode S in mode M and then select mode S without changing If you select a shutter speed of the shutter speed, the shutter-speed display will flash and the shutter can not be released. Rotate the main command dial to select a different shutter speed before shooting.
A: Aperture-Priority Auto In aperture-priority auto, you choose the aperture while the camera automatically selects the shutter speed that will produce the optimal exposure. Small apertures (high f/-numbers) increase depth of field, bringing both the main subject and background into focus. Large apertures (low f/-numbers) soften background details and let more light into the camera, increasing the range of the flash and making photographs less susceptible to blurring.
Non-CPU Lenses If the maximum aperture of the lens has been specified using the Non-CPU Lens Data item in shooting menu ( 93) when a non-CPU lens is attached, the current f/-number will be displayed in the control panel and viewfinder, rounded to the nearest full stop. Otherwise the aperture displays will show only the number of stops ( , with maximum aperture displayed as ) and the f/-number must be read from the lens aperture ring. Indicator Description Subject too bright.
M: Manual In manual exposure mode, you control both shutter speed and aperture. Shutter speed can be set to values between 30 s and / s, or the shutter can be held open for indefinitely for longer exposures ( ). Aperture can be set to values between the minimum and maximum values for the lens. Using the electronic analog exposure display in the viewfinder, you can adjust exposure according to shooting conditions and the task at hand.
Electronic Analog Exposure Displays At shutter speeds other than , the electronic analog exposure displays in the control panel and viewfinder show whether the photograph would be under- or over-exposed at current settings. Depending on the option chosen for Custom Setting b3 (EV Step), the amount of under- or over-exposure is shown in increments of / EV, / EV, or 1 EV. If the limits of the exposure metering system are exceeded, the displays will flash.
Autoexposure Lock When center-weighted metering is used, an area in the center of the frame is assigned the greatest weight when determining exposure. Similarly, when spot metering is used, exposure is based upon lighting conditions in the selected focus area. If the subject is not in the metered area when the picture is taken, exposure will be based on lighting conditions in the background, and the main subject may be under- or over-exposed.
Adjusting Shutter Speed and Aperture While exposure lock is in effect, the following settings can be changed without altering the metered value for exposure: Exposure mode Programmed auto Shutter-priority auto Aperture-priority auto Settings Shutter speed and aperture (flexible program; Shutter speed Aperture 63) The new values can be confirmed in the viewfinder and control panel.
Exposure Compensation To obtain the desired results with certain subject compositions, it may be necessary to use exposure compensation to alter exposure from the value suggested by the camera. As a rule of thumb, positive compensation may be needed when the main subject is darker than the background, negative values when the main subject is brighter than the background.
Exposure and Flash Bracketing In exposure bracketing, the camera varies exposure compensation with each shot, while in the case of flash bracketing, flash level is varied with each shot (iTTL and, with the optional SB-800 Speedlight, auto aperture flash control modes only). Only one photograph is produced each time the shutter is released, meaning that several shots (up to nine) are required to complete the bracketing sequence.
4 Compose a photograph, focus, and shoot. The camera will vary exposure and/or flash level shot-by-shot according to the bracketing program selected. Modifications to exposure are added to those made with exposure compensation ( 72), making it possible to achieve exposure compensation values of more than 5 EV. While bracketing is in effect, a bracketing progress indicator will be displayed in the control panel. A segment will disappear from the indicator after each shot.
Exposure Bracketing The camera modifies exposure by varying shutter speed and aperture (programmed auto), aperture (shutter-priority auto), or shutter speed (aperture-priority auto, manual exposure mode). When On is selected for Custom Setting b1 (ISO Auto), the camera will automatically vary ISO sensitivity for optimum exposure when the limits of the camera exposure system are exceeded.
Flash Photography Using the Built-in Flash The D200 is equipped with a Guide Number 12/39 flash (ISO 100, m/ft) that can be used not only when natural lighting is inadequate, but also to fill in shadows and backlit subjects or to add a catch light to the subject’s eyes. The built-in flash supports the following types of flash control: Reference—Flash Photography i-TTL Balanced Fill-Flash for Digital SLR: Speedlight emits series of nearly invisible preflashes (monitor preflashes) immediately before main flash.
Flash Sync Modes The camera supports the following flash sync modes: Flash sync mode Front-curtain sync Red-eye reduction Slow sync Rear-curtain sync Reference—Flash Photography Red-eye reduction with slow sync Description Recommended for most situations. In programmed auto and aperture-priority auto modes, shutter speed will automatically be set to values between / and / s (/ to /, s when using optional Speedlight with Auto FP High-Speed Sync; 160).
Using the Built-in Flash To use the built-in flash: Reference—Flash Photography 1 Choose a metering method ( 61). Select matrix or center-weighted metering to activate iTTL Balanced Fill-Flash for Digital SLR. Standard i-TTL Flash for Digital SLR is activated automatically when spot metering is selected. 2 Press the flash pop-up button. The built-in flash will pop up and begin charging. When the flash is fully charged, the flash-ready indicator will light.
4 Press the shutter-release button halfway and check exposure (shutter speed and aperture). The shutter speeds and apertures available when the built-in flash is raised are listed below. Exposure mode P S A M Shutter speed Set automatically by camera (/–/ s) 1 Value selected by user (/–30 s) 2 Set automatically by camera (/–/ s) 1 Value selected by user (/–30 s) 2 5 Check that the flash-ready indicator appears in the viewfinder.
Flash Exposure Compensation Flash exposure compensation can be used to increase or reduce flash output from the level chosen by the camera’s flash control system. Flash output can be increased to make the main subject appear brighter, or reduced to prevent unwanted highlights or reflections. As a rule of thumb, positive compensation may be needed when the main subject is darker than the background, negative compensation when the main subject is brighter than the background.
FV Lock This feature is used to lock flash output, allowing photographs to be recomposed without changing the flash level. This ensures that flash output is appropriate to the subject even when the subject is not positioned in the center of the frame. Flash output is adjusted automatically for any changes in ISO sensitivity or aperture. To use FV lock: Select FV Lock or FV Lock/Lens Data for Custom Setting f4 (FUNC. Button; 170). 2 Press the flash pop-up button to raise the flash.
6 Press the shutter-release button the rest of the way down to shoot. If desired, additional pictures can be taken without releasing FV lock. 7 Press the camera FUNC. button to release FV lock and and confirm that the FV lock icons ( ) are no longer displayed in the control panel and viewfinder. Reference—Flash Photography Using FV Lock with Optional Speedlights FV lock is also available with SB-800, SB-600, and SB-R200 Speedlights (available separately).
Self-Timer Mode The self-timer can be used to reduce camera shake or for self-portraits. Mount the camera on a tripod (recommended) or place the camera on a stable, level sur face. 2 Press the shooting mode dial lock release and rotate the shooting mode dial to select (selftimer mode). 3 Frame the photograph and focus. If autofocus is in effect, be sure not to block the lens when activating the self-timer.
Image Overlay and Multiple Exposure The following options are available for combining multiple exposures in a single frame: • Image overlay: two existing RAW photographs are combined to form a single picture which is saved separately from the originals. The originals must be on the same memory card. • Multiple exposure: a series of two to ten exposures is recorded as a single photograph. The individual exposures are not saved separately.
Press the multi selector up or down to select a value for gain between 0.1 and 2.0. The default value is 1.0; selecting 0.5 cuts gain in half, while selecting 2.0 doubles gain. The effects of gain are visible in the preview image. 6 Press the multi selector left or right to highlight Image 2. Repeat steps 3–5 to select the second image and adjust gain.
Multiple Exposure To create a multiple exposure: Reference—Image Overlay and Multiple Exposure 1 Highlight Multiple exposure in the shooting menu ( 124) and press the multi selector to the right. 2 Press the multi selector up or down to highlight Number of Shots and press the multi selector to the right. 3 Press the multi selector up or down to choose the number of exposures that will be combined to form a single photograph.
6 Press the multi selector up or down to highlight Done and press the multi selector to the right. A Frame a photograph, focus, and shoot. In continuous high-speed or continuous low-speed mode ( 26), the camera will record all exposures in a single burst. In single-frame shooting mode, one photograph will be taken each time the shutter-release button is pressed; continue shooting until all exposures have been recorded.
Exchanging Memory Cards Do not remove or replace the memory card while recording a multiple exposure. Photo Info The information listed in the playback photo information display (including date of recording and camera orientation) is for the first shot in the multiple exposure.
Interval Timer Photography The D200 is equipped to take photographs automatically at preset intervals. Highlight Intvl Timer Shooting in the shooting menu ( 124) and press the multi selector to the right.
4 Highlight Start at the bottom of the interval timer menu and press the multi selector up or down to select On, then press the button. The first series of shots will be taken at the specified starting time. Shooting will continue at the selected interval until all shots have been taken.
During Shooting During interval timer photography, the icon in the control panel will blink. Immediately before the next shooting interval begins, the shutter speed display will show the number of intervals remaining, and the aperture display will show the number of shots remaining in the current interval.
Interrupting Interval Timer Photography To interrupt interval timer photography, highlight Start at the bottom of the interval timer menu and press the multi selector up or down until Done is displayed, then press the button. Interval timer photography will also be interrupted if: • A two button reset is performed ( 97). • Menu Reset is selected in the shooting menu ( 127). • Bracketing settings are changed ( 73). • The battery is exhausted. Normal shooting will resume when interval timer photography ends.
Non-CPU Lenses By specifying lens data (lens focal length and maximum aperture), the user can gain access to a variety of CPU lens functions when using a non-CPU lens.
Reference—Non-CPU Lenses 2 Highlight Focal Length and press the multi selector to the right. 3 Select the group to which the lens belongs from 6–45 mm, 50–180 mm, 200–4000 mm and press the multi selector to the right. 4 Select the lens focal length (in mm) and press the multi selector to the right. The FUNC. Button 1 Select FV Lock/Lens Data for Custom Setting f4 (FUNC. Button; 170). 2 Press the FUNC. button and rotate the main command dial.
Specifying Maximum Aperture Lens maximum aperture can be specified using the Non-CPU Lens Data option in the shooting menu or by pressing the FUNC. button and rotating the subcommand dial. The following f/-numbers are available: • 1.2, 1.4, 1.8, 2, 2.5, 2.8, 3.3, 3.5, 4, 4.5, 5, 5.6, 6.3, 7.1, 8, 9.5, 11, 13, 15, 16, 19, 22 The Non-CPU Lens Data Menu Highlight Maximum Aperture in the NonCPU Lens Data menu and press the multi selector to the right.
Using a GPS Unit Reference—Using a GPS Unit Garmin and Magellan GPS units that conform to version 2.01 or later of the National Marine Electronics Association NMEA0183 protocol can be connected to the camera’s ten-pin remote terminal using an MC-35 GPS adapter cord (available separately; 182), allowing information on the camera’s current position to be recorded when photographs are taken.
Two-Button Reset The camera settings listed below can be restored to default values by holding the QUAL and buttons down together for more than two seconds (these buttons are marked by a green dot). The control panels turn off briefly while settings are reset. Custom Settings are not affected. Default Center* Programmed auto Off ±0 Option Bracketing Flash sync mode Flash exposure compensation FV lock Default Off‡ Front-curtain sync ±0 Off Off† ‡ Number of shots is reset to zero.
Reference: More on Playback Viewing Photographs Single-Image Playback To play photographs back, press the button. The most recent photograph will be displayed in the monitor. To end playback and return to shooting mode, press the button or press the shutter-release button halfway. To view camera menus ( 24), press the button. Reference—Viewing Photographs Using the Multi Selector The multi selector can be used at any time when the monitor is on.
Photo Information Photo information is superimposed on images displayed in single-image playback. There are up to eight pages of information for each photo. Press the multiselector down to cycle through photo information as follows: (Histogram), Basic Information, File Information, (Shooting Data Page 1), (Shooting Data Page 2), (GPS Data), (RGB Histogram), and (Highlights). Press the multi selector up to cycle through photo information in reverse order. 쐃 Basic Information 1 Protect status ...............
쐃 Shooting Data Page 2* 1 Protect status ..................104 7 Color mode/ Hue adjustment ...............47 2 Image optimization........45 3 ISO sensitivity† ...................33 8 Saturation .............................48 4 White balance/White 9 Image comment ...........118 balance adjustment .......35 10 Folder number/frame 5 Tone compensation .......47 number ...............................135 6 Sharpening ..........................
Highlights* 쐃 쐇 1 Protect status ........................................................................................104 2 Image highlights (areas of image that may be overexposed) are marked by a flashing border† 3 Current channel 4 Folder number/frame number ..................................................135 * Displayed only if Highlight is selected for Display mode ( 141). † Highlights can be displayed separately for each color channel.
Viewing Multiple Images: Thumbnail Playback To display images in “contact sheets” of four or nine images, press the button and rotate the main command dial. The following operations can be performed while thumbnails are displayed: To Use Change number of images displayed Reference—Viewing Photographs Toggle full frame playback Press center of multi selector to switch back and forth between full frame and thumbnail playback.
Taking a Closer Look: Playback Zoom Press the button to zoom in on the image displayed in single-image playback or on the image currently highlighted in thumbnail playback. The following operations can be performed while zoom is in effect: To Cancel/resume zoom Select area displayed View other areas of image ( ) Description Press to cancel zoom and return to single-image or thumbnail playback. Press again to zoom image in. Press button to display frame showing area currently zoomed in.
Protecting Photographs from Deletion In full-frame, zoom, and thumbnail playback, the button can be used to protect photographs from accidental deletion. Protected files can not be deleted using the button or the Delete option in the playback menu, and have DOS “read-only” status when viewed on a Windows computer. Note that protected images will be deleted when the memory card is formatted. To protect a photograph: 1 Display the image in full-frame playback or highlight it in the thumbnail list.
Deleting Individual Photographs To delete a photograph displayed in single-image or zoom playback, or the photograph highlighted in thumbnail playback, press the button. Once deleted, photographs can not be recovered. 1 2 Display the image or highlight it in the thumbnail list. 3 To delete the photograph, press the button again. Press the to exit without deleting the photograph. Press the button. A confirmation dialog will be displayed.
Viewing Photographs on TV The supplied EG-D100 video cable can be used to connect the camera to a television or VCR for playback or recording. Reference—Viewing Photographs on TV 106 1 Select the appropriate video mode from the Video Mode menu ( 117). 2 Turn the camera off. Always turn the camera off before connecting or disconnecting the video cable. 3 Open the cover protecting the video-out and Video out DC-in connectors. DC in 4 Connect the video cable as shown below.
Connecting to a Computer The supplied USB cable can be used to connect the camera to a computer. Once the camera is connected, the supplied software can be used to copy photographs to the computer, where they can be browsed, viewed, and retouched. The camera can also be used with Nikon Capture 4 Version 4.4 or later (available separately), which supports batch processing and more advanced image editing options and can be used to control the camera directly from the computer.
Connecting the USB Cable 1 2 Reference—Connecting to a Computer 108 Turn the computer on and wait for it to start up. Turn the camera off. 3 Connect the UC-E4 USB cable as shown. Connect the camera directly to the computer; do not connect the cable via a USB hub or keyboard. 4 Turn the camera on. If Mass Storage is selected for USB, will be displayed in the control panel and viewfinder, and the PC mode indicator will flash (if PTP is selected, the camera displays will not change).
5 If PTP is selected for USB ( 121), the camera can be turned off and the USB cable disconnected once transfer is complete. If the USB option in the camera setup menu is still at its default setting of Mass Storage, the camera must first be removed from the system as described below. Windows XP Home Edition / Windows XP Professional Click the “Safely Remove Hardware” icon ( ) in the taskbar and select Safely remove USB Mass Storage Device from the menu that appears.
Printing Photographs Photographs can be printed by any of the following methods: • Connect the camera to a printer and print photographs directly from the camera ( 111). • Insert the memory card in a printer equipped with a card slot (see the printer manual for details). If the printer supports DPOF ( 202), photographs can be selected for printing using Print Set ( 139). • Take the memory card to a developer or digital print center.
Connecting the Printer 1 Set the USB option in the setup menu to PTP ( 121). 2 3 Turn the printer on. 4 Turn the camera on. A welcome screen will be displayed, followed by the PictBridge playback display. Proceed to “Printing Photographs One at a Time” ( 112) or “Printing Multiple Photographs” ( 113). Turn the camera off and connect the supplied USB cable as shown. Do not use force or attempt to insert the connectors at an angle.
Printing Pictures One at a Time To print the photograph selected in the PictBridge playback display, press and release the button. The menu shown at right will be displayed. Press the multi selector up or down to highlight an option and press to the right to select. Option Reference—Printing Photographs Description Print selected picture. To cancel and return to PictBridge playback display button.
Option Cropping Description Menu shown at right will be displayed. Press multi selector up or down to highlight Crop (crop photo for printing) or No Cropping, then press multi selector to right. If Crop is selected, dialog shown at right will be displayed; rotate main command dial to choose size of crop and use multi selector to choose position of crop. Press to return to print menu. Note that quality may drop if small crop is printed at larger sizes.
Printing Selected Photographs Choosing Print Select in the PictBridge menu (see above) displays the menu shown in Step 1. 1 2 Scroll through pictures. To display current picture full screen, press button. * Select current picture and set number of prints to 1. Selected pictures marked by icon. * To print photos in print order created with Print Set ( 139), select Print (DPOF) in PictBridge menu. Print order can be modified as described on this page.
Setup Basic Camera Settings: The Setup Menu The setup menu contains the following options. See “Using the Menus” ( for more information on using the menus. * Not available at battery levels of or below or when camera is powered by optional MB-D200 battery pack equipped with AA batteries.
Format Memory cards must be formatted before first use. Formatting memory cards is also an effective way of deleting all pictures on the card. Selecting Format displays the following options. Press the multi selector up or down to highlight an option and then press the button: Setup Option Description No Exit without formatting memory card. Format memory card. Message shown at right displayed while formatting is in progress.
Mirror Lock-Up This option is used to lock the mirror in the up position to allow inspection or cleaning of the low-pass filter that protects the image sensor. See “Technical Notes: Caring for the Camera” ( 185). This option is not available at battery levels of or below, while multiple exposures are being shot, or when the camera is powered by an optional MBD200 battery pack using AA batteries. Use a fully-charged EN-EL3e battery or an optional AC adapter.
Language Choose the language for camera menus and messages from: De En Es Fr It Ne Po Deutsch English Español Français Italiano Nederlands Português German English Spanish French Italian Dutch Portuguese Py Русский Sv Svenska Russian Swedish Traditional Chinese Simplified Chinese Japanese Korean Image Comment Setup Add brief text comments to photographs as they are taken. Comments can be viewed when the photographs are displayed using the supplied software or Nikon Capture 4 Version 4.
Auto Image Rotation Photographs taken while On (the default option) is selected contain information on camera orientation, allowing them to be rotated automatically during playback ( 98) or when viewed in compatible Nikon software.* The following orientations are recorded: Landscape (wide) orientation Camera rotated 90 ° clockwise Camera rotated 90 ° counter-clockwise Camera orientation is not recorded when Off is selected. Choose this option when taking photographs with the lens pointing up or down.
Customizing the Recent Settings Menu To create a personalized menu of shooting and Custom Settings options: 1 Select Lock Menu > No to unlock the Recent Settings menu. 2 Select Delete Recent Settings > Yes to delete all existing recent settings. Setup 3 Select the items you wish to include in the Recent Settings menu from the shooting and Custom Settings menus. The fourteen most recently selected items will be stored. 4 Select Lock Menu > Yes to lock the Recent Settings menu.
USB Before connecting the camera to a computer via USB ( 107), select the appropriate USB option as determined by the computer operating system and whether the camera is being controlled from Nikon Capture 4 Version 4.
3 With the lens ten centimeters (four inches) from a bright, featureless white object, frame the object so that nothing else is visible in the viewfinder and press the shutter-release button halfway. In autofocus mode, focus will automatically be set to infinity; in manual focus mode, set focus to infinity manually before pressing the shutter-release button. If using the aperture ring to set aperture, choose the minimum setting (largest f/-number).
Battery Info View information on the EN-EL3e rechargeable Li-ion battery currently inserted in the camera. Setup Option Description Bat. Meter Current battery level as a percentage. Number of times shutter has been released with current battery since battery was last charged. Note that camera may sometimes release shutter Pic. Meter without recording photograph, for example when measuring value for preset white balance. Five-level display showing battery age. 0 (New) indicates that battery perCharg.
Shooting Options: The Shooting Menu The shooting menu contains the following options. See “Using the Menus” ( 24) for more information on using the menus. Setup Option Shooting Menu Bank Menu Reset Folders File Naming Optimize Image Color Space Image Quality* Image Size* JPEG Compression RAW Compression White Balance* Long Exp.
Shooting Menu Bank All shooting menu options are stored in one of four banks. Changes to settings in one bank have no effect on the others. To store a particular combination of frequently-used settings, select one of the four banks (the default bank is bank A) and set the camera to these settings. The new settings will be stored in the bank even when the camera is turned off, and will be restored the next time the bank is selected.
Renaming Shooting Menu Banks 1 2 3 Highlight Rename and press the multi selector to the right. A list of shooting menu banks will be displayed. Highlight the desired bank and press the multi selector to the right. The following dialog will be displayed. Enter a name as described below. Keyboard area: Use multi selector to highlight letters, press center of multi selector to select. Name area: Name appears here. To move cursor, press ton and use multi selector.
Menu Reset To restore default settings for the current shooting menu bank ( 125), highlight Yes and press the multi selector to the right (select No to exit without changing settings). The following settings are affected: Default DSC Normal sRGB JPEG Normal Large Size Priority NEF (RAW) Auto2 Off On (Normal) 100 Option Multiple exposure3 Number of shots Auto gain Interval timer shooting4 Start time Interval No. of intervals No.
Folders Select the folder in which subsequent images will be stored. Option Description Dialog shown at right will be displayed; press multi selector up or down to choose number for new folder. Press New multi selector to right to create new folder and return to shooting menu. Subsequent photographs will be stored in new folder.
File Naming Photographs are saved using file names consisting of “DSC_” or “_DSC” followed by a four-digit file number and a three-letter extension (e.g., “DSC_0001.JPG”). The File Naming option is used to change the “DSC” portion of the file name. Press the multi selector to the right to display the dialog shown below. Keyboard area: Use multi selector to highlight letters, press center of multi selector to select. Prefix area: File name prefix appears here.
Image Size Image size can be selected from Large, Medium, and Small. See “Reference: Image Quality and Size” ( 32). JPEG Compression Choose whether to compress JPEG images to a fixed size or to vary file size for improved image quality. See “Reference: Image Quality and Size” ( 30). RAW Compression Setup Choose whether to compress NEF (RAW) images. See “Reference: Image Quality and Size” ( 31). White Balance The Shooting Menu 130 Nine options are available for white balance.
Long Exp. NR Select On to reduce “noise” in the form of randomly-spaced, brightly-colored pixels in photographs taken at shutter speeds of 8 s or slower. High ISO NR Setup Option Description Off Noise reduction off ; camera functions normally. (default) Photos taken at shutter speeds of about 8 s or slower are processed to reduce noise, increasing recording time by about 50–100% and halving number of images that can be stored in memory buffer. During processing, On blinks in shutter-speed/aperture displays.
ISO Sensitivity ISO sensitivity can be increased from the default value (100). ISO sensitivities over 1600 are only available when Custom Setting b1 (ISO Auto) is off. See “Reference: Sensitivity (ISO Equivalency)” ( 33). Image Overlay Create a new image by superimposing two existing RAW photographs. The RAW photographs must have been created using the D200 and be on the same memory card. See “Reference: Image Overlay and Multiple Exposure” ( 84).
Playback Options: The Playback Menu The playback menu contains the following options. See “Using the Menus” ( 24) for more information on using the menus. Option Delete Playback Folder Slide Show Hide Image Print Set Display Mode Image Review After Delete Rotate Tall 133–134 135 135–136 137–138 139–140 141 141 142 142 The playback menu is only displayed if there is a memory card in the camera. Delete The delete menu contains the following options.
Deleting Selected Photographs: Selected Choosing Selected displays the photographs in the folder or folders selected in the Playback Folder menu ( 135) as small thumbnail images. 1 2 Highlight image. (To view highlighted image full screen, press . Release to return to thumbnail list.) Setup The Playback Menu 134 Select highlighted image. Selected image marked by icon. 3 Repeat steps 1 and 2 to select additional pictures. To deselect picture, highlight and press center of multi selector.
Playback Folder Choose a folder for playback. Option Description ND200 Images in all folders created by the D200 will be visible during playback. Images in all folders created by cameras that conform to the Design Rule for All Camera File System (DCF)—all Nikon digital cameras and most other makes of digital camera—will be visible during playback. Only images in folder currently selected using Folders option in shooting Current menu are displayed during playback.
The following operations can be performed during a slide show: To Use Description Go forward or back one frame Press multi selector left to return to previous frame, right to skip to next frame. View photo info Press multi selector up or down to change photo info displayed during slide show. Pause Press to pause slide show. Exit to playback Press to end slide show and display playback menu.
Hide Image The Hide Image option is used to hide or reveal selected photographs. Hidden images are visible only in the Hide Image menu, and can only be deleted by formatting the memory card. Option Description Select / Set Hide or reveal selected photographs. Deselect All? Reveal all photographs. Hiding Selected Photographs: Select / Set Choosing Select / Set displays the photographs in the folder or folders selected in the Playback Folder menu ( 135) as small thumbnail images.
Revealing All Photographs: Deselect All Choosing Deselect All? displays the confirmation dialog shown at right. Press the multi selector up or down to highlight an option, then press the button to make a selection. • Yes: reveal all images in the folder or folders selected in the Playback Folder menu ( 135). The monitor will briefly show the message “Deselect All Done,” and then the playback menu will be displayed. • No: exit to the playback menu without changing the hidden status of images.
Print Set Print Set is used to create a digital “print order” that lists the photographs to be printed, the number of copies, and the information to be included on each print. This information is stored on the memory card in Digital Print Order Format (DPOF). The card can then be removed from the camera and used to print the selected images printed on any DPOF-compatible device. Option Description Select / Set Select photographs for printing. Deselect All? Remove all images from print order.
Modifying the Print Order: Select / Set Choosing Select / Set displays the photographs in the folder or folders selected in the Playback Folder menu ( 135) as small thumbnail images. Setup The Playback Menu 140 1 Highlight image. (To view highlighted image full screen, press . Release to return to thumbnail list.) 2 Press button and press multi selector up or down to specify number of prints (up to 99), or press center of multi selector to select image and set number of prints to 1.
Display Mode To choose the information listed in the photo-information display ( 99), highlight the desired option and press the multi selector right. A ✔ appears next to selected items; to deselect, highlight and press the multi selector to the right. To return to the playback menu, highlight Done and press the multi selector to the right. Option Description Data* Shooting data appears in photo information display. Histogram* Histogram appears in photo information display.
After Delete Choose whether the following or previous picture is displayed after an image is deleted. Option Show Next (default) Show Previous Continue as Before Setup The Playback Menu 142 Description After image is deleted, following image is displayed or highlighted in thumbnail list. If deleted image was last frame in memory, previous frame will be displayed or highlighted. After image is deleted, previous image is displayed or highlighted in thumbnail list.
Custom Settings Custom settings are used to fine-tune a variety of camera settings to suit the user’s preferences, creating combinations of settings that differ from the factory defaults in effect at the time your camera was purchased.
The following Custom Settings are available: Setup Custom Settings 144 C Bank Select R Menu Reset a Autofocus a1 AF-C Mode Priority a2 AF-S Mode Priority a3 Focus Area Frame a4 Group Dynamic AF a5 Lock-On a6 AF Activation a7 AF Area Illumination a8 Focus Area a9 AF Assist a10 AF-ON for MB-D200 b Metering/Exposure b1 ISO Auto b2 ISO Step Value b3 EV Step b4 Exp Comp/Fine Tune b5 Exposure comp.
Custom Setting e Bracketing/Flash e1 Flash Sync Speed e2 Flash Shutter Speed e3 Built-in Flash e4 Modeling Flash e5 Auto BKT Set e6 Manual Mode Bkting e7 Auto BKT Order e8 Auto BKT Selection f Controls f1 Center Button f2 Multi-Selector f3 Photo Info/Playback f4 FUNC.
Custom Setting C: Custom Setting Bank Custom Settings are stored in one of four banks. Changes to settings in one bank have no effect on the others. To store a particular combination of frequently-used settings, select one of the four banks and set the camera to these settings. The new settings will be stored in the bank even when the camera is turned off, and will be restored the next time the bank is selected.
Custom Setting R: Reset Custom Setting Menu To restore default settings for the current Custom Settings bank ( 146), highlight Yes and press the multi selector to the right (select No to exit without changing settings).
Custom Setting a1: AF-C Mode Priority Selection This option controls whether photographs can be taken whenever the shutter-release button is pressed (release priority) or only when the camera is in focus (focus priority) in continuous-servo AF. Option Description FPS Rate Photos can be taken whenever shutter-release button is pressed. (default) FPS Rate Photos can be taken even when camera is not in focus. In continuous mode, + AF frame rate slows for improved focus if subject is dark or low contrast.
Custom Setting a4: Pattern Selection in Group Dynamic AF This option controls how focus areas are grouped in group dynamic-AF ( 54) and whether the camera gives priority to the subject in the center focus area of the selected group. Option Description Focus areas are grouped in pattern 1 ( 150). Camera focuses on subject in center focus area of selected group. Because camera does not Pattern 1 / have to select focus area, less time is required for focus operation.
Focus areas are grouped as follows (illustrations show the control panel display): Center Area Closest Subject Left Left Pattern 1 Pattern 2* Top Top Center Right Left Center 1 Center 2 Bottom Bottom Top Top Center Right Left Center 1 Center 2 Bottom Right Right Bottom * The center focus-area group is selected by pressing the center of the multi selector once to activate the current center focus-area group and then pressing the center of the multi selector to toggle between “center
Custom Setting a6: AF Activation This option controls whether both the shutter-release button and the AF-ON button can be used to initiate autofocus or whether autofocus is only initiated when the AF-ON button is pressed. Option Description Shutter/AF-ON Autofocus can be performed with AF-ON button or by pressing shutter(default) release button halfway. AF-ON Only Autofocus can only be performed with AF-ON button.
Custom Setting a9: Built-in AF-Assist Illuminator At the default setting of On, the built-in AF-assist illuminator lights to assist the focus operation when the subject is poorly lit ( 58). Select Off to turn the illuminator off. Custom Setting a10: AF-ON Button for MB-D200 Battery Pack This option controls the function assigned to the AF-ON button for the optional MB-D200 battery pack ( 181).
Option Off (default) On Description ISO sensitivity remains fixed at value selected by user, regardless of whether optimal exposure can be achieved at current exposure settings. If optimal exposure can not be achieved at ISO sensitivity selected by user, ISO sensitivity is adjusted to compensate, to minimum approximately equivalent to ISO 200 and maximum selected using Max. Sensitivity option. Flash level is adjusted appropriately when flash is used.
Custom Setting b2: ISO Sensitivity Step Value Choose whether adjustments to sensitivity (ISO equivalency) are made in increments equivalent to / EV (1/3 Step, the default option), / EV (1/2 Step), or 1 EV (1 Step). Custom Setting b3: EV Steps for Exposure Control Choose whether adjustments to shutter speed, aperture, and bracketing are made in increments equivalent to / EV (1/3 Step, the default option), / EV (1/2 Step), or 1 EV (1 Step).
Custom Setting b5: Easy Exposure Compensation This option controls whether the button is needed to set exposure compensation ( 72). If On is selected, the 0 at the center of the exposure display will blink even when exposure compensation is set to ±0. Option Off (default) On Exposure mode Description Exposure compensation set by pressing button and rotating main command dial. Exposure compensation set by rotating command dial only.
Custom Setting b7: Fine Tune Optimal Exposure Use this option to fine-tune the exposure value selected by the camera. Exposure can be fine tuned separately for each metering method by from +1 to –1 EV in steps of / EV. Selecting this option displays a message warning that the icon does not appear when exposure is altered; highlight Yes and press the multi selector to the right (select No to exit without altering exposure).
Option AE/AF Lock (default) AE Lock Only AE Lock Hold/Reset Description Both focus and exposure lock while AE-L/AF-L button is pressed. Exposure locks while AE-L/AF-L button is pressed. Focus is unaffected. Exposure locks when AE-L/AF-L button is pressed and remains locked until button is pressed again, shutter is released or exposure meters turn off. Exposure locks when AE-L/AF-L button is pressed and remains locked until AE Lock Hold button is pressed again or exposure meters turn off.
Custom Setting d1: Beep Controls the pitch of the beep that sounds when the selftimer is counting down or the camera focuses in singleservo AF with Focus (the default setting) selected for Custom Setting a2 (AF-S Mode Priority). Choose from High (the default option), Low, and Off. A icon appears in the control panel when High or Low is selected. Custom Setting d2: Viewfinder Grid Display Select On to display on-demand grid lines in the viewfinder ( 6). The default option is Off.
Custom Setting d6: File Number Sequence When a photograph is taken, the camera names the file new by adding one to the last file number used. This option controls whether file numbering continues from the last number used when a new folder is created, the memory card is formatted, or a new memory card is inserted in the camera. Option Description Off File numbering reset to 0001 when new folder is created, memory card is for(default) matted or new memory card is inserted in camera.
Custom Setting d8: MB-D200 Battery Type To ensure that the camera functions as expected when AA batteries are used in the optional MB-D200 battery pack, match the option selected in this menu to the type of battery inserted in the battery pack. There is no need to adjust this option when using EN-EL3e batteries. Option LR6 (AA-size Alkaline) (default) HR6 (AA-size Ni-MH) FR6 (AA-size Lithium) ZR6 (AA-size Ni-Mn) Description Select when using LR6 alkaline AA batteries.
Custom Setting e2: Slowest Speed When Using Flash This option determines the slowest shutter speed possible when using front- or rear-curtain sync or red-eye reduction in programmed auto or aperture-priority auto exposure mode (regardless of the setting chosen, shutter speeds can be as slow as 30 s in shutter-priority auto and manual exposure modes or when the flash is set to slow sync, slow rear-curtain sync, or red-eye reduction with slow sync).
Repeating Flash: The flash fires repeatedly while the shutter is open, producing a strobe-light effect. icons blink in the control panel and viewfinder when this option is selected. Press the multi selector left or right to highlight the following options, up or down to change. Press the button to return to the Custom Settings menu when settings are complete. Option Output Description Highlight flash output (expressed as fraction of full power). Choose number of times flash fires at selected output.
Commander Mode: Choose this option to use the built-in flash as a master flash controlling one or more remote optional Speedlights in up to two groups (A and B) using Advanced Wireless Lighting. Custom Settings Flash Exposure Compensation Flash exposure compensation ( 73) has no effect in Commander mode. Setup Option Description Built-in Choose flash mode for built-in flash (commander flash). i-TTL mode. Menu of flash compensation values will be displayed; choose TTL value between +3.0 and –3.
To use optional Speedlights in commander mode, select Commander Mode for Custom Setting e3 and follow the steps below. 1 2 Highlight Built-in > Mode. Select desired flash mode. 3 If TTL or M is selected, additional options can be selected. Press multi selector up or down to display option, press right to select. 4 5 Highlight Group A > Mode. Setup 6 If TTL, AA, or M is selected, additional options can be selected. Press multi selector up or down to display option, press right to select.
10 Compose shot and arrange optional Speedlights as shown below. 60–30 ° 5 m /16´ or less 30 ° or less Speedlight wireless remote sensor should face camera. Camera (built-in flash) 10 m /33´ or less 30 ° or less 5 m /16´ or less 60–30 ° Maximum distance between optional Speedlights and camera is about 10 m (33´) when Speedlight is positioned in front of camera (within 30 ° on either side of center line), or about 5 m (16´) when Speedlight is 30–60 ° to either side of center line.
flash pop-button to raise built-in flash (note that 12 Press built-it flash must be raised even if -- is selected for Builtin > Flash Mode). confirming that camera flash-ready light and flash-ready lights for all Speed13 After lights are lit, frame photograph, focus, and shoot.
Custom Setting e6: Auto Bracketing in M Exposure Mode This option controls what settings are affected when AE & Flash or AE Only is selected for Custom Setting e5 in manual exposure mode. Option Description Flash/Speed Camera varies shutter speed (Custom Setting e5 set to AE Only) or shut(default) ter speed and flash level (Custom Setting e5 set to AE & Flash).
Custom Setting f1: Multi-Selector Center Button This option determines what operations can be performed by pressing the center of the multi selector. Shooting Mode: This option controls what operation can be performed by pressing the center of the multi selector when the camera is in shooting mode. Option Description Pressing center of multi selector selects center focus area or center focusCenter AF area group (group dynamic-AF).
Custom Setting f2: When Multi-Selector Is Pressed; If desired, the multi selector can be used to activate the exposure meters or initiate autofocus. Option Description Do Nothing Multi selector does not activate exposure meters or initiate auto(default) focus. Reset Mtr-Off Delay Pressing multi selector activates exposure meters. In AF-S or AF-C mode, pressing multi selector activates exposure Initiate Autofocus meters. Camera focuses while multi selector is pressed.
Custom Setting f4: Assign FUNC. Button This option controls the function performed by the FUNC. button. Option FV Lock (default) Setup Custom Settings 170 Description If built-in flash or optional CLS-compatible Speedlight is used, flash value locks when FUNC. button is pressed. Press again to cancel FV lock. As above, except that if built-in flash is lowered or optional CLS-compatible FV Lock/ Speedlight is not attached, FUNC.
Option Setup Custom Settings Description Controls operation of command dials on camera and optional MB-D200 battery pack when setting flexible program, shutter speed, aperture, easy exposure comRotate pensation, exposure mode, exposure compensation Direction value, bracketing increment, and flash sync mode. • Normal (default): Normal command dial operation. • Reverse: Reverses rotation of command dials. Exchanges functions of main and sub-command dials when setting shutter speed and aperture.
Custom Setting f6: Setting Method for Buttons and Dials This option allows adjustments that are normally made by pressing the , , , , ISO, QUAL, or WB button and rotating a command dial to be made by rotating the command dial after the button is released. Option Description Default Changes to settings made by rotating command dial while button is held (default) down. Settings can be changed by rotating command dial after button is released.
Technical Notes Optional Accessories One advantage of digital SLR cameras is the wide variety of accessories available for broadening the scope of digital photography.
Lenses CPU lenses (particularly type G and D lenses) are recommended for use with the D200 (note that IX Nikkor CPU lenses can not be used). The following lenses can be used with the D200: Camera setting CPU lenses 1 AF Lens/accessory Type G or D AF Nikkor 2; AF-S, AF-I Nikkor ✔ PC-Micro Nikkor 85 mm f/2.
manual exposure mode, preset aperture using lens aperture 19 Requires PK-12 or PK-13 auto extension ring. ring and determine exposure before shifting lens. 20 Use preset aperture. In exposure mode A, set aperture using 18 Exposure compensation required when used with AI 28– focusing attachment before determining exposure and taking 85 mm f/3.5–4.5S, AI 35–105 mm f/3.5–4.5S, AI 35–135 mm photograph. f/3.5–4.5S, or AF-S 80–200 mm f/2.8D. See teleconverter • PF-4 Reprocopy Outfit requires PA-4 Camera Holder.
CPU lenses can be identified by the presence of CPU contacts. Type G lenses are marked with a “G” on the lens barrel, type D lenses with a “D.” CPU lens Type G lens Type D lens Type G lenses are not equipped with a lens aperture ring. Unlike other CPU lenses, there is no need to lock the aperture ring at the minimum aperture setting (maximum f/-number) when using a type G lens. Picture Angle and Focal Length The diagonal picture angle of the D200 is less than that of a 35-mm camera.
Optional Flash Units (Speedlights) When used with a compatible device such as the SB-800, SB-600, and remote SB-R200 Speedlights (available separately), the D200 supports the full range of options available with the Nikon Creative Lighting System (CLS), including i-TTL flash control ( 76), FV Lock ( 81), and Auto FP High-Speed Sync ( 160). Support for Advanced Wireless Lighting allows the built-in flash to be used as a commander unit for remote SB-800, SB-600, and SB-R200 Speedlights.
The following features are available with the SB-800, SB-600, and SB-R200: Technical Notes—Optional Accessories Speedlight Flash mode/feature i-TTL 3 AA Auto aperture 5 A Non-TTL auto GN Range-priority manual M Manual RPT Repeating flash REAR Rear-curtain sync Red-eye reduction Flash Color Information Communication Auto FP High-Speed Sync8 FV lock AF-assist for multi-area AF 10 Auto zoom ISO Auto (Custom Setting b1) SB-800 ✔4 ✔6 ✔6 ✔ ✔ ✔ ✔ ✔ ✔ ✔ ✔ ✔5 ✔ ✔ 1 Functions as remote flash only.
Notes on Optional Speedlights Refer to the Speedlight manual for detailed instructions. If the Speedlight supports the Creative Lighting System, refer to the section on CLS-compatible digital SLR cameras. The D200 is not included in the “digital SLR” category in the SB-80DX, SB-28DX, and SB-50DX manuals. If Auto FP High-Speed Sync is not used, the shutter will synchronize with an external flash at speeds of / s or slower. i-TTL flash control can be used at ISO sensitivities between 100 and 1600.
The Accessory Shoe The D200 is equipped with an accessory shoe that allows SB-series Speedlights, including the SB-800, 600, 80DX, 50DX, 28DX, 28, 27, 23, 22S, and 29S to be mounted directly on the camera without a sync cable. The accessory shoe is equipped with a safety lock for Speedlights with a locking pin, such as the SB-800 and SB-600. The Sync Terminal A sync cable can be connected to the sync terminal as required.
Other Accessories At the time of writing, the following accessories were available for the D200. Contact your retailer or local Nikon representative for details. Technical Notes—Optional Accessories Power ♦EN-EL3e Rechargeable Li-ion Battery: Additional EN-EL3e batteries are available sources from local retailers and Nikon service representatives. EN-EL3a and EN-EL3 batteries can not be used.
Technical Notes—Optional Accessories 182 Remote The D200 is equipped with a ten-pin remote terminal terminal for remote control and automatic phoaccessories tography. The terminal is provided with a cap, which protects the contacts when the terminal is not in use. The following accessories can be used (cable lengths are given in parentheses; all figures are approximate): ♦MC-22 Remote Cord (1 m/3 ft. 3 in.
Approved Memory Cards The following cards have been tested and approved for use in the D200: SDCFB 128 MB, 256 MB, 512 MB, 1 GB, 2 GB, 4 GB SDCFB (Type II) 300 MB SDCF2B (Type II) 256 MB SanDisk SDCFH (Ultra II) 256 MB, 512 MB, 1 GB, 2 GB, 4 GB, 8 GB SDCFX (Extreme III) 1 GB, 2 GB, 4 GB Entry-level CompactFlash cards 128 MB, 256 MB, 512 MB High speed 40× with Write Acceleration (WA) 256 MB, 512 MB, 1 GB Lexar Professional 40× with WA 8 GB Media Professional 80× with WA 512 MB, 1 GB, 2 GB, 4 GB Professional
Caring for the Camera Storage When the camera will not be used for an extended period, replace the monitor cover, remove the battery, and store the battery in a cool, dry area with the terminal cover in place. To prevent mold or mildew, store the camera in a dry, well-ventilated area.
The Low-Pass Filter The image sensor that acts as the camera’s picture element is fitted with a lowpass filter to prevent moiré. Although this filter prevents foreign objects from adhering directly to the image sensor, under certain conditions dirt or dust on the filter may appear in photographs. If you suspect that dirt or dust inside the camera is affecting your photographs, you can clean the filter as described below. Note, however, that the low-pass filter is extremely delicate and easily damaged.
Technical Notes—Caring for the Camera 186 4 Holding the camera so that light falls on the lowpass filter, examine the filter for dust or lint. If no foreign objects are present, proceed to Step 6. 5 Remove any dust and lint from the filter with a blower. Do not use a blower-brush, as the bristles could damage the filter. Dirt that can not be removed with a blower can only be removed by Nikon-authorized ser vice personnel. Under no circumstances should you touch or wipe the filter. 6 Turn the camera off.
Caring for the Camera and Battery: Cautions Technical Notes—Caring for the Camera Do not touch the shutter curtain Do not drop The product may malfunction if subjected to The shutter curtain is extremely thin and easily damaged. Under no circumstances should strong shocks or vibration. you exert pressure on the curtain, poke it with Keep dry cleaning tools, or subject it to powerful air This product is not waterproof, and may malcurrents from a blower.
Technical Notes—Caring for the Camera 188 Storage • To prevent mold or mildew, store the camera in a dry, well-ventilated area. If you will not be using the product for long periods, remove the battery to prevent leakage and store the camera in a plastic bag containing a desiccant. Do not, however, store the camera case in a plastic bag, as this may cause the material to deteriorate. Note that desiccant gradually loses its capacity to absorb moisture and should be replaced at regular intervals.
Troubleshooting If the camera fails to function as expected, check the list of common problems below before consulting your retailer or Nikon representative. Refer to the page numbers in the right-most column for more information. Problem Solution 105, 133 • Adjust viewfinder focus. 16 Viewfinder is out of focus. • Use optional diopter adjustment lens. 181 Viewfinder is dark. Charge battery or insert charged battery. 10 Displays turn off without warning. Choose longer monitor off or meter off delays.
Problem Solution Unlock focus area selector. Closest subject priority is in effect. Can not select focus area. Monitor is on: camera in playback mode. Exposure meters are off : press shutter-release button halfway. • Camera is in focus mode C. • Center focus area or focus area group is not selected or closest priority is selected for group dynamic-area AF. AF-assist illuminator does not light. • Off selected for Custom Setting a9 (AF Assist). • Illuminator has turned off automatically.
Problem Solution • NEF (RAW) or NEF+JPEG image quality option selected for image quality. White balance bracketing unavail(Choose Color • White balance set to able. Temp.) or (White Balance Preset). • Multiple exposure is being recorded. Select Custom and choose setting other than Results for Optimize Image vary Auto for Image Sharpening, Tone Compenfrom shot to shot. sation, and Saturation. Metering can not be changed. Autoexposure lock is in effect.
Camera Error Messages and Displays This section lists the indicators and error messages that appear in the viewfinder, control panel, and monitor when there is a problem with the camera. Indicator Control Viewpanel finder Problem Solution Lens aperture ring is not locked Lock ring at minimum aperture (blinks) at minimum aperture. (largest f/-number). Low battery. Ready fully-charged spare battery. • Battery exhausted. • Recharge or exchange with fully-charged spare battery.
Indicator Control Viewpanel finder Problem Solution Memory insufficient to record • Reduce quality or size. further photos at current set- • Delete photographs. (blinks) tings, or camera has run out of (blinks) file or folder numbers. • Insert new memory card. (blinks) No memory card. (blinks) Camera malfunction. Insert memory card. 28 105, 133 14 14 Release shutter. If error persists or appears frequently, consult viii with Nikon-authorized service representative.
Indicator Control Viewpanel finder Monitor NO CARD PRESENT THIS CARD CAN NOT BE USED Technical Notes—Troubleshooting 194 CARD IS NOT FORMATTED (displayed when button is pressed) FOLDER CONTAINS NO IMAGES ALL IMAGES HIDDEN FILE DOES NOT CONTAIN IMAGE DATA Problem Solution Camera cannot detect Turn camera off and confirm (blinks) 14 memory card. that card is correctly inserted. (blinks) (blinks) • Error accessing memory • Use Nikon-approved card. card. • Check that contacts are clean.
Appendix The Appendix covers the following topics: Topic Exposure Program (Mode P) Memory Card Capacity and Image Quality/Size Bracketing Programs Fine Tuning and Color Temperature Flash Range, Aperture, and Sensitivity Lenses That Can Be Used with the Built-in Flash Supported Standards 195 196 197–199 200 200 201 202 Exposure Program (Mode P) The exposure program for mode P is shown in the following graph: 12 14 F1 13 11 9 10 8 7 5 6 3 2 4 0 1 -1 -3 -2 V] [E -4 ISO 200; lens with m
Memory Card Capacity and Image Quality/Size The following table shows the approximate number of pictures that can be stored on a 1 GB SanDisk SDCFX (Extreme III) series card at different image quality and size settings. Image size File size (MB)1 No. of images1 Buffer capacity1, 2 L6 20.7 44 19 M6 NEF+JPEG Fine3, 4, 5 18.6 49 19 S6 17.1 55 19 L6 18.3 50 19 NEF+JPEG Normal3, 4, 5 17.2 54 19 M6 S6 16.5 57 19 L6 17.1 55 19 NEF+JPEG Basic3, 4, 5 M6 16.5 57 19 S6 16.2 58 19 NEF (RAW) — 15.8 60 22 L 4.8 167 37 M 2.
Bracketing Programs The following bracketing programs are available when WB Bracketing is selected for Custom Setting e5 (Auto BKT Set).
The programs are available when AE & Flash, AE Only or Flash Only is selected for Custom Setting e5 (Auto BKT Set) depend on the option selected for Custom Setting b3 (EV Step). 1/3 Step Selected for EV Step Control panel display Technical Notes—Appendix 198 No. of Exposure shots increment Bracketing order (EVs) 3 +/ +0.3, 0, +0.7 3 +/ +0.7, 0, +1.3 3 +1 1.0, 0, 2.0 3 –/ –0.3, –0.7, 0 3 –/ –0.7, –1.3, 0 3 –1 –1.0, –2.0, 0 2 +/ 0, +0.3 2 +/ 0, +0.7 2 +1 0, +1 2 –/ 0, –0.3 2 –/ 0, –0.
1/2 Step Selected for EV Step Control panel display No. of Exposure shots increment Bracketing order (EVs) 3 +/ +0.5, 0, +1.0 3 +1 1.0, 0, 2.0 3 –/ –0.5, –1.0, 0 3 –1 –1.0, –2.0, 0 2 +/ 0, +0.5 2 +1 0, +1 2 –/ 0, –0.5 2 –1 0, –1 3 ±/ 0, –0.5, +0.5 3 ±1 0, –1, +1 5 ±/ 0, –1.0, –0.5, +0.5, +1.0 5 ±1 0, –2.0, –1, +1, +2.0 7 ±/ 0, –1.5, –1.0, –0.5, +0.5, +1.0, +1.5 7 ±1 0, –3.0, –2.0, –1.0, +1.0, +2.0, +3.0 9 ±/ 0, –2.0, –1.5, –1.0, –0.5, +0.5, +1.0, +1.5, +2.0 9 ±1 0, –4.0, –3.0, –2.0, –1.
Fine-Tuning and Color Temperature Approximate color-temperatures for settings other than A (auto) are given below (values may differ from color temperatures given by photo color meters): +3 +2 +1 ±0 –1 –2 –3 Fluorescent* 2,700 K 3,000 K 3,700 K 4,200 K 5,000 K 6,500 K 7,200 K Incandescent 2,700 K 2,800 K 2,900 K 3,000 K 3,100 K 3,200 K 3,300 K Direct sunlight 4,800 K 4,900 K 5,000 K 5,200 K 5,300 K 5,400 K 5,600 K Cloudy (daylight) 5,400 K 5,600 K 5,800 K 6,000 K 6,200 K 6,400 K 6,600 K Flash 4,800 K 5,
Lenses That Can Be Used with the Built-in Flash The built-in flash can be used with any CPU lens with a focal length of 18–300 mm. Note that the flash may be unable to light the entire subject if the following lenses are not used at or above the minimum ranges given below: Lens AF-S DX ED 12–24 mm f/4G AF-S ED 17–35 mm f/2.8D AF-S DX IF ED 17–55 mm f/2.8G AF ED 18–35 mm f/3.5–4.5D AF-S DX VR ED 18–200 mm f/3.5–5.6G AF 20–35 mm f/2.8D AF-S ED 28–70 mm f/2.
Supported Standards DCF Version 2.0: Design Rule for Camera File System (DCF) is standard widely used in the digital camera industry to ensure compatibility among different makes of camera. DPOF: Digital Print Order Format (DPOF) is an industry-wide standard that allows pictures to be printed from print orders stored on the memory card. Exif version 2.21: The D200 supports Exif (Exchangeable Image File Format for Digital Still Cameras) version 2.
Specifications Type Single-lens reflex digital camera with interchangeable lenses Effective pixels 10.2 million CCD Image size (pixels) 23.6 × 15.8 mm; total pixels: 10.92 million • 3872 × 2592 (Large) • 2896 × 1944 (Medium) • 1936 × 1296 (Small) Lens mount Nikon F mount (with AF coupling and AF contacts) * IX Nikkor lenses can not be used † Excluding lenses for F3AF Picture angle Equivalent in 35-mm format is approximately 1.
Autofocus Detection range AF-area mode Focus lock Exposure Metering Matrix Center-weighted Spot Technical Notes—Specifications Range (ISO 100 equivalent, f/1.
Built-in flash Manual pop-up with button release Guide number (m / ft at ISO Approximately 12/39 (manual 13/42) 100 and 20 °C/68 °F) Flash Sync contact Flash control TTL Auto aperture Non-TTL auto Range-priority manual Flash sync modes Flash compensation Flash-ready indicator Storage Media File system Compression TTL flash control by 1,005-pixel RGB sensor • SB-800, 600: i-TTL balanced fill-flash for digital SLR and standard i-TTL flash for digital SLR Available with SB-800 with CPU lens Available with such S
Technical Notes—Specifications 206 External interface USB 2.0 Hi-speed Tripod socket ¼ in. (ISO) Firmware upgrades Firmware can be upgraded by user Supported languages Chinese (Simplified and Traditional), Dutch, English, French, German, Italian, Japanese, Korean, Portuguese, Russian, Spanish, Swedish Power source • One rechargeable Nikon EN-EL3e Li-ion battery; charging voltage (MH-18a quick charger): 7.
EN-EL3e Rechargeable Li-ion Battery Type Rechargeable lithium-ion battery Rated capacity 7.4 V/1500 mAh Dimensions (W × H × D) Approximately 39.5 × 56 × 21 mm (1.6 × 2.2 × 0.8 in.) Weight Approximately 80 g (2.8 oz), excluding terminal cover Battery Life The number of shots that can be taken with a fully-charged EN-EL3e battery (1500 mAh) varies with the condition of the batteries, temperature, and how the camera is used. The following measurements were performed at a temperature of 20 °C (68 °F).
Index Technical Notes—Index 208 Menus PLAYBACK MENU, 133–142 Delete, 133–134 Playback Folder, 135 Slide Show, 135–136 Hide Image, 137–138 Print Set, 139–140 Display Mode, 141 Image Review, 141 After Delete, 142 Rotate Tall, 142 SHOOTING MENU, 124–132 Shooting Menu Bank, 125–126 Menu Reset, 127 Folders, 128 File Naming, 129 Optimize Image, 45–49 Color Space, 50 Image Quality, 28–29 Image Size, 32 JPEG Compression, 30 RAW Compression, 31 White Balance, 35–42 Long Exp.
E Electronic analog exposure display, 69, 72 Electronic range finder, 60 Exif version 2.21, 50, 139, 202 Exposure bracketing, 73–75, 166, 198–199 Exposure compensation, 72, 154, 155 Exposure delay mode, 158 Exposure meters, 16, 157. See also Auto meter off Exposure mode, 62–69 aperture-priority auto, 66–67 manual, 68–69 programmed auto, 63 shutter-priority auto, 64–65 F FINE. See Image quality Flash, 76–80.
Technical Notes—Index 210 N NEF, 28–29, 31 Nikon Capture 4, 39, 47, 107– 109, 110, 118, 121, 122, 182 Noise, 34 reduction, 131 high sensitivities, 34, 131 slow shutter speeds, 65, 68, 131 NORMAL. See Image quality P PictBridge. See Printing photographs Picture Transfer Protocol. See PTP Photo information, 99–101 Playback, 22, 98–105 Playback menu, 133–142 PRE. See White balance, preset Predictive focus tracking, 52 Printing photographs, 110–114.
No reproduction in any form of this manual, in whole or in part (except for brief quotation in critical articles or reviews), may be made without written authorization from NIKON CORPORATION.