F55 (E) 03.4.
F55 (E) 03.4.15 7:51 PM Page 2 Introduction • Take trial shots BEFORE YOU BEGIN • Thank you for purchasing the Nikon F55/F55D—a camera that is sure to make photography a bigger part of your life. Get to know your F55/F55D camera, and be sure to read this manual thoroughly before using it. We recommend that you keep this manual handy. Take trial shots before shooting at important occasions like weddings or graduations.
F55 (E) 03.4.15 7:51 PM Page 4 BEFORE YOU BEGIN ............................................................................2-11 EXPOSURE MODE ..............................................................................53-62 Introduction...............................................................................................................2-3 Nomenclature............................................................................................................
F55 (E) 03.4.15 7:51 PM Page 6 Focus mode selector (PP. 46-47) Lens release button (P. 19) Auto Exposure Bracketing (P. 66)/ Multiple Exposure (P. 69)/Film rewind button (P. 72) Built-in Speedlight (P. 40/76) Self-timer (P. 42)/ AF-Assist Illuminator (P. 50)/ Red-Eye Reduction lamp (P. 79) Viewfinder eyepiece Dioptre adjustment lever (P. 73) Rubber eyecup (P. 73) Command Dial Power switch (P. 16) Camera back lock release lever (P. 20) Flash lock-release (P. 80)/Flash sync mode button (P.
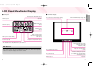
F55 (E) 03.4.15 7:51 PM Page 8 • LCD panel • Viewfinder display Auto Exposure Bracketing (P. 66) Shutter speed Self-timer (P. 42) Focus area (focus brackets) (P. 30/48) Centre Partial Metering area (p. 60) Aperture Multiple Exposure (P. 69) Battery power (P. 17) Flash sync mode (P. 78/80) Focus area (P. 48) Frame counter (P. 21)/ Exposure Compensation value (P. 64) Exposure Compensation (P. 64) * The illustrations are fully labelled for your reference. Flash ready-light (P.
F55 (E) 03.4.15 7:51 PM Page 10 Available Exposure Modes • Point-and-shoot exposure mode BEFORE YOU BEGIN The exposure mode dial of the Nikon F55/F55D can be divided into two sections. One is the user-controlled exposure mode with Auto-Multi Program, Shutter-Priority Auto, Aperture-Priority Auto or Manual exposure modes, where the photographer can determine various exposure factors. The other section is point-and-shoot exposure mode in which the camera automatically controls various exposure settings.
F55 (E) 03.4.15 7:51 PM Page 12 1 Open the battery chamber and install batteries while the camera’s power is off (page 16). 2 Attach the lens and turn the power switch on (page 18). 3 4 12 5 Hold the camera properly, compose frame and focus by lightly pressing the shutter release button (page 30). 6 Confirm focus indicator / appears without blinking and slowly depress the shutter release button (page 32). 7 Film starts to rewind automatically when it reaches the end of the roll (page 33).
F55 (E) 03.4.15 7:51 PM Page 14 PREPARATION This section introduces the various operations necessary before you start shooting.
03.4.15 7:51 PM 1 Page 16 Install Batteries and Check Battery Power Use two CR2-type 3V lithium batteries. 1 Turn the power switch off and open the battery chamber cover by sliding the battery chamber cover lock release lever toward indicated direction. Check points • We recommend that you take spare batteries with you, especially when travelling. • For the number of film rolls that can be shot with fresh batteries, see page 114.
03.4.15 7:51 PM 2 Page 18 Mount Lens Turn the power switch off and mount the lens to the camera body. CPU contacts of CPU Nikkor lens 1 Å G-type Nikkor lens 2 With G-type Nikkor lens Position lens in the camera’s bayonet mount so that the mounting indexes on lens and camera body are aligned, then twist lens anticlockwise until it locks into place. (Be sure not to touch the lens release button.
03.4.15 7:51 PM 3 Page 20 Load Film Turn the power switch on and load DX-coded film. With DX-coded film, film speed will be set automatically (ISO 25-5000). When the camera back is closed, the film automatically advances and the number of available exposures is displayed in the LCD panel. 1 Gently close the camera back until the camera back snaps closed. Turn the power switch on, open the camera back by sliding the camera back lock release lever and load film.
F55 (E) 03.4.15 7:51 PM 4 Page 22 Set Date and Time (F55D only) This camera allows you to imprint Year/Month/Day, Day/Hour/Minute (24-hour clock), Month/Day/Year or Day/Month/Year on your picture in any exposure mode. (For imprinting date/time, see page 44.) • Changing battery for imprinting 1 Open camera back, remove the battery chamber cover for imprinting by removing the screw using a screwdriver. 2 Remove the used battery and insert a new CR2025 3V lithium battery with ´ side facing up.
F55 (E) 03.4.15 7:51 PM Page 24 About Shutter Release Button Lightly pressing the shutter release button and holding it halfway down activates the camera’s exposure meter and pressing it all the way down releases the shutter. 1 Lightly press the shutter release button. Before pressing Lightly pressing 2 • When the focus mode selector is set to AF (autofocus), camera starts to focus on the subject when the shutter release button is lightly pressed (page 30).
03.4.15 7:52 PM 1 Page 26 Set Focus Mode to AF Set focus mode to AF (autofocus). (See page 46 for details.) Turn the power switch on and set the focus mode selector to AF (autofocus). • Make sure to turn the focus mode selector until it clicks into position. • To focus, lightly press the shutter release button (page 24). • Situations where autofocus may not work as expected Autofocus may not work as expected in the following situations.
03.4.15 7:52 PM 2 Page 28 Set Exposure Mode to a When the exposure mode is set to a, the camera automatically controls all the exposure settings. Set exposure mode to a. • About exposure mode Four exposure modes besides a and five Vari-Program modes are available with this camera. Utilising the characteristics of each exposure mode, effective results can be achieved with various types of subjects or shooting situations.
03.4.15 7:52 PM 3 Page 30 Hold Camera and Focus Lightly pressing the shutter release button automatically focuses the camera on the subject and when the subject is in focus, causes / to appear in the viewfinder. • When shutter release button is lightly pressed, the camera focuses automatically and focus indicator appears or blinks as follows: / appears: Subject is in focus. / 1 Hold the camera properly. blinks: Unable to focus using autofocus.
03.4.15 7:52 PM 4 Page 32 Release Shutter Confirm that / (in-focus indicator) appears in the viewfinder, then slowly, fully depress the shutter release button. With a moving subject, Continuous Servo AF (page 46) activates and camera continuously focuses on the subject. 1 3 Film starts to rewind automatically when the last shot is taken. Confirm indications in the viewfinder while lightly pressing the shutter release button. BASIC OPERATION 1 F55 (E) • o––– is displayed during film rewind.
F55 (E) 03.4.15 7:52 PM C Page 34 O L U M N About Metering Systems and Exposure Metering systems and exposure are important factors for taking pictures. Knowing the characteristics of each factor helps you widen your photographic expression. •Metering Systems As the proper combination of shutter speed and aperture for correct exposure is determined according to subject brightness and film sensitivity, measuring subject brightness is very important.
F55 (E) 03.4.15 7:52 PM Page 36 Shooting with Vari-Program 1 Set the exposure mode dial to the desired Vari-Program, then lightly press the shutter release button. s: Portrait mode Use this mode whenever you are taking pictures of people. It creates a blurred background to accentuate your main subject. • 85mm to 200mm telephoto lenses with large maximum apertures are recommended. • Distancing the main subject and the background emphasises the effect.
F55 (E) 03.4.15 7:52 PM Page 38 f: Close-Up mode h: Night Portrait mode Use this mode when you are taking pictures up close. It creates a blurred background to accentuate your main subject. Useful in taking close-ups of subjects such as flowers or insects. Use this mode for subjects with an evening or night background. Night Portrait mode captures all the lighting in the scene, including the foreground subject and background.
F55 (E) 03.4.15 7:52 PM Page 40 Using Built-In Speedlight 1 2 Confirm fi in viewfinder, then compose, focus and take the picture with flash by fully depressing the shutter release button. When the subject is dark or backlit and the shutter release button is lightly pressed, the built-in Speedlight automatically pops up and starts charging. • When the built-in Speedlight is ready to fire, fi appears without blinking in the viewfinder (when the camera’s meter is on).
F55 (E) 03.4.15 7:52 PM Page 42 Self-Timer Operation You can use the self-timer when you want to be in the photograph or reduce camera shake. Press v (self-timer) button and confirm that V appears on the LCD panel. Check points • Use a tripod or place the camera on a stable surface before using the self-timer.
F55 (E) 03.4.15 7:52 PM Page 44 Imprinting Date/Time (F55D only) You can imprint the following date information on your picture: Year/Month/Day, Day/Hour/Minute, Month/Day/Year or Day/Month/Year. See page 22 to set date and time. 1 Push MODE button to select available imprinting displays.
F55 (E) 03.4.15 7:52 PM Page 46 Focus Mode • Autofocus • With the focus mode selector set to AF, lightly pressing the shutter release button automatically focuses the camera on the subject at the focus area (page 9/48) and causes / to appear in the viewfinder. • Auto-Servo AF Camera automatically chooses Single Servo AF or Continuous Servo AF operation according to the subject status, i.e. stationary or moving. • Single Servo AF Automatically activated when shooting a stationary subject.
F55 (E) 03.4.15 7:52 PM Page 48 Focus Area Tip Dynamic AF Mode with Closest-Subject Priority is useful when you want the camera to take automatic control over focus operations, or when shooting a moving subject. Dynamic AF Mode is useful in achieving focus on a particular part of a subject, or when the composition of the photograph is your top priority.
F55 (E) 03.4.15 7:52 PM Page 50 AF-Assist Illuminator Approx. 0.5-3m • AF-Assist Illuminator automatically turns on in the following situations: Focus mode is autofocus, AF Nikkor lens (except AF-S and AF-I) is used, subject is dark and centre focus area is selected or Dynamic AF Mode with Closest-Subject Priority is activated. • AF-Assist Illuminator does not turn on in d or g. • Focal length of the usable AF Nikkor lens is 24200mm. • The distance range of the AF-Assist Illuminator is approx. 0.5-3m.
F55 (E) 03.4.15 7:52 PM Page 52 Focus Lock Focus lock is useful in autofocus shooting when you want to capture a subject that’s framed outside of the F55/F55D’s three focus areas. Tip Focus lock is best suited for a photograph where composition is your top priority, and in situations where autofocus may not work as expected (page 27). 1 Position the focus area on the subject and lightly press the shutter release button. (For example, EXPOSURE MODE when centre focus area is selected.
F55 (E) 03.4.15 7:52 PM Page 54 Auto-Multi Program P: Auto-Multi Program Difference between a (AUTO mode) and P (Auto-Multi Program) The camera automatically controls exposure to achieve correct exposure in any shooting situation. For more complex shooting, use Flexible Program (page 55), Exposure Compensation (page 64) or Auto Exposure Bracketing (page 66).
F55 (E) 03.4.15 7:52 PM Page 56 S: Shutter-Priority Auto Enables you to manually set the desired shutter speed (30-1/2000 sec.); the camera automatically selects the proper aperture to provide correct exposure. Fast shutter speed 1/500 sec. • S (Shutter-Priority Auto) can only be used with a CPU Nikkor lens such as G- or D-type Nikkor (page 88). Tip With high shutter speeds, you can freeze the motion of a fast-moving subject; with slower speeds, you can create a motion effect.
F55 (E) 03.4.15 7:52 PM Page 58 A: Aperture-Priority Auto Enables you to set the desired aperture (lens’ minimum to maximum) manually. The camera automatically selects a shutter speed suitable for correct exposure. Small aperture f/32 • A (Aperture-Priority Auto) can only be used with a CPU Nikkor lens such as G- or D-type Nikkor (page 88). • In flash photography, varying the aperture changes the flash shooting distance (page 83).
F55 (E) 03.4.15 7:52 PM Page 60 Manual Exposure Mode M: Manual NOTE: CPU Nikkor lenses other than G-type Enables you to set both shutter speed (-[Time] and 30-1/2000 sec.) and aperture (lens’ minimum to maximum) manually. Always set the aperture ring of a CPU Nikkor lens (except G-type) to its minimum (largest f-number). When the lens is not set to its minimum aperture setting, ƒEE blinks in the LCD panel and viewfinder, and the shutter locks.
F55 (E) 03.4.15 7:52 PM Page 62 Long Time Exposure • Long Time (Time) exposure of more than 30 sec. When the exposure mode dial is set to M (Manual), set the shutter speed indication to -- (next after 30 sec.) to set Long Time (Time) exposure. Depress the shutter release button once to open the shutter, then press the shutter release button again to close the shutter. This function is useful for shooting nighttime scenes or stars.
F55 (E) 03.4.15 7:52 PM Page 64 Exposure Compensation To modify exposure control (i.e. from the ISO standard), use the Exposure Compensation function. This can be useful when intentionally achieving underor overexposure to obtain a specific photographic effect. This camera offers compensation of –2 EV to +2 EV in 1/2 steps. • Exposure Compensation can be set in P, S, A and Vari-Program.
F55 (E) 03.4.15 7:52 PM Page 66 Auto Exposure Bracketing Auto Exposure Bracketing allows you to shoot in selected compensated EV values (maximum of ±2 EV) shifting from the automatically set proper exposure (or selected exposure in Manual exposure mode) for three shots each time the shutter is released. • Auto Exposure Bracketing is available in P, S, A and M exposure modes.
03.4.15 7:52 PM Page 68 Auto Exposure Bracketing—continued 3 Auto Exposure Bracketing is completed and automatically cancelled when the third shot is taken. • z and = in the LCD panel and = and the electronic analogue exposure display in the viewfinder disappear when the bracketing is completed. • To cancel the bracketing, rotate the Command Dial while pressing the ¸ button so z disappears from the LCD panel. Turning the power switch off does not cancel bracketing.
F55 (E) 03.4.15 7:52 PM Page 70 Multiple Exposure—continued Standard compensation value in multiple exposure Number of exposures Two Three Four Eight or nine 3 Compensation value –1.0 EV –1.5 EV –2.0 EV –3.0 EV Exposure Compensation is necessary depending on the number of exposures in multiple exposure since more than one image is exposed in the same frame. Compose picture, confirm focus indicator / and shoot.
03.4.15 7:52 PM Page 72 Film Rewind Dioptre Adjustment/Viewfinder Accessories This section explains mid-roll rewind and what to do if the film does not rewind. The F55/F55D enables near- or far-sighted photographers to adjust the eyepiece dioptre to suit their vision. Viewfinder accessories such as an eyepiece cap or eyepiece correction lens can also be attached. Mid-roll rewind • To rewind film at mid-roll, press the two film rewind buttons „ simultaneously for approx. 1 sec.
F55 (E) 03.4.15 7:52 PM Page 74 Available Mode Combinations The following chart lists available modes when a CPU Nikkor lens such as a G- or D-type lens is attached.
F55 (E) 03.4.15 7:52 PM Page 76 Built-In Speedlight/Ready-Light This camera is equipped with a built-in Speedlight that provides an angle of coverage for a 28mm lens with a guide number of 12 (ISO 100, m). When the subject is dark or backlit, in a or Vari-Program (except in d or g), the built-in Speedlight automatically pops up. When the shutter is released, the flash fires to create natural-looking flash photography utilising Matrix Balanced Fill-Flash.
F55 (E) 03.4.15 7:52 PM Page 78 Flash Sync Mode Features Five flash sync modes can be selected for desired photographic effect depending on the conditions when using the built-in Speedlight. In d and g modes, flash is not available even when the subject is dark or backlit. ⁄: Red-Eye Reduction Set the flash sync mode by rotating the Command Dial while pressing the flash sync mode button ±. ¶: Red-Eye Reduction with Slow Sync Red-Eye Reduction with Slow Sync can be used in h, P or A exposure mode.
F55 (E) 03.4.15 7:52 PM Page 80 This section explains how to use the built-in Speedlight set to desired flash sync mode when a G- or D-type AF Nikkor lens is attached. 1 In P, S, A or M exposure mode, release the built-in Speedlight by pressing the ± flash lock-release button. In a or Vari-Program (except in d or g), when the subject is dark or backlit and the shutter release button is lightly pressed, the built-in Speedlight automatically pops up.
F55 (E) 03.4.15 7:52 PM Page 82 Using Built-In Speedlight—continued Confirm fi appears in the viewfinder, make sure the subject is within the flash shooting distance range and shoot. • The shutter cannot be released unless fi appears without blinking in the viewfinder. • fi in the viewfinder blinks approx. 3 sec. after full flash output. This may indicate underexposure has occurred. Check the focus distance, aperture or flash shooting distance range and shoot again.
F55 (E) 03.4.15 7:52 PM Page 84 Using Built-In Speedlight—continued • Available flash sync mode combinations TTL Auto Flash Front-Curtain Sync Red-Eye Reduction a s d f g h P S A M Å Å — Å — Å Å Å Å Í ® ® — ® — — R R R R R R — R — — R R R R Red-Eye Reduction with Slow Sync — — — — — R R — R — Lens Slow Sync Flash Cancel — — — — — ® R — R — R*1 R*1 ®*2 R*1 ®*2 R*1 — — — — Å: Matrix Balanced Fill-Flash Í: Standard TTL flash R: Available ®: Automatically set when the exposure mode is selected.
F55 (E) 03.4.15 7:52 PM C Page 86 O L U M N About Depth of F ield Basics of the relationship between focus and depth of field are explained in this section. •Depth of field When focusing, depth of field should be considered. Depth of field is the zone of sharpest focus in front of and behind the subject on which the lens is focused. It varies according to shooting distance, focal length and, above all, aperture.
F55 (E) 03.4.15 7:52 PM Page 88 Use a CPU Nikkor lens (except IX-Nikkor) with this camera. G- or D-type AF lenses give you access to all available functions. (This camera is not compatible with the Vibration Reduction function of the VR Nikkor lens and autofocus function of the AF-S and AF-I lens.) Mode Non-CPU Nikkor*9 CPU Nikkor*2 Lens/accessories G-type AF Nikkor, D-type AF Nikkor*3, AF-S, AF-I Nikkor PC Micro-Nikkor 85mm f/2.
03.4.15 7:52 PM Page 90 Lens Compatibility—continued When a non-CPU lens is attached Set exposure mode to M with a non-CPU lens. (When other modes are selected, shutter cannot be released.) The camera’s exposure meter cannot be used and the aperture cannot be set using the Command Dial when using non-CPU lenses. ƒ-appears in place of the aperture indication in the LCD panel and viewfinder; set/confirm aperture using the lens aperture ring.
F55 (E) 03.4.15 7:52 PM Page 92 Usable Optional Speedlights—continued • Non-TTL Auto Flash using optional Speedlight 1 Attach the optional Speedlight to the accessory shoe of the camera. Turn the camera power switch on and set the exposure mode dial to A or M. NOTE: Standby function of optional Speedlight Make sure to cancel the standby mode of the optional Speedlight.
F55 (E) 03.4.15 7:52 PM Page 94 Usable Optional Speedlights—continued 5 Confirm fi appears in the viewfinder, focus and fully depress the shutter release button to shoot. • Programmed Flash mode When the optional Speedlight is attached with the flash mode set to A (NonTTL Auto Flash) and the exposure mode dial is set to a, Vari-Program, P or S, Programmed Flash is performed (camera aperture is automatically controlled according to the film speed). • fi in the viewfinder blinks approx. 3 sec.
F55 (E) 03.4.15 7:52 PM Page 96 Usable Optional Speedlights—continued • Notes on using optional Speedlights • See your Speedlight manual for details. • Make sure to cancel the standby mode of the optional Speedlight. • Flash sync speed is 1/90 sec. or slower when using an optional Speedlight. • When Red-Eye Reduction or Red-Eye Reduction with Slow Sync is set on a camera attached with an optional Speedlight, the Red-Eye Reduction lamp of the camera body lights up.
F55 (E) 03.4.15 7:52 PM Page 98 Optional Accessories Eyepiece correction lenses • Eyepiece correction lenses enable near- or far-sighted photographers to adjust the eyepiece dioptre to suit their vision, and can be attached easily by inserting onto the viewfinder eyepiece. Nine optional eyepiece correction lenses provide viewfinder dioptre settings of –5, –4, –3, –2, 0, +0.5, +1, +2 and +3m–1 (combined dioptre with setting on camera body).
F55 (E) 03.4.15 7:52 PM Page 100 Camera Care Use a blower brush to remove dirt and dust from the camera body and clean it with a soft, clean cloth. After using the camera near seawater, wipe the camera body with a soft, clean cloth slightly moistened with pure water to remove salt, and then dry it with a dry cloth. NEVER use organic solvents like thinner or benzene. They may damage the camera. • Cleaning mirror and lens Use a blower brush to remove dirt and dust from the mirror or lens.
03.4.15 7:52 PM Page 102 Notes on Batteries WARNING Troubleshooting Keep batteries out of children’s reach. LCD panel Viewfinder If someone accidentally swallows batteries, call a doctor immediately. ƒEE blinks ƒEE blinks M appears Turn the camera power off before changing batteries and insert the batteries with ´ and ‰ ends positioned correctly. • Stains on the battery poles may cause lack of contact. Wipe the batteries well with a dry cloth before installing.
F55 (E) 03.4.15 7:52 PM Page 104 Troubleshooting—continued Viewfinder — / blinks HI appears HI appears Lo appears — -- blinks Lo appears Cause LCD panel Viewfinder 90 appears (when shutter speed faster than 1/90 sec. is selected) 90 appears — fi blinks — • Focus manually. 47 • Overexposure warning (subject is too bright). • In P mode, use ND filter. • In S mode, select faster shutter speed. • In A mode, select smaller aperture (larger f-number).
F55 (E) 03.4.15 7:52 PM Page 106 Glossary EV Exposure Value: A number representing the available combinations of shutter speeds and apertures that give the same exposure effect under conditions of similar scene brightness and ISO. At ISO 100, the combination of a one-second shutter speed and an aperture of f/1.4 is defined as EV1. The camera can be used only within the EV range of the exposure meter. For example, with the F55/F55D, the exposure metering range is from EV1 to EV20 at ISO 100 with an f/1.
F55 (E) 03.4.15 7:52 PM Page 108 Glossary—continued Front-Curtain Sync The flash fires an instant after the front curtain of a focal plane shutter has completed its travel across the film plane. This is the way the F55/F55D operates with the flash sync mode at Normal Sync. Guide number The guide number indicates the power of a flash in relation to ISO film speed. The guide number of the built-in Speedlight of the F55/F55D is 12 (ISO 100, m). Guide numbers are quoted in either metres or feet.
F55 (E) 03.4.
F55 (E) 03.4.15 7:52 PM Page 112 Shutter Electronically controlled vertical-travel focal-plane shutter Shutter speeds • In a, s, d, f, g, h, P, A: Automatically set between 30 and 1/2000 sec. • In S: 30 to 1/2000 sec. (in 1/2 steps) • In M: 30 to 1/2000 sec. (in 1/2 steps), Time Sync contact X-contact only; flash synchronisation up to 1/90 sec.
F55 (E) 03.4.15 7:52 PM Page 114 Specifications—continued Battery power confirmation Usable number of 36exposure (24exposure) film rolls per set of two fresh 3V lithium batteries In LCD panel, with exposure meter on • N for sufficient power • M indicates batteries are nearing exhaustion • Blinking M indicates batteries are just about exhausted At 20°C At –10°C Without flash Approx. 45 (67) Approx. 27 (40) With flash and AF-Assist Illuminator for half of all exposures Approx. 11 (16) Approx.
F55 (E) 03.4.15 7:52 PM Page 116 Index A E L S AF-Assist Illuminator.................................... ........................ 31, 41, 50-51, 74, 82, 94 Electronic rangefinder..............................47 Long Time exposure (Time) ...............57, 62 Self-timer............................................42-43 Aperture-Priority Auto exposure mode ....... .............10, 29, 34, 58-59, 74, 82, 84, 95 Exposure meter .................................17, 24 M Exposure mode ................
F55 (E) 118 03.4.
F55 (E) 03.4.15 7:52 PM Page 120 No reproduction in any form of this manual, in whole or in part (except for brief quotation in critical articles or reviews), may be made without written authorisation from NIKON CORPORATION. K NIKON CORPORATION FUJI BLDG.