En Install Guide
Table of Contents Introduction: About This Manual ................................................................................................... 1 Overview ......................................................................................................................................... 2 Windows ........................................................................................................................................... 3 Installing Nikon Capture 3 Under Windows ....................
About This Manual Introduction About This Manual Thank you for your purchase of Nikon Capture 3. This install guide explains how to install and uninstall Nikon Capture 3 on your Windows or Macintosh computer, and how to connect your camera to your computer. It also explains how to insert a camera memory card in a card reader or PC card slot, how to start Nikon Capture 3, and how to register the camera with the system. Before reading this guide, be sure to read the Nikon Capture 3 User’s Manual.
Introduction Overview This guide is divided into two main parts, one for Windows and the other for Macintosh computers. Windows This section explains how to install and uninstall Nikon Capture 3 on your Windows computer, and how to connect your camera to your computer. It also explains how to insert the memory card in a card reader or PC card slot, and how to start Nikon Capture 3 under Windows.
Windows This section explains how to install and uninstall Nikon Capture 3, how to connect your camera and insert the camera memory card in a card reader or PC card slot, how to start Nikon Transfer, and how to register the camera with the system.
Windows Installing Nikon Capture 3 Under Windows Before installing Nikon Capture 3, make sure that your computer meets the following system requirements.
Installing Nikon Capture 3 Under Windows When installing Nikon Capture 3, you can choose between Easy Install and Custom Install options. Easy Install The following software will be installed in the order given below. 1 Driver for D1-series cameras 4 Nikon Capture 3 camera drivers (Windows 98 SE 2 COOLPIX 5 Nikon View 5 only) 3 QuickTime 5.0.
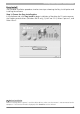
Windows When the Nikon Capture 3 CD is inserted into a CD-ROM drive, the Welcome window will open automatically. The Welcome window contains three tabs: the Software tab, the Custom Install tab, and the Customer Support tab. Clicking the Quit button will interrupt installation and close the Welcome window. Software Clicking the Easy Install button in the Software tab begins installation of the driver for D1 series cameras, the COOLPIX camera drivers (Windows 98 SE only), QuickTime 5.0.
Installing Nikon Capture 3 Under Windows Easy Install The standard installation procedure involves two steps: choosing the Easy Install option and installing the software. Step 1: Choose the Easy Install option In the Software tab, click Easy Install to begin installation of the driver for D1-series cameras, the Coolpix camera drivers (Windows 98 SE only), QuickTime 5.0.2, Nikon Capture 3, and Nikon View 5.
Windows Step 2: Complete installation 2.1 — Install the driver for D1-series cameras If you are using one of the D1 series of cameras, first install the driver for your camera. If you are using a different model of camera, click Cancel and go to the next step. To install the driver for D1 series cameras, click OK. The system will display a message stating that installation is complete. Click OK. 2.2 — Install Quick Time 5.0.2 Installation of QuickTime 5.0.2 opens with the dialog shown below.
Installing Nikon Capture 3 Under Windows 2.3 — Install Nikon Capture 3 Once installation of QuickTime 5.0.2 is complete, installation of Nikon Capture 3 will begin. 2.3.1 — Accept the license agreement Installation of Nikon Capture 3 begins with the license agreement. After making sure that you have read and understood the contents of the agreement, click Yes to continue installation. 2.3.2 — Personalize your copy of Nikon Capture 3 Enter your name and company (if applicable) to activate the Next button.
Windows 2.3.3 — Choose a location The folder to which Nikon Capture 3 will be installed is shown in the Destination Folder area (the default location is …\Program Files\Nikon\NCapture30). To install to this folder, click Next. To select a new folder, click the Browse… button and navigate to the desired location. If the chosen folder does not already exist, clicking Next will display the following dialog. Click Yes to create a folder in the location shown. 2.3.
Installing Nikon Capture 3 Under Windows 2.3.5 — Create a shortcut on the desktop When the progress indicator reaches 100%, the dialog shown below will appear. Click Yes to create a shortcut, allowing you to start Nikon Capture 3 directly from an icon on the desktop. If you do not want to create a shortcut, click No. 2.3.6 — Associate Nikon Capture 3 with image adjustment file extensions The dialog for image adjustment file extensions will be displayed.
Windows 2.3.7 — Choose default color management settings To use the color-space profile embedded in images opened in Nikon Capture 3, choose (A) Use the color space of the file to be opened as working color space. To choose a default RGB color-space profile for the working color space in Nikon Capture 3, choose (B) Always use the RGB default color space as the working color space. When this option is selected, you can choose the default color-space profile from a pull-down menu.
Installing Nikon Capture 3 Under Windows 2.3.8 — Complete installation of Nikon Capture 3 The following dialog is displayed when installation of Nikon Capture 3 is complete. Click Finish to proceed to the next step.
Windows 2.4 — Install Nikon View 5 Installation of Nikon View 5 begins with the license agreement shown in Step 2.4.1. 2.4.1 — Accept the license agreement After making sure that you have read and understood the contents of the agreement, click Yes to continue installation. 2.4.2 — Choose a location The folder to which Nikon View 5 will be installed is shown in the Destination Folder area (the default location is …\Program Files\Nikon\NKView5). To install to this folder, click Next.
Installing Nikon Capture 3 Under Windows 2.4.3 — Create a shortcut on the desktop When the Nikon View application files have been installed, the dialog shown below will appear. Click Yes to create a shortcut, allowing you to start Nikon View 5 directly from an icon on the desktop. If you do not want to create a shortcut, click No. 2.4.4 — Complete installation of Nikon View 5 The following dialog is displayed when installation of Nikon View 5 is complete. Click Finish to proceed to the next step. 2.
Windows Custom Install The standard installation procedure involves two steps: choosing the Custom Install option and installing the software. Step 1: Choose the Custom Install option Click the Custom Install tab and check the software you want to install. Coolpix Camera Drivers (all models except 990 and 880) This check box is only displayed under Windows 98 Second Edition (SE). Check this box to install the Mass Storage driver for Windows 98 SE. PTP Driver Check this box to install PTP drivers.
Installing Nikon Capture 3 Under Windows Step 2: Complete installation To begin installation of the selected software, click the Install button in the Custom Install tab. If more than one option is selected, the software will be installed in the order listed. Before installation Before installing Nikon Capture 3 and the device drivers, make sure the camera is not connected to the computer. If the Device Wizard is displayed, click Cancel to exit the Wizard.
Windows 2.1 — Install drivers If you selected PTP driver, Driver for COOLPIX 990/880, or Driver for D1-series cameras, installation will begin with the selected drivers. The explanation that follows takes the driver for D1-series camera as an example. 2.1.1 — Begin driver installation If you selected Driver for D1-series cameras, the following dialog will be displayed. Click OK to begin installation. 2.1.2 — End driver installation When installation is complete, the following dialog will be displayed.
Installing Nikon Capture 3 Under Windows A Note on the PTP Driver Under Windows XP Home Edition or Windows XP Professional, installation will begin with the PTP driver, if selected. Installing this driver allows the camera transfer button to be used with PTP (the camera must be equipped with a transfer button; see your camera manual for details). To install the driver, click OK. Once the driver has been installed, the Windows XP Updater shown below may be displayed depending on your operating environment.
Windows 2.2 — Install Quick Time 5.0.2 If you opted to install QuickTime 5.0.2, installation will open with the dialog shown below. Leave the registration information blank and click Next. Follow the on-screen instructions to complete installation and proceed to the next step. 2.3 — Install Nikon Capture 3 Installation of Nikon Capture 3 begins with the license agreement. 2.3.
Installing Nikon Capture 3 Under Windows 2.3.2 — Personalize your copy of Nikon Capture 3 Enter your name and company (if applicable) to activate the Next button. Clicking Next will display a confirmation dialog; if the information you entered is correct, click Yes to proceed to the next step. 2.3.3 — Choose a location The folder to which Nikon Capture 3 will be installed is shown in the Destination Folder area (the default location is …\Program Files\Nikon\NCapture30).
Windows 2.3.4 — Start installation While installation is in progress, the dialog shown below will be displayed. 2.3.5 — Create a shortcut on the desktop When the progress indicator reaches 100%, the dialog shown below will appear. Click Yes to create a shortcut, allowing you to start Nikon Capture 3 directly from an icon on the desktop. If you do not want to create a shortcut, click No. 2.3.6 — Associate Nikon Capture 3 with image adjustment file extensions The following dialog will be displayed.
Installing Nikon Capture 3 Under Windows 2.3.7 — Choose default color management settings To use the color-space profile embedded in images opened in Nikon Capture 3, choose (A) Use the color space of the file to be opened as working color space. To choose a default RGB color-space profile for the working color space in Nikon Capture 3, choose (B) Always use the RGB default color space as the working color space.
Windows 2.3.8 — Complete installation of Nikon Capture 3 The following dialog is displayed when installation of Nikon Capture 3 is complete. Click Finish to proceed to the next step.
Installing Nikon Capture 3 Under Windows 2.4 — Install Nikon View 5 Installation of Nikon View 5 begins with the license agreement shown in Step 2.4.1. 2.4.1 — Accept the license agreement After making sure that you have read and understood the contents of the agreement, click Yes to continue installation. 2.4.2 — Choose a location The folder to which Nikon View 5 will be installed is shown in the Destination Folder area (the default location is …\Program Files\Nikon\NKView5).
Windows 2.4.3 — Create a shortcut on the desktop When the Nikon View application files have been installed, the dialog shown below will appear. Click Yes to create a shortcut, allowing you to start Nikon View 5 directly from an icon on the desktop. If you do not want to create a shortcut, click No. 2.4.4 — Complete installation of Nikon View 5 The following dialog is displayed when installation of Nikon View 5 is complete. Click Finish to proceed to the next step. 2.
Connecting to a Computer Connecting to a Computer If you are using a computer running Windows, make sure that you install Nikon Capture 3 before connecting your camera to the computer for the first time. After installing Nikon Capture 3, turn the camera on and connect it to the computer, or insert the memory card into a card reader or a PC card slot. For more information about connecting your camera to a computer, see the documentation provided with your camera.
Windows Using a PC Card Slot When inserted in a PC-card adapter (available separately), the camera memory card functions as a Type II PCMCIA ATA card, allowing images to be read from the card. Inserting a Memory Card Remove the memory card from the camera and insert it in the adapter. Insert the adapter into a PCMCIA TYPE II ATA card slot on your computer. For more information on inserting the adapter, see the documentation provided with your computer.
Connecting to a Computer Starting Nikon Transfer Once installation is complete, Nikon Transfer will start automatically whenever your Nikon digital camera is connected to your computer and turned on, or when the camera memory card is inserted in a PC card slot or in a card reader connected to the computer. Note that only one camera can be connected to the computer at a time. For information on using other components of Nikon Capture 3, see the Nikon Capture 3 User’s Manual.
Windows Starting Nikon Transfer under Windows XP The procedure for starting Nikon Transfer under Windows XP Home Edition/Professional differs from that for other operating systems. Under Windows XP, the Removable Disk dialog is displayed when you connect the camera to the computer or insert the memory card into a card reader or PC card slot. Select Copy pictures to a folder on my computer using Nikon View 5 in this dialog to start Nikon Transfer.
Connecting to a Computer “Always do the selected action” If Always do the selected action is checked when Copy pictures to a folder on my computer (using Nikon View 5) is selected in the Removable Disk dialog, the Removable Disk dialog will not be displayed the next time you connect a camera to the computer or insert a memory card in a card reader or PC card slot. Instead, Nikon Transfer will start automatically. If Always do the selected action is not checked, the Removable Disk dialog will be displayed.
Windows Uninstall Uninstalling Nikon Capture 3 and Nikon View 5 This section describes how to uninstall the Windows versions of Nikon Capture 3 and Nikon View 5. Uninstalling Nikon Capture 3 1 From the Start menu, select All Programs > Nikon Capture 3 > Nikon Capture 3 Uninstall (Windows XP) or Programs > Nikon Capture 3 > Nikon Capture 3 Uninstall (other versions of Windows). The uninstall program will start.
Uninstall Uninstalling Nikon View 5 1 From the Start menu, select All Programs > Nikon View 5 > Nikon View 5 Uninstall (Windows XP) or Programs > Nikon View 5 > Nikon View 5 Uninstall (other versions of Windows). The uninstall program will start. 2 The uninstall program will display the message, “Do you want to completely remove the selected application and all of its components?” Click OK to uninstall Nikon View 5.
Windows Device Registration If you connect a supported digital camera to a Windows computer after installing Nikon Capture 3 and restarting the computer, Windows will automatically identify the camera as a new device and register the camera with the system. This section explains how to confirm that the camera is correctly registered. Read the section for your camera and operating system.
Device Registration: D100/COOLPIX-Series Cameras D100/COOLPIX-Series Cameras Windows XP Home Edition/Professional The following explanation uses D100 as an example. After installing Nikon Capture 3 and restarting the computer, connect your camera to the computer using a USB cable and turn the camera on . The camera will be registered automatically. If the Removable Disk dialog is displayed after registration, click Cancel to close the dialog box.
Windows Step 3 Confirm that Nikon Digital Camera USB Device, Generic Volume, and USB Mass Storage Device are listed respectively under Disk drives, Storage volumes, and Universal Serial Bus controllers. Double-click each of these listings to open the associated Properties window. If the Nikon Digital Camera D100 is listed under Other devices, delete this entry and then turn the camera and off and then on again. Step 4 The Properties dialogs for the selected devices will be displayed.
Device Registration: D100/COOLPIX-Series Cameras Windows 2000 Professional The following explanation uses D100 as an example. After installing Nikon Capture 3 and restarting the computer, connect your camera to the computer using a USB cable and turn the camera on . The camera will be registered automatically. Follow the instructions below to check that the camera has been correctly registered with the system. Step 1 Right-click the My Computer icon on the desktop.
Windows Step 3 Confirm that Nikon Digital Camera USB Device, Generic volume, and USB Mass Storage Device are listed respectively under Disk drives, Storage volumes, and Universal Serial Bus controllers. Double-click each of these listings to open the associated Properties window. If the Nikon Digital Camera D100 is listed under Other devices, delete this entry and then turn the camera and off and then on again. Step 4 The Properties dialogs for the selected devices will be displayed.
Device Registration: D100/COOLPIX-Series Cameras Windows Millennium Edition (Me) The following explanation uses D100 as an example. After installing Nikon Capture 3 and restarting the computer, connect your camera to the computer using a USB cable and turn the camera on . The camera will be registered automatically. Follow the instructions below to check that the camera has been correctly registered with the system. Step 1 Right-click the My Computer icon on the desktop.
Windows Step 3 Confirm that NIKON D100, USB Disk, and USB Mass Storage Device are listed respectively under Disk drives, Storage device, and Universal Serial Bus controllers. Double-click each of these listings to display the associated Properties window. If the NIKON D100 is listed under Other devices, delete this entry and then turn the camera and off and then on again. Step 4 The Properties dialogs for the selected devices will be displayed.
Device Registration: D100/COOLPIX-Series Cameras Windows 98 Second Edition (SE) The following explanation uses D100 as an example. After installing Nikon Capture 3 and restarting the computer, connect your camera to the computer using a USB cable and turn the camera on. The camera will be registered automatically. Follow the instructions below to check that the camera has been correctly registered with the system.
Windows Step 3 Confirm that NIKON D100, Nikon Digital Camera Controller, and Nikon Digital Camera Mass Storage Driver are listed respectively under Disk drives, Hard disk controllers, and Universal Serial Bus controllers. Double-click each of these listings to open the associated Properties window. If the Nikon Digital Camera D100 is listed under Other devices, reinstall the device driver as instructed in “Reinstalling the Device Driver” ( 55).
Device Registration: D100/COOLPIX-Series Cameras Reinstalling the Device Driver — Windows 98 Second Edition (SE) If NIKON D100 is listed under Other devices, you will need to reinstall the device driver. Step 1 Double-click the NIKON D100 listing under Other devices. Step 2 The NIKON D100 Properties dialog will be displayed. Open the General tab and click Reinstall Driver. Step 3 The Windows Update Device Driver Wizard will be displayed; click Next.
Windows Step 4 Insert the Nikon Capture 3 CD into a CD-ROM drive. To prevent the Welcome dialog from opening automatically, hold down the shift key while inserting the CD. Check the CD-ROM drive option and click Next. The Welcome Dialog If the Welcome dialog appears when the CD is inserted, click Exit to close the dialog. Step 5 The dialog shown at right will be displayed. Click Next.
Device Registration: D100/COOLPIX-Series Cameras Step 7 Click the General tab in the Nikon Digital Camera Mass Storage Driver dialog and confirm that This device is working properly appears under Device status. Click Close. Step 8 The wizard will now start installation of the Nikon Digital Camera Controller with the dialog shown at right. Click Next. Step 9 Select Search for the best driver for your device and click Next.
Windows Step 10 After confirming that the Nikon Capture 3 CD is inserted in the CD-ROM drive, check the CD-ROM drive option and click Next. Step 11 A dialog will be displayed stating that Windows has found the drivers for “Nikon Digital Camera Controller”; click Next.
Device Registration: D100/COOLPIX-Series Cameras Step 13 Click the General tab in the Nikon Digital Camera Controller Properties dialog and confirm that This device is working properly appears under Device status. Click Close. Step 14 Click OK to close the System Properties dialog.
Windows COOLPIX990/COOLPIX 880 Windows XP Home Edition/Professional The following explanation uses COOLPIX990 as an example. After installing Nikon Capture 3 and restarting the computer, connect your camera to the computer using a USB cable and turn the camera on. The camera will be registered automatically. Follow the instructions below to check that the camera has been correctly registered with the system. Step 1 Select Control Panel from the Start menu.
Device Registration: COOLPIX990/COOLPIX880 Step 2 After confirming that Imaging devices is listed in the Device Manager dialog, click the plus sign (+) to its left. If no Imaging devices listing appears or if Nikon Digital Camera E990 is listed under Other Devices, reinstall the device driver as instructed in “Reinstalling the Device Driver” ( 50).
Windows Reinstalling the Device Driver — Windows XP Home Edition/Professional If Nikon Digital Camera E990 (E880) is listed under Other devices, you will need to reinstall the device driver. Step 1 Double-click the listing for the Nikon Digital Camera E990 that appears under Other devices. Step 2 The Nikon Digital Camera E990 Properties dialog will be displayed. Open the General tab and click Reinstall Driver. Step 3 The Hardware Update Wizard will be displayed. Click Next.
Device Registration: COOLPIX990/COOLPIX880 Step 4 The dialog shown at right will be displayed. Select Search removable media and click Next. Step 5 The dialog shown at right will be displayed. Step 6 A dialog will be displayed indicating that driver update was successful. Click Finish to close the dialog.
Windows Step 7 Click the General tab in the Nikon COOLPIX990 Properties dialog and confirm that This device is working properly appears under Device status. Click OK. Click OK to close the System Properties dialog.
Device Registration: COOLPIX990/COOLPIX880 Windows 2000 Professional The following explanation uses COOLPIX990 as an example. After installing Nikon Capture 3 and restarting the computer, connect your camera to the computer using a USB cable and turn the camera on. The camera will be registered automatically. Follow the instructions below to check that the camera has been correctly registered with the system.
Windows If no Imaging devices listing appears or if Nikon Digital Camera E990 is listed under Other Devices, reinstall the device driver as instructed in “Reinstalling the Device Driver” ( 55). If Imaging devices is not listed in the Device Manager and Nikon Digital Camera E990 is not listed under Other devices, disconnect the camera and restart the computer. Reconnect the camera after the computer has restarted.
Device Registration: COOLPIX990/COOLPIX880 Reinstalling the Device Driver — Windows 2000 Professional If Nikon Digital Camera E990 (E880) is listed under Other devices, you will need to reinstall the device driver. Step 1 Double-click the listing for the Nikon Digital Camera E990 that appears under Other devices. Step 2 The Nikon Digital Camera E990 Properties dialog will be displayed. Open the General tab and click Reinstall Driver.
Windows Step 4 The dialog shown at right will be displayed. Select Search for a suitable driver for my device and click Next. Step 5 The dialog shown at right will be displayed. Insert the Nikon Capture 3 CD into the CDROM drive. To prevent the Welcome dialog from opening automatically, hold down the shift key while inserting the CD. Select the CD-ROM drives option and click Next. The Welcome Dialog If the Welcome dialog appears when the CD is inserted, click Exit to close the dialog.
Device Registration: COOLPIX990/COOLPIX880 Step 7 A dialog will be displayed indicating that driver update was successful. Click Finish to close the dialog. Step 8 Click the General tab of the Nikon COOLPIX990 Properties dialog and confirm that This device is working properly appears under Device status. Click Close. Click OK to close the System Properties dialog.
Windows Windows Millennium Edition (Me) The following explanation uses COOLPIX990 as an example. After installing Nikon Capture 3 and restarting the computer, connect your camera to the computer using a USB cable and turn the camera on. The camera will be registered automatically. If a message is displayed prompting you to insert a disk, insert the Windows Millennium Edition CD into a CD-ROM drive and click OK.
Device Registration: COOLPIX990/COOLPIX880 If no Imaging devices listing appears or if Nikon Digital Camera E990 is listed under Other Devices, reinstall the device driver as instructed in “Reinstalling the Device Driver” ( 60). If Imaging devices is not listed in the Device Manager and Nikon Digital Camera E990 is not listed Other devices, disconnect the camera and restart the computer. Reconnect the camera after the computer has restarted.
Windows Reinstalling the Device Driver — Windows Millennium Edition (Me) If Nikon Digital Camera E990 (E880) is listed under Other devices, you will need to reinstall the device driver. Step 1 Double-click the listing for the Nikon Digital Camera E990 that appears under Other devices. Step 2 The Nikon Digital Camera E990 Properties dialog will be displayed. Open the General tab and click Reinstall Driver. Step 3 The Windows Update Device Driver Wizard will be displayed.
Device Registration: COOLPIX990/COOLPIX880 Step 4 A dialog will be displayed indicating that driver update was successful. Click Finish to close the dialog. Step 5 Click the General tab in the Nikon COOLPIX990 Properties dialog and confirm that This device is working properly appears under Device status. Click Close. Step 6 Click OK to close the System Properties dialog.
Windows Windows 98 Second Edition (SE) The following explanation uses COOLPIX990 as an example. After installing Nikon Capture 3 and restarting the computer, connect your camera to the computer using a USB cable and turn the camera on. The camera will be registered automatically. If a message is displayed prompting you to insert a disk, insert the Windows Second Edition CD into the CD-ROM drive and click OK.
Device Registration: COOLPIX990/COOLPIX880 If no Imaging Device listing appears or if Nikon Digital Camera E990 is listed under Other Devices, reinstall the device driver as instructed in “Reinstalling the Device Driver” ( 64). If Imaging Device is not listed in the Device Manager and Nikon Digital Camera E990 is not listed Other devices, disconnect the camera and restart the computer. Reconnect the camera after the computer has restarted.
Windows Reinstalling the Device Driver — Windows 98 Second Edition (SE) If Nikon Digital Camera E990 (E880) is listed under Other devices, you will need to reinstall the device driver. Step 1 Double-click the listing for the Nikon Digital Camera E990 that appears under Other devices. Step 2 The Nikon Digital Camera E990 Properties dialog will be displayed. Open the General tab and click Reinstall Driver. Step 3 The Windows Update Device Driver Wizard will be displayed; click Next.
Device Registration: COOLPIX990/COOLPIX880 Step 4 The dialog shown at right will be displayed. Select Search for a better driver than the one your device is using now and click Next. Step 5 The dialog shown at right will be displayed. Insert the Nikon Capture 3 CD into the CD-ROM drive. To prevent the Welcome dialog from opening automatically, hold down the shift key while inserting the CD. Select the CD-ROM drive option and click Next.
Windows If the computer displays a dialog stating that usbscan.sys was not found, click Browse…. Double-click the win98 folder and click OK. Confirm that the win98 folder on the CDROM is displayed under Copying files from and click OK. The Windows 98 (Second Edition) CD If the opening dialog for the Windows 98 (Second Edition) CD is displayed, click the close box to exit the dialog. Step 7 A dialog will be displayed indicating that driver update was successful. Click Finish to close the dialog.
Device Registration: COOLPIX990/COOLPIX880 Step 9 Click OK to close the System Properties dialog.
Windows D1-Series Cameras Windows XP Home Edition/Professional Before You Begin Confirm that your OHCI-compliant IEEE 1394 interface board or card has been correctly registered with the system. Select Control Panel from the Start menu. In the Control Panel window, click the Performance and Maintenance icon to open the Performance and Maintenance window. Click the System icon in the Performance and Maintenance window to open the System Properties window.
Device Registration: D1-Series Cameras If no “Nikon 1394 Protocol Device” listing appears or if “NIKON D1X” (or “D1” or “D1H”) is listed under Other Devices, reinstall the device driver as instructed in “Reinstalling the Device Driver” ( 70). If “Nikon 1394 Protocol Device” is not listed in the Device Manager and “NIKON D1X” (or “D1” or “D1H”) is not listed under Other Devices, disconnect the camera, and restart the computer. When the computer has restarted, reconnect the camera.
Windows Reinstalling the Device Driver — Windows XP Home Edition /Professional If “NIKON D1X” (or “D1” or “D1H”) appears under “Other Devices,” reinstall the device driver as instructed below. Step 1 Open the Device Manager dialog. Doubleclick the listing for the Nikon D1X (or D1 or D1H) that appears under “Other devices.” The Properties dialog will be displayed. Step 2 Open the General tab and click Reinstall Driver… . Step 3 The “Hardware Update Wizard” dialog will appear.
Device Registration: D1-Series Cameras Step 4 When the driver installation has been completed, the dialog shown at right will be displayed; click Finish to close the wizard. Step 5 Confirm that “This device is working properly” appears under “Device status” in the General Tab of the Nikon Digital Camera D1 Series Properties dialog. Click Close. Step 6 Close the Device Manager, then click OK to close the System Properties window.
Windows Windows 2000 Professional Before You Begin Confirm that your OHCI-compliant IEEE 1394 interface board or card has been correctly registered with the system. Click the My Computer icon on the desktop with the right mouse button and select Properties from the menu that appears to display the System Properties dialog. Open the Hardware tab and click the Device Manager… button in the Device Manager section.
Device Registration: D1-Series Cameras Step 2 The Device Manager will be displayed. After confirming that “Nikon 1394 Protocol Device” is listed in the Device Manager, click the “+” sign to its left. If no “Nikon 1394 Protocol Device” listing appears or if “NIKON D1X” (or “D1” or “D1H”) is listed under Other Devices, reinstall the device driver as instructed in “Rein74).
Windows Step 4 The Nikon Digital Camera D1 Series Properties dialog will be displayed. Click the General tab and confirm that “This device is working properly” appears under “Device status”. Click Close. Close the Device Manager, then click OK to close the System Properties window. Device registration is now complete. Reinstalling the Device Driver — Windows 2000 Professional If “Nikon 1394 Protocol Device” is listed “Other Devices,” reinstall the device driver as described below.
Device Registration: D1-Series Cameras Step 2 The Device Manager will be displayed. Double-click the listing for the Nikon D1X (or D1 or D1H) that appears under “Other Devices” or “Miscellaneous Devices.” Step 3 Open the General tab and click Reinstall Driver…. Step 4 The Windows update device driver wizard will be displayed; click Next.
Windows Step 5 Select the search option and click Next. Step 6 The dialog shown at right will be displayed. Holding down the shift key to prevent the Welcome dialog from opening automatically, insert the Nikon Capture 3 CD into the CD-ROM drive. Select CD-ROM drives and click Next. The Welcome Dialog If the Welcome dialog appears when the CD is inserted, click the Quit button to close the dialog. Step 7 The dialog shown at right will be displayed; click Next.
Device Registration: D1-Series Cameras Step 8 The dialog shown at right will be displayed; click Finish. Step 9 Confirm that “This device is working properly” appears under “Device status” in the General Tab of the Nikon Digital Camera D1 Series Properties dialog. Click Close. Step 10 Close the Device Manager, then click OK to close the System Properties window.
Windows Updating Driver for the D1 — Windows 2000 Professional If you are already using the D1 with Nikon View DX or Nikon Capture, you will need to update the camera driver. Step 1 Click the My Computer icon on the desktop with the right mouse button and select Properties from the menu that appears to display the System Properties dialog. Open the Hardware tab and click the Device Manager… button in the Device Manager section. Step 2 The Device Manager will be displayed.
Device Registration: D1-Series Cameras Step 4 The Windows update device driver wizard will be displayed; click Next. Step 5 The dialog shown at right will be displayed. Select the search option and click Next. Step 6 The dialog shown at right will be displayed. Holding down the shift key to prevent the Welcome dialog from opening automatically, insert the Nikon Capture 3 CD into the CD-ROM drive. Select CD-ROM drives and click Next.
Windows Step 7 The dialog shown at right will be displayed. Select “Install one of the other drivers” and click Next. Step 8 Select Nikon Digital Camera D1 Series from the dialog at right and click Next. Step 9 The dialog shown at right will be displayed; click Finish.
Device Registration: D1-Series Cameras Step 10 Confirm that “This device is working properly” appears under “Device status” in the General Tab of the Nikon Digital Camera D1 Series Properties dialog. Click Close. Step 11 Close the Device Manager, then click OK to close the System Properties window.
Windows Troubleshooting • If “1394 Bus host Controller” is not displayed in the Device Manager, if the IEEE 1394 board or card is listed under “Other Devices” or “Miscellaneous Devices,” or if the listing for the IEEE 1394 board or card is preceded by a red or yellow warning icon… …the computer does not recognize the IEEE 1394 board or card. Refer to the documentation provided with your computer or IEEE 1394 board or card for information on registering the board or card with the system.
Device Registration: D1-Series Cameras Windows Millennium Edition (Me) Before You Begin Confirm that the OHCI-compliant IEEE 1394 interface board has been correctly registered with the system. Click the My Computer icon on the desktop with the right mouse button and select Properties from the menu that appears. The System Properties dialog will be displayed; click the Device Manager tab. The bus controller for your IEEE 1394 board or card should be listed under “1394 Bus Controller.
Windows Step 2 The Device Manager sheet will be displayed. After confirming that “Nikon 1394 Protocol Device” is listed in the Device Manager, click the “+” sign to its left. If no “Nikon 1394 Protocol Device” listing appears or if “NIKON D1X” (or “D1” or “D1H”) is listed under Other Devices, reinstall the device driver as instructed in “Reinstalling the Device Driver” ( 85).
Device Registration: D1-Series Cameras Reinstalling the Device Driver — Windows Millennium Edition (Me) If “Nikon 1394 Protocol Device” is listed Other Devices, reinstall the device driver as described below. Step 1 Click the My Computer icon on the desktop with the right mouse button and select Properties from the menu that appears. The System Properties dialog will be displayed; click the Device Manager tab. Step 2 The Device Manager sheet will be displayed.
Windows Step 5 The dialog shown at right will be displayed; click Finish. Step 6 Confirm that “This device is working properly” appears under “Device status” in the General Tab of the Nikon Digital Camera D1 Series Properties dialog. Click Close. Step 7 Click OK to close the System Properties window.
Device Registration: D1-Series Cameras Updating the Drivers for the D1 — Windows Millennium Edition (Me) If you are already using the D1 with Nikon View DX or Nikon Capture, you will need to update the camera driver. Step 1 Click the My Computer icon on the desktop with the right mouse button and select Properties from the menu that appears. The System Properties dialog will be displayed; click the Device Manager tab. Step 2 The Device Manager sheet will be displayed.
Windows Step 5 The dialog shown below will be displayed. Select the driver located at “(Drive letter for CDROM drive):\” and click OK. Step 6 The dialog shown at right will be displayed; click Finish. Step 7 Confirm that “This device is working properly” appears under “Device status” in the General Tab of the Nikon Digital Camera D1 Series Properties dialog. Click Close.
Device Registration: D1-Series Cameras Step 8 Click OK to close the System Properties window. Troubleshooting • If “1394 Bus Controller” is not displayed in the Device Manager, if the IEEE 1394 board or card is listed under “Other Devices” or “Miscellaneous Devices,” or if the listing for the IEEE 1394 board or card is preceded by a red or yellow warning icon… …the computer does not recognize the IEEE 1394 board or card.
Windows Windows 98 Second Edition (SE) Before You Begin Confirm that your OHCI-compliant IEEE 1394 interface board or card has been correctly registered with the system. Click the My Computer icon on the desktop with the right mouse button and select Properties from the menu that appears. The System Properties dialog will be displayed; click the Device Manager tab. The bus controller for your IEEE 1394 board or card should be listed under “1394 Bus Controller.
Device Registration: D1-Series Cameras Step 2 The Device Manager sheet will be displayed. After confirming that “Nikon 1394 Protocol Device” is listed in the Device Manager, click the “+” sign to its left. If no “Nikon 1394 Protocol Device” listing appears or if “NIKON D1X” (or “D1” or “D1H”) is listed under Other Devices, reinstall the device driver as instructed in “Reinstalling the Device Driver” ( 92).
Windows Reinstalling the Device Driver — Windows 98 Second Edition (SE) If “Nikon 1394 Protocol Device” is listed Other Devices, reinstall the device driver as described below. Step 1 Click the My Computer icon on the desktop with the right mouse button and select Properties from the menu that appears. The System Properties dialog will be displayed; click the Device Manager tab. Step 2 The Device Manager sheet will be displayed.
Device Registration: D1-Series Cameras Step 5 The dialog shown at right will be displayed. Select “Search for a better driver than the one your device is using now. (Recommended)” and click Next. Step 6 The dialog shown at right will be displayed. Holding down the shift key to prevent the Welcome dialog from opening automatically, insert the Nikon Capture 3 CD into the CD-ROM drive. Select CD-ROM drive and click Next.
Windows Step 8 The dialog shown at right will be displayed; click Finish. Step 9 Confirm that “This device is working properly” appears under “Device status” in the General Tab of the Nikon Digital Camera D1 Series Properties dialog. Click Close. Step 10 Click OK to close the System Properties window.
Device Registration: D1-Series Cameras Updating Driver for the D1 — Windows 98 Second Edition (SE) If you are already using the D1 with Nikon View DX or Nikon Capture, you will need to update the camera driver. Step 1 Click the My Computer icon on the desktop with the right mouse button and select Properties from the menu that appears. The System Properties dialog will be displayed; click the Device Manager tab. Step 2 The Device Manager sheet will be displayed.
Windows Step 5 The dialog shown at right will be displayed. Select “Search for a better driver than the one your device is using now. (Recommended)” and click Next. Step 6 The dialog shown at right will be displayed. Holding down the shift key to prevent the Welcome dialog from opening automatically, insert the Nikon Capture 3 CD into the CD-ROM drive. Select CD-ROM drive and click Next. The Welcome Dialog If the Welcome dialog appears when the CD is inserted, click the Quit button to close the dialog.
Device Registration: D1-Series Cameras Step 8 The dialog shown at right will be displayed; click Finish. Restart If a message is displayed prompting you to restart Windows, click Restart. Step 9 Confirm that “This device is working properly” appears under “Device status” in the General Tab of the Nikon Digital Camera D1 Series Properties dialog. Click Close. Step 10 Click OK to close the System Properties window.
Windows Troubleshooting • If “1394 Bus Controller” is not displayed in the Device Manager, if the IEEE 1394 board or card is listed under “Other Devices” or “Miscellaneous Devices,” or if the listing for the IEEE 1394 board or card is preceded by a red or yellow warning icon… …the computer does not recognize the IEEE 1394 board or card. Refer to the documentation provided with your computer or IEEE 1394 board or card for information on registering the board or card with the system.
Macintosh This section explains how to install and uninstall Nikon Capture 3, how to connect your camera and insert the camera memory card in a card reader or PC card slot, and how to start Nikon Transfer.
Macintosh Installing Nikon Capture 3 on a Macintosh Before installing Nikon Capture 3, make sure that your computer meets the following system requirements. Mac OS 9.0.4*, 9.1, 9.2, Mac OS X (version 10.1.
Installing Nikon Capture 3 on a Macintosh When the Nikon Capture 3 CD is inserted into a CD-ROM drive on a computer running Mac OS 9.0, 9.1, or 9.2, the Welcome window will open automatically. To open the Welcome window in Mac OS X, open the Nikon Capture 3 CD and double-click the Welcome icon. In Mac OS 9, the Welcome window contains three tabs: the Software tab, the Bundled Software tab, and the Customer Support tab. The Bundled Software tab is not displayed in Mac OS X.
Macintosh Installing Software from the Software Tab Installing software from the software tab involves two steps: selecting the software and installing the software. Step 1: Select software Select the programs you want to install from the list in the Software tab. Nikon Capture 3 Check this box to install Nikon Capture 3. Nikon View 5 Check this box to install Nikon View 5. QuickTime 5.0.2 (Mac OS 9 only) Check this box to install QuickTime 5.0.2 from Apple Computer.
Installing Nikon Capture 3 on a Macintosh 2.1.2 — Accept the license agreement The license agreement will be displayed. After making sure that you have read and understood the contents of the agreement, click Accept to continue installation. The ReadMe file will be displayed. Take a few moments to view this file, which may contain important information that could not be included in the manual. After viewing the ReadMe file, click Continue….
Macintosh 2.1.3 — Choose Easy Install Choose Easy Install from the pull-down menu in the top left corner of the Nikon Capture Installer dialog. 2.1.4 — Confirm the install destination The disk and folder to which Nikon Capture 3 will be installed are listed under “Install Location.” 2.1.5 — Start the installer Click Install in the Nikon Capture Installer dialog to begin installation of Nikon Capture 3. A progress meter will be displayed during installation.
Installing Nikon Capture 3 on a Macintosh 2.1.6 — Personalize your copy of Nikon Capture 3 Enter your name and company (if applicable) to personalize your copy of Nikon Capture 3. Clicking OK will display a confirmation dialog; if the information you entered is correct, click Yes to proceed to the next step. To change the information you entered, click No. 2.1.
Macintosh Clicking Color space details displays a description of the different color-space profiles. Use this explanation to help you choose a color-space profile. The default output color-space profile can be changed at any time after installation in the Color Management tab of the Nikon Capture 3 Editor or Nikon Capture 3 Camera Control Preferences dialog. 2.1.8 — Complete installation of Nikon Capture 3 The following dialog is displayed when installation of Nikon Capture 3 is complete.
Installing Nikon Capture 3 on a Macintosh 2.2 — Install Nikon View 5 If you opted to install Nikon View 5 in Step 1, the Nikon View 5 installer will start. 2.2.1 — Accept the license agreement Installation of Nikon View 5 begins with the license agreement. After making sure that you have read and understood the contents of the agreement, click Accept to continue installation. The ReadMe file will be displayed.
Macintosh 2.2.2 — Choose Easy Install Choose Easy Install from the pull-down menu in the top left corner of the Nikon View 5 Installer dialog. 2.2.3 — Confirm the install destination The disk and folder to which Nikon View 5 will be installed are listed under “Install Location.” 2.2.4 — Start the installer Click Install in the Nikon View 5 Installer dialog to begin installation of Nikon Vie 5. A progress meter will be displayed during installation.
Installing Nikon Capture 3 on a Macintosh 2.2.5 — Complete installation of Nikon View 5 The following dialog is displayed when installation of Nikon View 5 is complete. Click Quit to proceed with installation of QuickTime 5.0.2, if selected (Mac OS 9 only). 2.2.6 — Restart the computer (Mac OS X only) The dialog shown below when installation is complete. Click Restart to restart your computer. 2.3 — Install QuickTime 5.0.2 (Mac OS 9 Only) If you opted to install QuickTime 5.0.
Macintosh 2.3.3 — Choose the installation type The Choose Installation Type dialog will be displayed. Select Recommended and click Continue. 2.3.4 — Skip registration The Registration dialog will be displayed. Leave the entry fields blank and click Continue. 2.3.5 — Adjust QuickTime settings The first of three QuickTime setup dialogs will be displayed. Click Next after reading the information in the first of these dialogs.
Installing Nikon Capture 3 on a Macintosh 2.4 — Restart the computer When installation of all components is complete, the dialog shown below will be displayed. Click Restart to end installation and restart your computer.
Macintosh Connecting to a Computer Before connecting your camera to a Macintosh computer for the first time, make sure that you install Nikon Capture 3. After installing Nikon Capture 3, turn the camera on and connect it to the computer, or insert the memory card into a card reader or a PC card slot. For more information about connecting your camera to a computer, see the documentation provided with your camera.
Connecting to a Computer Using a PC Card Slot When inserted in a PC-card adapter (available separately), the camera memory card functions as a Type II PCMCIA ATA card, allowing images to be read from the card. Inserting a Memory Card Remove the memory card from the camera and insert it in the adapter. Insert the adapter into a PCMCIA TYPE II ATA card slot on your computer. For more information on inserting the adapter, see the documentation provided with your computer.
Macintosh Starting Nikon Transfer Once installation is complete, Nikon Transfer will start automatically whenever your Nikon digital camera is connected to your computer and turned on, or when the camera memory card is inserted in a PC card slot or in a card reader connected to the computer. Note that only one camera can be connected to the computer at a time. For information on using other components of Nikon Capture 3, see the Nikon Capture 3 User’s Manual. Starting Nikon Transfer under Mac OS X (10.1.
Connecting to a Computer 2 Select None for “Automatic Task” and “Hot Plug Action” Select None for “Automatic Task” and “Hot Plug Action” and close the Image Capture dialog (if you install Apple iPhoto software after installing Nikon View 5, repeat steps 1 and 2 to prevent both iPhoto and Nikon View 5 from starting when you connect your camera). 3 Connect the camera Connect your camera to the computer and turn the computer on. Nikon Transfer will start automatically.
Macintosh Uninstall Uninstalling Nikon Capture 3 and Nikon View 5 This section describes how to uninstall the Macintosh versions of Nikon Capture 3 and Nikon View 5. Uninstalling Nikon Capture 3 1 2 Insert the Nikon Capture 3 CD into a CD-ROM drive and start the Nikon Capture 3 installer as described on pages 145–147 of “Installing Nikon Capture 3 on a Macintosh.” 3 4 Click the Uninstall button at the bottom right corner of the Nikon Capture Installer dialog.
Uninstall Uninstalling Nikon View 5 1 2 Insert the Nikon Capture 3 CD into a CD-ROM drive and start the Nikon View 5 installer as described on pages 145 and 152–154 of “Installing Nikon Capture 3 on a Macintosh.” 3 4 Click the Uninstall button at the bottom right corner of the Nikon View Installer dialog. Select Uninstall from the menu at the top left corner of the Nikon View Installer dialog. Once Nikon View 5 has been removed from your system, the dialog shown below will be displayed. Click OK.