/ Professional Technical Guide - RAW Video Recording - Revision 1.
Contents About RAW video 4 RAW video output with the Nikon Z series 5 RAW output options activation service 6 8 Atomos Ninja V RAW video output settings 1 Connecting the camera with the Atomos Ninja V 2 Camera settings 3 Atomos Ninja V settings 9 13 Other settings Standby timer settings Recording timecodes 15 16 Important notes on RAW output options 18 Editing the RAW video file 18 Frame sizes, etc.
Contents Blackmagic Design Video Assist 12G RAW video output settings 21 22 26 1 Connecting the camera with the Video Assist 12G 2 Camera settings 3 Video Assist 12G settings Other settings Standby timer settings Recording timecodes 28 29 Important notes on RAW output options 31 Editing the RAW video file 31 Frame sizes, etc.
About RAW video RAW video is a video file that is output directly from the c am e r a’s imag e s e ns o r w ith o ut any in - c am e r a imag e processing (RGB data before demosaicing)*. Like RAW still images, RAW video f iles record rich image information (tonal gradation, etc.), meaning they offer greater flexibility in color grading compared to Log video or video recorded in-camera. This makes them ideal for shoots where postproduction is going to be required.
RAW video output with the Nikon Z series Nikon’s RAW video output function outputs 12-bit RAW data via HDMI connector. The recording format depends on the specifications of the external recorder connected via HDMI. Recording to the camera’s memory card is not available. RAW video output is compatible with the Atomos Ninja V ver.10.2 (hereinaf ter called “Ninja V”) and Blackmagic Design Video Assist 12G ver.3.3 (hereinafter called "Video Assist 12G").
RAW output options activation service In order to use RAW video output with the Z 7/Z 6, it is necessary to activate RAW output options. Please contact your nearest Nikon-authorized service representative to receive this service*. * This is a paid service. Please refer to products’ websites for details. After activation, a RAW output options item will be added to the camera’s SETUP MENU > HDMI > Advanced.
Atomos Ninja V 7
RAW video output settings 1 Connecting the camera with the Atomos Ninja V Ninja V Z 7/Z 6 HDMI cable Connect an HDMI cable to the camera’s HDMI connector Connect the other end to the Ninja V HDMI video input 8 Note: • Please make sure the camera is turned off before plugging/ unplugging the HDMI cable. • A cable clip is recommended to prevent the HDMI cable from being accidentally detached. • If the image is not displayed on the Ninja V monitor, please check the HDMI cable connections.
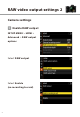
RAW video output settings 2 Camera settings 1 Enable RAW output SETUP MENU > HDMI > Advanced > RAW output options Select RAW output Select Enable (no recording to card) 9
RAW video output settings 2 2 Choose a RAW output mode SETUP MENU > HDMI > Advanced > RAW output options Select RAW output mode Pick your desired RAW output mode* * The menu screen shown here is for the Z 6. There are some differences from the Z 7. Please refer to P.19 for details.
RAW video output settings 2 3 Choose RAW output type A SETUP MENU > HDMI > Advanced > RAW output options Select RAW output type Select A 11
RAW video output settings 2 4 Turn on External recording control SETUP MENU > HDMI > Advanced > External recording control Select On ⇒ You can now start/stop recording by pressing the camera’s movie-record button. (recording) or (standby) icon will be displayed on the camera monitor.
RAW video output settings 3 Atomos Ninja V settings 1 Select Record > CODEC > ProRes RAW > Confirm ⇒ Supports RAW input via HDMI and displays monitor image in color. Note: Please refer to the Ninja V User Manual for more details about Ninja V settings.
RAW video output settings 3 2 Select Input > TRIGGER > HDMI ⇒ Now the camera’s movierecord button can be used to control the start/stop of recording on the Ninja V. If this is functioning correctly, a red frame will appear on the Ninja V monitor during recording. Note: Please refer to the Ninja V User Manual for more details about Ninja V settings.
Other settings Standby timer settings The monitor will turn off automatically and stop sending video output to the Ninja V after the length of time set in CUSTOM SETTING MENU c3 (Power off delay) > Standby timer. The Standby timer should be set to No Limit or a time longer than the anticipated recording time.
Other settings Recording timecodes 1 Enable Record timecodes in the camera MOVIE SHOOTING MENU > Timecode > Record timecodes Select On (with HDMI output) ⇒ The timecode is output from the camera to the Ninja V via HDMI. Hour, minute, second and frame number will be embedded to each frame during RAW video recording.
Other settings 2 Select Timecode > Source > HDMI on the Ninja V ⇒ The Ninja V receives a timecode from the camera. Note: Please refer to the Ninja V User Manual for more details about Ninja V settings.
Important notes on RAW output options • Upon receiving RAW video output functionality, camera firmware will also be updated to the latest available version. • After the RAW video output is activated, other camera features will continue to function normally. • Some RAW video output specifications are subject to change with future firmware updates. • ISO sensitivity can be set up to ISO 25600 with the Z 7 and ISO 51200 with the Z 6.
Frame sizes, etc. for RAW video recording The following frame sizes, frame rates and image areas are available with RAW video recording.
Blackmagic Design Video Assist 12G 20
RAW video output settings 1 Connecting the camera with the Video Assist 12G Video Assist 12G Z 7/Z 6 HDMI cable Connect an HDMI cable to the camera’s HDMI connector Connect the other end to the Video Assist 12G HDMI video input 21 Note: • Please make sure the camera is turned off before plugging/ unplugging the HDMI cable. • A cable clip is recommended to prevent the HDMI cable from being accidentally detached.
RAW video output settings 2 Camera settings 1 Enable RAW output SETUP MENU > HDMI > Advanced > RAW output options Select RAW output Select Enable (no recording to card) 22
RAW video output settings 2 2 Choose a RAW output mode SETUP MENU > HDMI > Advanced > RAW output options Select RAW output mode Pick your desired RAW output mode* * The menu screen shown here is for the Z 6. There are some differences from the Z 7. Please refer to P.32 for details.
RAW video output settings 2 3 Choose RAW output type B SETUP MENU > HDMI > Advanced > RAW output options Select RAW output type Select B 24
RAW video output settings 2 4 Turn on External recording control SETUP MENU > HDMI > Advanced > External recording control Select On ⇒ You can now start/stop recording by pressing the camera’s movie-record button. (recording) or (standby) icon will be displayed on the camera monitor.
RAW video output settings 3 Video Assist 12G settings 1 Select RECORD > INPUT > HDMI ⇒ Supports RAW input via HDMI. 2 Select RECORD > CODEC > Blackmagic RAW ⇒ Records HDMI input image in Blackmagic RAW and displays monitor image in color. Note: Please refer to the Video Assist 12G manual for more details about Video Assist 12G settings.
RAW video output settings 3 3 Select RECORD > TRIGGER RECORD > Video Start/Stop ⇒ Now the camera’s movierecord button can be used to control the start/stop of recording on the Video Assist 12G. If this is functioning correctly, timecodes will increment in red on the Video Assist 12G monitor during recording. Note: Please refer to the Video Assist 12G manual for more details about Video Assist 12G settings.
Other settings Standby timer settings The monitor will turn off automatically and stop sending video output to the Video Assist 12G after the length of time set in CUSTOM SETTING MENU c3 (Power off delay) > Standby timer. The Standby timer should be set to No Limit or a time longer than the anticipated recording time.
Other settings Recording timecodes 1 Enable Record timecodes in the camera MOVIE SHOOTING MENU > Timecode > Record timecodes Select On (with HDMI output) ⇒ The timecode is output from the camera to the Video Assist 12G via HDMI. Hour, minute, second and frame number will be embedded to each frame during RAW video recording.
Other settings 2 Select SETUP > TIMECODE INPUT > Video Input on the Video Assist 12G ⇒ The Video Assist 12G receives a timecode from the camera. Note: Please refer to the Video Assist 12G manual for more details about Video Assist 12G settings.
Important notes on RAW output options • Upon receiving RAW video output functionality, camera firmware will also be updated to the latest available version. • After the RAW video output is activated, other camera features will continue to function normally. • Some RAW video output specifications are subject to change with future firmware updates. • ISO sensitivity can be set from ISO 800 up to ISO 25600 with the Z 7 and ISO 51200 with the Z 6.
Frame sizes, etc. for RAW video recording The following frame sizes, frame rates and image areas are available with RAW video recording.
© 2020 Nikon Corporation