
Reference Guide (PDF Edition)

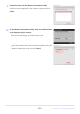
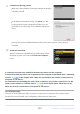


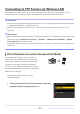

Table Of Contents
- Table of Contents
- When Your First Photo Can’t Wait
- Before You Begin
- Parts of the Camera
- Using the Menus
- First Steps
- Basic Photography and Playback
- Shooting Settings
- Video Recording
- Viewing Pictures
- Retouching Photographs
- Editing Videos
- Voice Memos
- Connecting to HDMI TVs and Recorders
- Connecting to Smart Devices
- Connecting to Computers or FTP Servers
- Making the Connection
- Computers: Connecting via USB
- Computers: Connecting via Wireless LAN
- Computers: Connecting via Ethernet
- FTP Servers: Connecting via Wireless LAN
- FTP Servers: Connecting via Ethernet
- What You Can Do When the Camera Is Connected to a Computer or FTP Server
- Troubleshooting Wireless LAN and Ethernet Connections
- Connecting to Other Cameras
- Flash Photography
- Remote Flash Photography
- The Photo Shooting Menu
- Menu Items and Defaults
- Shooting Menu Bank
- Extended Menu Banks
- Storage Folder
- File Naming
- Primary Slot Selection
- Secondary Slot Function
- Image Area
- Tone Mode
- Image Quality
- Image Size Settings
- RAW Recording
- ISO Sensitivity Settings
- White Balance
- Set Picture Control
- Manage Picture Control
- Set Picture Control (HLG)
- Color Space
- Active D-Lighting
- Long Exposure NR
- High ISO NR
- Vignette Control
- Diffraction Compensation
- Auto Distortion Control
- Skin Softening
- Portrait Impression Balance
- Photo Flicker Reduction
- High-Frequency Flicker Reduction
- Metering
- Flash Control
- Flash Mode
- Flash Compensation
- Focus Mode
- AF-Area Mode
- AF Subject Detection Options
- Vibration Reduction
- Auto Bracketing
- Multiple Exposure
- HDR Overlay
- Interval Timer Shooting
- Time-Lapse Video
- Focus Shift Shooting
- The Video Recording Menu
- Menu Items and Defaults
- Shooting Menu Bank
- Extended Menu Banks
- Storage Folder
- File Naming
- Destination
- Video File Type
- Frame Size/Frame Rate
- Video Quality (N-RAW)
- Image Area
- Extended Oversampling
- ISO Sensitivity Settings
- White Balance
- Set Picture Control
- Manage Picture Control
- HLG Quality
- Active D-Lighting
- High ISO NR
- Vignette Control
- Diffraction Compensation
- Auto Distortion Control
- Skin Softening
- Portrait Impression Balance
- Video Flicker Reduction
- High-Frequency Flicker Reduction
- Metering
- Focus Mode
- AF-Area Mode
- AF Subject Detection Options
- Vibration Reduction
- Electronic VR
- Microphone Sensitivity
- Attenuator
- Frequency Response
- Wind Noise Reduction
- Mic Jack Plug-in Power
- Headphone Volume
- Timecode
- External Rec. Cntrl (HDMI)
- Hi-Res Zoom
- The Custom Settings Menu
- Menu Items and Defaults
- Custom Settings Bank
- a1: AF-C Priority Selection
- a2: AF-S Priority Selection
- a3: Focus Tracking with Lock-On
- a4: Focus Points Used
- a5: Store Points by Orientation
- a6: AF Activation
- a7: Focus Point Persistence
- a8: Limit AF-Area Mode Selection
- a9: Focus Mode Restrictions
- a10: Focus Point Wrap-Around
- a11: Focus Point Display
- a12: Built-in AF-Assist Illuminator
- a13: Focus Peaking
- a14: Focus Point Selection Speed
- a15: Manual Focus Ring in AF Mode
- b1: ISO Sensitivity Step Value
- b2: EV Steps for Exposure Cntrl
- b3: Easy Exposure Compensation
- b4: Matrix Metering Face Detection
- b5: Center-Weighted Area
- b6: Fine-Tune Optimal Exposure
- b7: Keep Exp. When f/ Changes
- c1: Shutter-Release Button AE-L
- c2: Self-Timer
- c3: Power Off Delay
- d1: Continuous Shooting Speed
- d2: Maximum Shots per Burst
- d3: Pre-Release Capture Options
- d4: Sync. Release Mode Options
- d5: Extended Shutter Speeds (M)
- d6: Limit Selectable Image Area
- d7: File Number Sequence
- d8: View Mode (Photo Lv)
- d9: Starlight View (Photo Lv)
- d10: Warm Display Colors
- d11: LCD Illumination
- d12: View All in Continuous Mode
- d13: Release Timing Indicator
- d14: Image Frame
- d15: Grid Type
- d16: Virtual Horizon Type
- d17: Custom Monitor Shooting Display
- d18: Custom Viewfinder Shooting Display
- d19: High FPS Viewfinder Display
- e1: Flash Sync Speed
- e2: Flash Shutter Speed
- e3: Exposure Comp. for Flash
- e4: Auto Flash ISO Sensitivity Control
- e5: Modeling Flash
- e6: Auto Bracketing (Mode M)
- e7: Bracketing Order
- e8: Flash Burst Priority
- f1: Customize i Menu
- f2: Custom Controls (Shooting)
- f3: Custom Controls (Playback)
- f4: Control Lock
- f5: Reverse Dial Rotation
- f6: Release Button to Use Dial
- f7: Reverse Indicators
- f8: Reverse Ring for Focus
- f9: Focus Ring Rotation Range
- f10: Control Ring Response
- f11: Switch Focus/Control Ring Roles
- f12: Full-Frame Playback Flicks
- f13: Prefer Sub-selector Center
- g1: Customize i Menu
- g2: Custom Controls
- g3: Control Lock
- g4: Limit AF-Area Mode Selection
- g5: Focus Mode Restrictions
- g6: AF Speed
- g7: AF Tracking Sensitivity
- g8: Hi-Res Zoom Speed
- g9: Fine ISO Control (Mode M)
- g10: Extended Shutter Speeds (Mode M)
- g11: View Assist
- g12: Zebra Pattern
- g13: Limit Zebra Pattern Tone Range
- g14: Grid Type
- g15: Brightness Information Display
- g16: Custom Monitor Shooting Display
- g17: Custom Viewfinder Shooting Display
- g18: Red REC Frame Indicator
- The Playback Menu
- The Setup Menu
- Menu Items and Defaults
- Format Memory Card
- Language
- Time Zone and Date
- Monitor Brightness
- Monitor Color Balance
- Viewfinder Brightness
- Viewfinder Color Balance
- Finder Display Size (Photo Lv)
- Limit Monitor Mode Selection
- Auto Rotate Info Display
- AF Fine-Tuning Options
- Non-CPU Lens Data
- Save Focus Position
- Auto Temperature Cutout
- Sensor Shield Behavior at Power Off
- Clean Image Sensor
- Image Dust Off Ref Photo
- Pixel Mapping
- Image Comment
- Copyright Information
- IPTC
- Voice Memo Options
- Camera Sounds
- Silent Mode
- Touch Controls
- HDMI
- USB Connection Priority
- Location Data
- Wireless Remote (WR) Options
- Assign Remote (WR) Fn Button
- Conformity Marking
- Battery Info
- USB Power Delivery
- Energy Saving (Photo Mode)
- Slot Empty Release Lock
- Save/Load Menu Settings
- Reset All Settings
- Firmware Version
- The Network Menu
- My Menu/Recent Settings
- Troubleshooting
- Technical Notes
- Compatible Lenses and Accessories
- Camera Displays
- Compatible Flash Units
- Other Compatible Accessories
- Optional MB-N12 Power Battery Packs
- Parts of the MB-N12: Names and Functions
- Attaching the MB-N12
- Inserting Batteries in the MB-N12
- Charging Batteries Using an Optional EH-7P Charging AC Adapter or EH-8P AC Adapter
- Using an Optional EH-7P Charging AC Adapter or EH-8P AC Adapter as a Power Source
- Checking the Level of the Batteries in the MB-N12
- Precautions for Use
- If the Holder-Chamber Cover Detaches
- Specifications
- Attaching an EP-5B Power Connector and EH-5d, EH-5c, or EH-5b AC Adapter
- Software
- Caring for the Camera
- Caring for the Camera and Battery: Cautions
- Specifications
- Approved Memory Cards
- Portable Chargers (Power Banks)
- Memory Card Capacity
- Memory Card Capacity (Videos)
- Battery Endurance
- Trademarks and Licenses
- Notices
- Bluetooth and Wi-Fi (Wireless LAN)
- Index

Complete the pairing process.
When the camera displays a message stating that pairing is
complete, pr
ess J.
In the Wireless Transmitter Utility, click [Next]; you will
be prompt
ed to choose a destination folder. For more
information, see online help for the Wireless Transmitter
Utility.
Check the connection.
When a connection is established, the profile name will be
display
ed in green in the camera [Connect to computer]
menu.
A connection will be established between the camera and computer when pairing is
complete.
A connection has now been established between the camera and the comput
er.
Pictures taken with the camera can be uploaded to the computer as described under “Uploading
Pictures” (
0 359) in the chapter titled “What You Can Do When the Camera Is Connect
ed to a
Computer or FTP Server”.
For information on controlling the camera from a computer using Camera Control Pro2 or NX
Tether, see the section on “Camera Control” (
0 365) in the chapter titled “What You Can Do
When the Camera Is Connect
ed to a Computer or FTP Server”.
Tip: Firewall Settings
TCP port 15740 and UDP port 5353 are used for connections to computers. File transfer may be
blocked if the server firewall is not configured to allow access to these ports.
333
Computers: Connecting via Ethernet
11
12