
Specifications


15
IMPORTANT WARNINGS
1. This machine is also suitable for normal housekeeping
purposes in hotels, schools, hospitals, factories, shops
and offices.
2. This machine is not suitable for picking up health
endangering dust.
3. This machine is for dry use only and shall not be used or
stored outdoors in wet conditions. Store indoors between
max. 60 C (degrees centigrade) and min. 0 C (degrees
centigrade).
4. The machine for vacuum dry dust must not be used for
the suction of water or other liquids.
5. The machine must not be used for picking up combustible
or explosive materials, nor should it be used in an
explo sive atmosphere.
6. Under no circumstances should the machine be used for
picking up hot material. In particular the machine must not
be used for cleaning open and closed fireplaces, ovens or
similar that contain warm or glowing ashes.
7. The machine must not be used if the electrical cord
shows any sign of damage. Regularly inspect the cord for
damage, in particular if it has been crushed, shut in a door
or run over.
A detachable supply cord with integrally molded plugs
must not be repaired. It has to be replaced by a new
supply cord supplied by NILFISK if the cable or plugs are
damaged.
8. The machine must not be used if it is faulty.
9. Do not unplug by pulling on cord. To unplug, grasp the
plug, not the cord.
10. When repairing or replacing the cord, the same type of
cord as originally supplied with the machine must be used.
This cord can be supplied by NILFISK.
11. The plug must always be removed from the socket outlet
before starting any service work of the machine or the
cord.
12. Repair of the electrical unit with motor or the cord must
only be carried out by a skilled or instructed person after
having disconnected the main switch installed prior to the
machine or after having removed the plug from the current
socket.
13. No changes or modifications to the mechanical or
elec trical safety devices should be made.
Instructions for use
Before the vacuum cleaner is ready for use, the hose must be
fitted to the curved tube as described under point 5.
Before using the vacuum cleaner make sure that the voltage
shown on the rating plate corresponds with the mains voltage.
The vacuum cleaner is supplied with a paper dust bag already
in place. Never use the vacuum cleaner without a properly
fitted dust bag. The procedure for replacing the dust bag is
described under point 8.
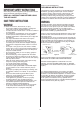
1 Starting / stopping
1 Place the appliance plug of the cable in the motor socket.
Plug the cable into the wall socket.
Press button 1. to start the motor
Press button 1. again to stop it.
After cleaning, unplug the cable from the wall socket.
Detaching the power cord
To prolong the life of your cord, detach it from the motor each
time after cleaning, roll it up loosely and store it.
2 Note
Do not roll the cord tightly around the motor as this will place a
strain on the cord and considerably shorten its life.
Thermal cut-out protection
(Only USA and Canada)
The vacuum is provided with a thermal cut-out protection
mechanism. This prevents the motor from overheating if a
blockage should occur. If this occur start by removing the
electrical cord from the power outlet. Then remove the cause
of the blockage to allow free air passage. Wait at least 5-10
minuttes. Then put back the electrical cord to the power outlet.
When the motor is cool, it will automatically start again.
3 Micro-Static Filter
The grey Micro-Static filter on the top of the motor attracts and
retains micro-particles efficiently. In order to ensure a constant
cleaning of the exhaust air and to avoid overheating of the
motor, it is essential that the filter is replaced regularly. The
Micro-Static filter should be replaced after approx. 50 hours
use, equivalent to one year of domestic use.
Replacing
1Turn the two screws with a coin until their slots are vertical.
2 Release the handle by a gentle downward pressure at its
centre. Press until both ends spring out from the motor
recess.
3 Lift off the exhaust grill and the filter. The sound absorbent
material must remain on top of the motor.
4 Remove the grey filter and mount the new one. Replace the
grill. Locate the handle into position and lock it by turning the
screws until their slots are horizontal.
4 Hose connection
Insert the bayonet coupling into the suction inlet, and lock it
in place by turning it clockwise. Reverse this procedure to
disconnect the hose.