2015 QUICK REFERENCE GUIDE 1655184_15b_GTR_QRG_Cover_062414.
1655184_15b_GTR_QRG_Cover_062414.
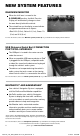
TABLE OF CONTENTS NEW SYSTEM FEATURES RearView Monitor.................................................................................................................................... 2 USB (Universal Serial Bus) Connection Port/iPod® Interface..................................................... 2 NavTraffic and NavWeather.................................................................................................................. 2 ESSENTIAL INFORMATION Tire Pressure Monitoring System (TPMS)......
NEW SYSTEM FEATURES REARVIEW MONITOR When the shift lever is moved to the R (REVERSE) position, the Multi Function Display will automatically change to show the area directly behind the vehicle. The colored lines on the display screen indicate the approximate distances to objects: •R ed 1.5 ft (0.5 m); Yellow 3 ft (1 m); Green 7 ft (2 m) and 10 ft (3 m). For more information, refer to the “Monitor system (section 9)” of your Multi Function Display Owner’s Manual.
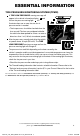
ESSENTIAL INFORMATION TIRE PRESSURE MONITORING SYSTEM (TPMS) A TIRE LOW PRESSURE warning message will appear in the vehicle information display 1 and the low tire pressure warning light 2 will illuminate when one or more tires are low in pressure and air is needed. 1 •T he tire pressures should be checked when the tires are cold. The tires are considered cold after the vehicle has been parked for 3 hours or more or driven less than 1 mi (1.6 km) at moderate speeds.
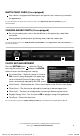
ESSENTIAL INFORMATION FUEL-FILLER DOOR/CAP The fuel-filler door is located on the passenger side, towards the rear of the vehicle. When the doors of the vehicle are locked or unlocked, the fuel-filler door is automatically locked or unlocked at the same time. Push 1 of the power door lock switches to unlock the fuel-filler door from inside the vehicle or push the door handle request switch to unlock the fuel-filler door from outside the vehicle.
MATTE PAINT CARE (if so equipped) Your vehicle is equipped with Matte paint and special care is necessary to maintain the appearance. For more information on special care instructions, refer to the “Appearance and care (section 7)” of your Owner’s Manual. CARBON-BASED PARTS (if so equipped) Do not wax carbon parts such as the rear diffuser or the optional dry carbon fiber rear spoiler Waxing speeds up deterioration by allowing water under the carbon layer.
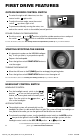
FIRST DRIVE FEATURES NISSAN INTELLIGENT KEY® SYSTEM The NISSAN Intelligent Key® system allows you to lock or unlock the vehicle and open the trunk. It is important to make sure the Intelligent Key is with you (that is, in your pocket or purse). 1 The operating range of the Intelligent Key is within 31.5 in (80 cm) from each request switch. To lock the vehicle, push either door handle request switch 1 once or press the button 2 on the key fob.
TRUNK LID RELEASE Use 1 of the following methods to unlatch the trunk then raise the trunk lid to open: Push the trunk open request switch 1 under the trunk handle for more than 1 second. 1 Press the trunk button HOLD on the NISSAN Intelligent Key® for more than 1 second. From inside the vehicle, push down on the trunk lid release switch 2 located on the left side of the instrument panel. 2 For more information, refer to the “Pre-driving checks and adjustments (section 3)” of your Owner’s Manual.
FIRST DRIVE FEATURES OUTSIDE MIRROR CONTROL SWITCH To select the right or left side mirror, turn the control switch 1 right or left. 1 2 To adjust the mirror angle, move the control switch 1 up, down, right or left. To prevent accidentally moving the mirror, turn and set the control switch to the middle (neutral) position.
LANE CHANGE SIGNAL To signal a lane change, move the lever up or down to the point where the indicator light begins to flash but the lever does not latch. The turn signal will flash 3 times automatically. HIGH BEAM SELECT Push the headlight control switch forward 4 to select the high beam function. The blue indicator light illuminates in the instrument panel. Pull the headlight switch back to the original position to select the low beam. The blue indicator light extinguishes.
FIRST DRIVE FEATURES 8 1 4 9 2 6 3 5 7 AUTOMATIC CLIMATE CONTROLS 1 AUTO BUTTON/DRIVER’S SIDE TEMPERATURE CONTROL DIAL The AUTO mode can be used year-round. Press the AUTO button, and the system will automatically control the inside temperature (automatic cooling and/or dehumidified heating). Air flow distribution and fan speed are also controlled automatically. To set the desired temperature, turn the temperature control dial left for cooler air or right for warmer air.
7 DEFROSTING/DEFOGGING REAR WINDOW AND OUTSIDE HEATED MIRRORS Push the rear window defroster switch This function automatically turns off after approximately 15 minutes. 8 to turn the system on or off. AIR RECIRCULATION BUTTON Press the air recirculation button to recirculate interior air inside the vehicle. This setting can be used to assist in avoiding outside odors and in cooling down the vehicle’s interior.
FIRST DRIVE FEATURES STATION PRESET BUTTONS 4 Six stations can be set for the AM band, 12 for the FM band and 18 for satellite radio. To store a station in a preset, you must first select a radio band by pressing the AM•FM button 5 or SAT button 6 then tune to the desired AM, FM or satellite radio station. Then press and hold the desired station preset button (1-6) until the sound is briefly muted. The station indicator will then display, and the sound will resume.
SYSTEM GUIDE DRIVE COMPUTER The drive computer is located in the vehicle information display 1 at the bottom of the tachometer. Press the button 2 to cycle through the following modes on the vehicle information display: 1 • MPG – Displays the current fuel economy. • MPH – Displays the current vehicle speed. •C RUISE/MPH – Displays the set cruise control status. •M PG/MPH – Displays the average fuel economy and average speed since the last reset.
SYSTEM GUIDE BLUETOOTH® HANDS-FREE PHONE SYSTEM A cellular telephone should not be used while driving so full attention may be given to vehicle operation.* Before using the hands-free feature, you need to setup or connect the system to recognize your compatible cellular phone(s). Five Bluetooth®enabled phones can be connected. After set-up, the system automatically connects with a connected phone when the ignition is in the ACC or ON position as long as the phone is on and in the vehicle.
2. Initiate connecting from the phone. • The connecting procedure varies according to each cellular phone model. For detailed connecting instructions and a list of compatible phones, please visit www.nissanusa.com/bluetooth. • When prompted for a PIN code, enter “1234” from the handset. (The PIN code is assigned by NISSAN and cannot be changed.) 3. W hen the connecting is complete, the screen will return to the Phone menu display.
SYSTEM GUIDE RECEIVING/ENDING A CALL To accept the call, press the button on the steering wheel or touch the “Answer” key. To reject the call, touch the “Reject Call” key. o hang-up, press the T “Hang Up” key. button or touch the For more information, refer to the “Bluetooth® Hands-Free Phone System (section 4)” of your Multi Function Display Owner’s Manual or please visit www.nissanusa.com/bluetooth.
Make sure the correct region is selected. To change the region, touch the “Change Region” key and select the appropriate region. Touch the “Street Address” key. A character input screen is displayed. Enter the street number of your home then touch the “OK” key. Enter your street name then touch the “OK” key. The map screen is displayed. Press the directional buttons to adjust your home location if necessary. After adjusting the location, touch the “ENTER” key.
SYSTEM GUIDE Enter the name of the street. After finishing the entry, touch the “List” key. A list of possible street names is displayed. Touch the correct name of the destination from the list. You might need to touch the “UP” or “DOWN” key to find the preferred street name. The selected destination is displayed at the center of the map. Touch the “Start” key after confirming the location of the displayed destination.
To verify the programing is complete, press and hold the HomeLink button and observe the indicator light: •A solid, continuous light indicates the programing is complete and the HomeLink button will activate your device. •A blinking light that turns to a solid, continuous light after 2 seconds indicates additional steps are required to complete the programing. An additional person may make the remaining steps easier.
MEMO 1655184_15b_GTR_QRGText-Insert_062414.
This Quick Reference Guide is intended to provide an overview of some of the unique features of your new vehicle. Please see your Owner’s Manual for important safety information and system operation limitations. Features and equipment in your vehicle may vary depending on model, trim level, options selected, order, date of production, region or availability. Therefore, you may find information about features or equipment that are not included or installed on your vehicle.