
User's Manual


Table Of Contents
- Introduction
- Parts of the Camera
- The Basics of Shooting and Playback
- Shooting Features
- Easy Auto Mode
- Scene Mode (Shooting Suited to Scenes)
- Special Effects Mode (Applying Effects When Shooting)
- Smart Portrait Mode (Capturing Images of Smiling Faces)
- Auto Mode
- Functions That Can Be Set Using the Multi Selector
- Functions That Can Be Set with the MENU Button (Shooting Menu)
- Functions That Cannot Be Used Simultaneously
- Focusing
- Playback Features
- Recording and Playing Back Movies
- General Camera Setup
- Connecting the Camera to a TV, Computer, or Printer
- Reference Section
- Using Easy Panorama (Shooting and Playback)
- Viewing and Deleting Images Captured Continuously (Sequence)
- Editing Still Images
- Before Editing Images
- Quick Retouch: Enhancing Contrast and Saturation
- D-Lighting: Enhancing Brightness and Contrast
- Red-eye Correction: Correcting Red Eyes Caused by Using the Flash
- Skin Softening: Softening Skin Tones
- Filter Effects: Applying Digital Filter Effects
- Small Picture: Reducing the Size of an Image
- Crop: Creating a Cropped Copy
- Connecting the Camera to a TV (Viewing Images on a TV)
- Connecting the Camera to a Printer (Direct Print)
- Editing Movies
- The Shooting Menu (for Auto Mode)
- The Smart Portrait Menu
- The Playback Menu
- The Movie Menu
- The Setup Menu
- Error Messages
- File Names
- Optional Accessories
- Technical Notes and Index
E16
Reference Section
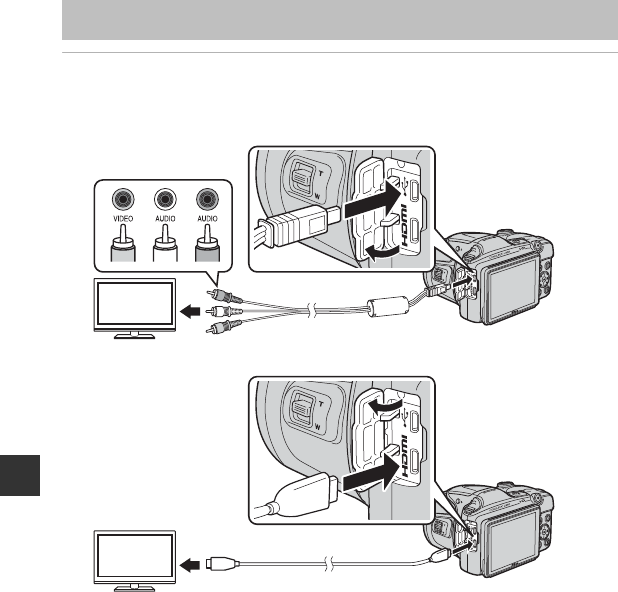
1 Turn off the camera and connect it to the TV.
• Make sure that the plugs are properly oriented. Do not insert or remove the plugs at an
angle when connecting or disconnecting them.
When using the audio/video cable
When using a commercially available HDMI cable
Connecting the Camera to a TV (Viewing Images on a TV)
WhiteYellow Red
HDMI micro connector (Type D)
to HDMI jack