Assembly Instructions Caution : You must read this before you proceed. BISTRO CHAIR CAUTION : This chair is NOT a TOY. Keep your child / children at bay in the process of assembly.
Assembly Preparation Before Beginning Assembly: Parts list NO.
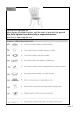
Hard ware H J Washers(8mm) 12 Spring washers(8mm) 12 Nuts(8mm) 12 Spanner 1 Assembly Step Parts Introduction Backrest (A) Chair seat(B) Legs with pre‐attached Leveller(C) FRONT FACING This Bistro Chair has multiple parts and may require up to some 20 minutes to assemble. To give you an overview of the Chair parts, the above picture is to help you put the various parts into perspective. Please read through the instructions herebelow to familiarise the parts and steps before assembly.
Unpack and place all parts on a clean soft surface. Attach the Backrest(A) to the the Chair Seat (B) by using Washers, Spring washers, Nuts (H) . The Spanner p ((J)) is used to affix the Nuts. DO NOT OVERTIGHTEN, yet. Attach the Legs with pre-attached Leveller(C) to the stud-points located on the underside of the Chair Seat(B)by using Washers, Spring Washers and Nuts (H). Then use of the Nuts and Washers is to hold the legs in position. Then Spanner (J) is used to affix the Nuts. DO NOT OVERTIGHTEN, yet.
Turn the chair rightside up. Adjust the pre-installed Levellers, until the chair is level with the ground. Now, Fully tighten these Bolts fully in sequential manner. Your chair is now ready for use.