Caution : You must read this before you proceed Club Chair Label Picture Description QTY A Left Armrest (with Legs) 1 B Right Armrest (with Legs) 1 C Backrest (with Legs) 1 Noble House Home Furnishings LLC Page 1 OF 7
D Seat Panel 1 E Front Panel (with Legs) 1 F Left Front Foot Clip 1 G Right Front Foot Clip 1 H Left Back Foot Clip 1 I Right Back Foot Clip 1 M Seat Cushion 1 Q Rubber Hammer 1 Before Beginning Assembly: Noble House Home Furnishings LLC Page 2 OF 7
Overview Backrest (C) Right Armrest (B) Left Armrest (A) Seat Cushion (M) Seat Panel (D) Front Panel (E) Left Back Foot Clip (H) Right Front Foot Clip (G) Left Front Foot Clip (F) Front Facing This Club Chair has multiple parts and may require up to 30 minutes to assemble. To give you an overview of the Club Chair parts, the above picture is to help you put the various parts into perspective. Please read through the instructions below to familiarise yourself with the parts and steps before assembly.
Step 2 Clasp Pear-shaped Clasp Mounting Position Place the Backrest(C) upright and align Seat Panel(D) as shown above. There are four Pear-shaped Clasp mounting positions on the Backrest(C), and four Clasps on the Seat Panel(D). Insert the four Clasps into four mounting positions and push down to button up the Clasps with the Rubber Hammer(Q). Step 3 Pear-shaped Clasp Mounting Position Clasp Turn the assembly onto it's side as shown.
Step 4 Button up the Clasps with the Rubber Hammer(Q) from left to right as shown above. Step 5 With the help of an adult partner, turn the assembly over as shown above. Repeat the same process from Steps 3 - 4 with the Right Armrest(B).
Step 6 Attach the Left Front Foot Clip(F), Right Front Foot Clip(G), Left Back Foot Clip(H), Right Back Foot Clip(I) to the feet of the Club Chair using the Rubber Hammer(Q) as shown above. Step 7 With the help of your adult partner, stand the Club Chair up on a Lever surface, to check for wobbles. If there are wobbles, use the Rubber Hammer(Q) to ensure all parts are properly secured. Step 8 Place the Cushion(M) on the seat. Your Club Chair is ready for use.
Noble House Home Furnishings LLC Page 7 OF 7
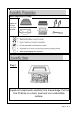
Warnings: You must read this before you proceed.
Part NO.
Before Beginning Assembly: Unpack all the parts for a clear overview. Step 1 Unpack all components carefully from the package. Put the Fire Pit Body on a hard, level and non-combustible surface.
Step 2 Insert Bowl Handles into the holes on the inside Fire Bowl wall, as depicted in the picture. Step 3 Put the Fire Bowl into the Fire Pit opening as shown in Step 3 above. Make sure it sits evenly in the frame housing.
Step 4 Take out the Handles after the Fire Bowl is placed inside the Fire Pit Main Housing. Place the Log Grill into the Fire Bowl. Step 5 Put the Spark Safeguard Screen onto the top opening of the Fire Pit Body and make sure it sits into it evenly. The Firepit is ready for use. CAUTION: Firepit will become hot during use and remain hot after use.