
Instructions / Assembly


Shaping Instructions
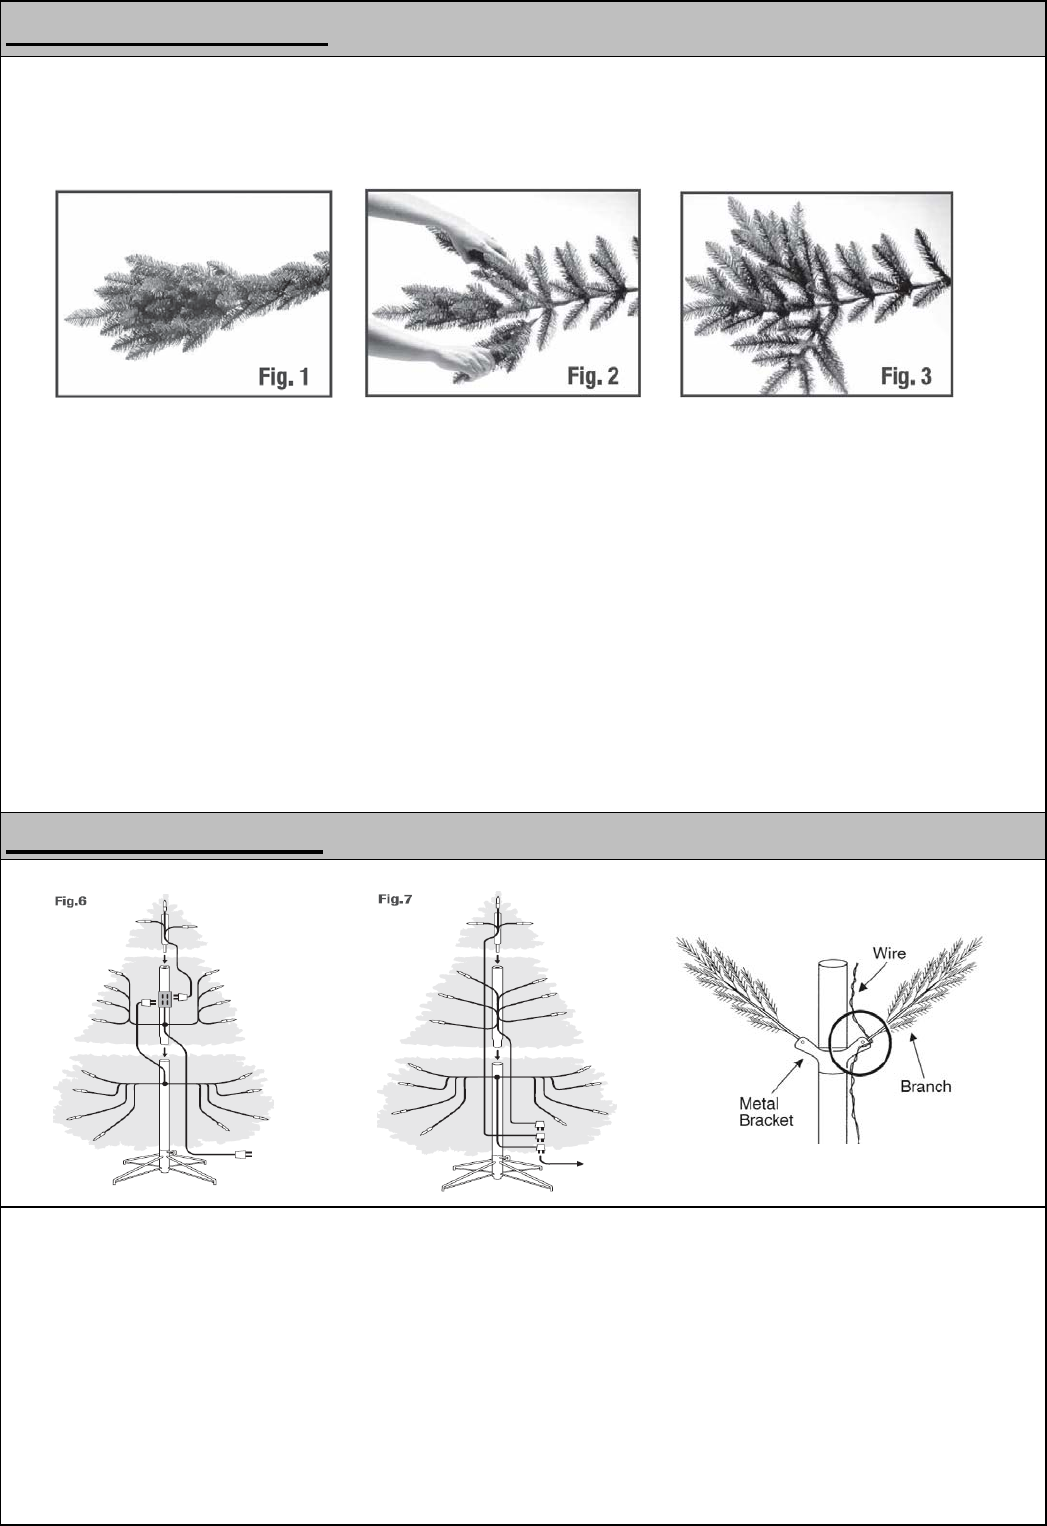
Pre-Lit Hinged Trees
Style 1: Some tree styles will have a single extension cord that will run from the
center part of tree and out to the electrical outlet ALL lights strings will plug into
this single cord(Figure 6).
Style 2: The light string cords from all sections should be pulled down through
the center of the tree, The cords can then be plugged inton each other and then
into an extension cord to power supply(Fighre7).
IMPORTANT NOTE:When lowering branches be extremely careful not to tangle
wire in gap between branch and tracket.
Shaping the Tree Branches is the last step of assembly. The care and attention
given to this final process will result in a genuinely beautiful and appealing
holiday centerpiece.
1. Every tree style is shipped from the factory with the tips of each Branch
compressed to the center(Figure 1).
2.Each Branch tip must be shaped to it's proper position to give the tree a natural
look. This is done by gently grasping the left and right wing tips and spreading
them out away from the centre tip(Fighre 2).
3.Each individual tip should then be spread out separately.Tips should then be
bent slightly upward to add a more natural looking appearance. Fighre 3 shows a
typical tree Branch after shaping.
4.As you shape colser to the top, the Branches will not have wing tips, but will
otherwise shape in the same manner as lower sections.
Page 3 OF 5