
User Manual


6
Connecting your OSU to a computer
This section describes how to connect your OSU to a computer.
If you want to connect your OSU to a network device (such as a
router or switch), refer to the section “Connecting the OSU to a
network” on page 24, in this guide.
INSTALLATION OVERVIEW
The installation consists of the following major tasks, each of which
is explained in greater detail in the sections that follow:
1 After ensuring your Ethernet NIC is installed properly, make sure
your computer is set up to automatically obtain an IP address.
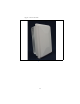
2 Attach the OSU mounting bracket to the outside of the house,
then snap the OSU into the bracket.
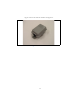
3 Mount the NIM box to the outside of the house.
4 Run the power cable, the Power/Ethernet cable, and RJ-45 cable
through a hole drilled through house’s wall.
5 Plug the cables into the NIM box.
6 Connect the grounding wires.
7 Back inside the house, plug in the power cord to standard
household power.
8 Scan for the strongest service provider signal.
9 Connect to the Internet.
1
SETTING UP THE COMPUTER TO DYNAMICALLY
RECEIVE AN IP ADDRESS
You must set up your computer so it can dynamically receive an IP
address. Your service provider assigns your computer an IP address
so that the Internet information you request can reach your computer.
• If you are running Windows 95, Windows NT, Windows 98 or
Windows ME, go to “Windows 95, Windows NT, Windows 98,
Windows ME: Setting up the network connection” on page 7.
• If you are running Windows 2000, go to “Windows 2000: Setting
up the network connection” on page 7.
• If you don’t see your operating system listed here, check the sys-
tem’s help file. Most explain how to set up a system to dynami-
cally receive an IP address.