
User's Manual


9
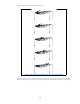
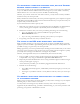
The blinking lights indicate the strength of the signal received. The stronger the signal, the
more lights on the RSU blink on and off. Figure 7 illustrates blinking lights.
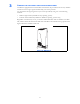
5 Point the back of the RSU to the right of the starting position. Remove your hands from the
RSU, and let it stand still for about five seconds.
6 Again, note how many lights are blinking while the RSU is in this orientation. The stronger
the signal, the more lights on the RSU blink.
7 Point the back of the RSU to the left of the starting position. Remove your hands from the
RSU, and let it stand still for about 5 seconds. Note how many lights blink while the RSU is
in this orientation.
8 Remembering the strongest signal reported, re-orient the back of the RSU in the direction
that the RSU was pointed when the strongest signal was found.
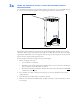
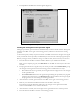
9 Plug the Ethernet cable into your computer. The other end of the cable should already be
plugged into the RSU.
10 Turn on your computer. During power up, the lights on the RSU stop blinking, and are
continuously lit.
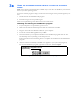
11 After the lights stop blinking, observe the lights for about 30 to 90 seconds. Make sure the
same number (or more) of indicator lights stay on.
• If the same number or more lights are on, you are ready to use your high-speed Internet
connection.
• If fewer lights are on, complete the fine tuning steps described in the section, “Fine-tun-
ing the connection to the service provider” on page 12.
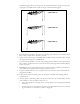
Figure 7: Indicator lights blinking simultaneously: signal found
Lights blink on
Lights blink off
Lights blink on