User Guide
DE Hiermit erklärt Nokia, daß dieser digitale Receiver, Mediamaster 230 S, den geltenden Anforderungen sowie anderen geltenden Bestimmungen der Richtlinie 1999/5/EC entspricht. IT Nokia dichiara che questo ricevitore digitale, Mediamaster 230 S, è conforme ai requisisti fondamentali e alle disposizioni della Direttiva 1999/5/ EC. EL Με το παρόν, η Nokia δηλώνει ότι ο παρών ψηφιακός δέκτης, Mediamaster 230 S, συµµορφώνεται µε τις βασικές απαιτήσεις και τις σχετικές διατάξεις της οδηγίας 1999/5/ EC.
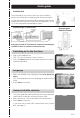
Quick guide Satellite dish The satellite dish must have a clear view to the satellites. Mount the satellite dish according to the fitting instructions. In case you already have a satellite dish mounted, note that you need a Universal LNB which works on the frequencies 10.7012.75 GHz to be able to handle digital signals.
Quick guide One antenna/one LNB configuration Select this alternative if you have one (1) LNB mounted on the antenna. • Press opt to view the predefined channel. LNB type Select the correct LNB type for your configuration. The most common values, including Universal LNB, are selectable with the cursor left and cursor right buttons. LNB offset voltage If the cable from the antenna is very long, the voltage at the LNB could be too low to change the polarisation. You can increase the voltage to the LNB by 0.
Contents Contents Quick guide 3-4 Contents 5 Software end-user licence 6-7 General information 8 Important! Before you use the 230 S 8 Remote Control 9 Front and rear panel 10 About the Smartcard and CA module 11 General The right-hand card slot Inserting a CA module with a smart card Installation of the Mediamaster Preparing the remote control Connecting the Mediamaster to the dish General Connecting to the TV Connecting a TV and VCR Connecting an analogue satellite receiver and a VCR Nokia smart switch C
Nokia Mediamaster software end-user license IMPORTANT: READ CAREFULLY BEFORE OR USING THE SOFTWARE NOKIA CORPORATION, NOKIA HOME COMMUNICATIONS END-USER SOFTWARE AGREEMENT This Software Agreement (“Agreement”) is between You (either an individual or an entity), the End User, and Nokia Corporation, Nokia Home Communications (“Nokia”). The Agreement authorizes You to use the Software specified in Clause 1 below and which is included in this Nokia digital TV receiver.
Nokia Mediamaster software end-user license related materials provided by Nokia. Your end-user rights automatically and immediately terminate without notice from Nokia if You fail to comply with any provision of this Agreement. In such an event, You must immediately return at Your own cost, this Nokia digital TV receiver, and all related material to the place of purchase. 6. NO OTHER OBLIGATIONS. This Agreement creates no obligations on the part of Nokia other than as specifically set forth herein. 7.
General information about the Mediamaster Throughout this manual you will notice that the everyday operation of your Mediamaster is based on a series of user friendly on-screen displays and menus. These menus will help you get the most from your Mediamaster, guiding you through installation, channel selection, viewing and many other functions. All functions can be carried out using the buttons on the remote control, and some of the functions can also be carried out using the buttons on the front panel.
Remote control This section describes how to operate the Mediamaster using the buttons on the remote control. The standby button has double functions. One function is carried out if you press the button gently once and the other function is carried out if you hold down the button for a few seconds. Some of the functions can also be carried out using the buttons on the front panel. Press once to turn the sound off/on (mute).
Front and rear panels Front panel Lid open the lid in order to insert the CA module and the smart card to change channels and to move through menus Slot for a CA module with a smart card Slot for inserting a Viaccess smart card Button push the button to release a CA module that has been inserted.
About the smart card and CA module General In order to receive scrambled digital channels, you will need a CA module and a smart card, which can be obtained from a Service Provider. There are several different CA modules available on the European market. Each of the CA modules supports a certain kind of encryption system. The Mediamaster supports CA modules which work according to the DVB standard.
Installation of the Mediamaster The Mediamaster box should contain the following items: • the Mediamaster • a remote control with 2 AAA batteries • a SCART cable (fully connected 1.0 metre) • a mains cable • an owner’s manual with the software license agreement SCART cable Mains cable Remote Owner’s control manual About the SCART sockets The rear panel of the Mediamaster contains 2 SCART sockets (see diagram).
Installation of the Mediamaster Connecting to the TV • Connect the SCART cable between the main SCART socket on the TV and the TV SCART socket on the Mediamaster. • Connect the TV aerial to the TV. SCART Connecting a TV and VCR Refer to your VCR’s manual for full instructions. • Connect one SCART cable from the main SCART socket on the TV to the TV SCART socket on the Mediamaster. • Connect another SCART cable from to the AUX SCART socket on the Mediamaster.
Installation of the Mediamaster Connecting a Hi-fi system • Connect an RCA stereo cable from the AUDIO L R sockets on the Mediamaster to the LINE, AUX, SPARE or EXTRA input sockets on your Hi-fi system. • If available, you can connect a single RCA cable from the DIGITAL AUDIO socket on the Mediamaster to a Hi-fi system that is equipped with digital audio input. This output is also used for connecting to an external DolbyTM digital decoder. Note: To avoid interference you must use a screened audio cable.
First-time installation General information Once you have correctly connected the Mediamaster, you will also have to perform a “First-time installation.” During this procedure, helpful information is displayed at the bottom of the menus. Please note! The select button always confirms a selection within these menus, and pressing it will take you to the next step in the installation process. However, and this is important, more than one value often has to be entered in a menu.
First-time installation One antenna/one LNB configuration Select this alternative if you have one (1) LNB mounted on the antenna. • Press opt to view the predefined channel. LNB type Select the correct LNB for your configuration. The most common values, including Universal LNB, can be selected using the cursor left/cursor right button. LNB offset voltage If the cable from the antenna is very long, the voltage at the LNB could be too low to change the polarisation.
First-time installation Typical connection of a two-way DiSEqC switch: • Connect the cable from the LNB that is intended for channels from the ASTRA satellite (or THOR) to the connector marked LNB 1 (A) on the switch. • Connect the cable from the HOTBIRD satellite (or SIRIUS) to the connector marked LNB 2 (B). • Then, connect the antenna cable to the connector marked OUT on the switch. • Connect the other end of this cable to the ANTENNA input at the rear of the Mediamaster.
First-time installation Motor antenna configuration If you have an antenna motor to control your satellite antenna you must configure the following settings. • From the “Antenna/Satellite selection” menu select option 3 “Motor Antenna Configuration” and press select. Type of motor • Select SATSCAN (ASTRA) if you have a Nokia SatScan motor. • Select DiSEqC (Hotbird) if the motor that you have is controlled by DiSEqC commands. LNB type • Select the correct LNB type for your configuration, e.g. “Universal”.
First-time installation Remove limits If you need to remove the limits. When you activate this command, the motor will turn itself to the 0° (Zero) position. However, the next time you select a channel, the motor will turn to its proper position. Channel search The Channel search procedure can be carried out in different ways. The menu will look different depending on what option you selected in the “Antenna/satellite selection” menu.
First-time installation Advanced manual search The information that must be entered in this menu is available in satellite TV magazines or on the Internet. You can use this menu if you are looking for some “special” channels (i.e. non-DVB standard channels) which can only be found when you have entered the necessary settings here. Transponder frequency: Specify the frequency in MHz. Polarisation: Select Horizontal, Vertical, Circular left or right. Symbol rate: Enter symbol rate with the numeric buttons.
NaviBars General information • Press select to open the NaviBars. Bookmark name Bookmark The NaviBars is used for selecting TV/Radio channels and changing system settings. The horizontal row contains folders, for example, All TV, Settings and so on. Their names are shown in black text at the bottom of each folder. Each folder contains bookmarks. The All TV folder contains bookmarks for the different TV channels; the Control folder contains bookmarks for some system settings and so on.
NaviBars Control folder ☛ User preferences Banner time-out When you switch channels, an information banner will be shown for a few seconds. You can select the length of time that the banner will be shown. Volume bar Select whether or not you want the volume bar to appear on the screen when you change the volume. Volume bar time-out Select the length of time that the volume bar will be visible on the screen. Subtitles Select whether or not you want subtitles (if available) to be visible on the screen.
NaviBars Important information about editing channels Before you start, you must select the list, TV or radio, that you want to edit. If you are watching TV and press select and choose Edit channels, you can only edit TV channels. If you are listening to radio channels you can only edit radio channels. After selecting radio or TV, use the cursor left/cursor right button to select the name of the list that you want to edit.
NaviBars Delete list If you want to delete a Favourite list, select the list using the cursor left/cursor right button and press select. Rename list You can give an existing list a new name by following the instructions in the “How to give a specific name” section on page 19. Rearrange lists If you have created several Favourite lists, you can determine the sequence in which the lists will appear. • Using the cursor right button, mark the list that you want to move to a new position.
NaviBars Lock channels To open this menu, you will be asked to enter your access code. The access code is set to 1234 at the factory. You can lock (and later unlock) channels on any of the lists in order to prevent, for example, your children from watching. Three different symbols can be shown beside the channel name. = a channel that you have not previously visited. = the channel is scrambled according to the service information. = the channel is locked by the user.
NaviBars • You can adjust the dish using channel preview if PID information has been entered. • Press select to start the channel search. • When you get the message on the screen that ”you have found X new TV-channels and X new radio channels”, press select to save the new channels. The new channels will be saved and added to the TV and radio lists. When your antenna is controlled by a motor: • Select “Channel” in the NaviBars. • Select “Manual” or “Advanced” search. • Select the new satellite name.
NaviBars Viewing images received from an external device General 230 S is equipped with a built in Bluetooth module that makes it possible to receive, watch and also save digital images transmitted from an external device. This device must be equipped with the Bluetooth Standard Version 1.1 and “Object Push Profile”. No cables are necessary as the transmission is wireless. The distance between the transmitting device and the 230 S should not exceed 10 meters to ensure good transmission.
NaviBars Local device name The 230 S is named Mediamaster on this line. This is also the name the external device will find during its search procedure. You can enter another name with the number buttons on the remote control. Press any number button and a keyboard will be shown on the screen. How to enter a new name, please refer to page 23. Bluetooth passkey The very first time you want to send an image to the 230 S a passkey has to be entered in the transmitting device.
NaviBars Control folder ☛ Timer General You can program the Mediamaster to switch on and off at predefined times. The timer function is very useful when you want to record a programme and you are unable to start/stop the recording event yourself, or when you just want to be reminded of the start of a programme that you do not want to miss. Note! The timer function only works when the receiver is in standby mode. Timer setup • First, select Channel List using the cursor left /cursor right button.
NaviBars Settings folder ☛ Antenna To open this menu, you will be asked to enter your access code. The access code is set to 1234 at the factory. The procedure is performed in the same way as during the FirstTime Installation. Please refer to page 15. Settings folder ☛ Channel To open this menu, you will be asked to enter your access code. The access code is set to 1234 at the factory. The procedure is performed in the same way as during the FirstTime Installation. Please refer to page 19.
NaviBars Picture format If you have a TV set with a 4:3 picture format and the transmission is 16:9, you can select “Fullscreen” or “Letterbox”. Fullscreen will fill the screen but some information on the left and right sides will be cut off. Letterbox will give a complete picture, but black areas will be visible at the top and bottom of the screen. ‘fullscreen’ ‘letterbox’ Settings folder ☛ Access To open this menu you will be asked to enter your access code.
NaviBars Settings folder ☛ SW (software) update In order to keep the Mediamaster up-to-date, it will be possible to download new versions of the system software via satellite. New software may include new or improved features for existing menus. Enter this menu to check if a new software version is available. If a new version is available and you continue with the update, all your previous settings, access code, favourite channels etc., will be erased! IMPORTANT! Updating via satellite may take a while.
Viewing Mode General information The following describes the basic functions of your Mediamaster that can be used while watching satellite TV or listening to satellite radio. Some of the functions described here are dependent on the Service Provider and can only be used if they are included in the transmitted programme information. Please note that during the Channel Search procedure, the Mediamaster may download a large number of channels.
Viewing Mode Extended programme information The Mediamaster can display information about programmes that are currently being broadcasted as well as those that will be broadcast next. This procedure is the same for both TV and radio mode. By pressing info while watching TV the “Programme information” banner will appear. Press info again to display extended information about the current and the subsequent programmes.
Viewing Mode TV release (0) With the 0 button you can toggle between analogue terrestrial TV, video, and analogue and digital satellite TV signals. Teletext Pressing txt will open a teletext page (if teletext is transmitted on that channel.) Select teletext pages using the numeric buttons on the remote control. You can also quickly move to the different page options shown on any page by pressing the cursor left/cursor right button. • After highlighting a page number, press select to go to that page.
Glossary of terms AC-3 A multichannel digital audio encoding system. Access control A feature that allows parents to ”lock” programmes that they consider to be unsuitable for children. A ”locked” channel or programme can only be ”unlocked” using the special access code. Access code A four-digit code stored in the Mediamaster. It is used to lock/unlock the Mediamaster. AGC Automatic Gain Control. AUX Auxiliary. BER Bit Error Rate. A signal quality measure. C/N Carrier to Noise.
Troubleshooting Problem Possible causes What to do The LED on the front panel does not light up/is not lit. The left-hand LED is red The mains cable is not connected. Check that the mains cable is plugged into the power socket. Press the standby button to take the Mediamaster out of standby mode. No sound or picture. The satellite dish is not pointing at the satellite. The Mediamaster is in standby mode. There is no signal or only a weak signal.
Technical specifications Transmission standards DVB, MPEG 2 LNB/Tuner input Connector RF input frequency QPSK Ku & C-band SCPC & MCPC RF input power level Supply voltage Max. current Control voltage DiSEqC RF impedance TV SCART Video output Audio output RGB output RGB bandwidth Fast blanking output 1x F-type (LNB) 950-2150 MHz -20 to -65 dBm 13/18 V ± 5% 500 mA, overload protected 22 kHz, 0.65 Vpp Tone burst A/B or Level 1.2 75 Ω Status output 1 Vpp (1 dB)/75 Ω 0.5 Vrms /RL >10 kΩ Internal RGB 5.
Menu screen structure First time installation Language preferences “First-time installation” menu English Français Italiano ...... Deutsch Espanol Nederlands ....... Antenna/satellite selection One antenna/One LNB configuration Multisatellite/DiSEqC Switch configuration Motor antenna configuration Antenna adjustment LNB type LNB offset voltage Satellite Predefined channel Channel Search in Progress Channel search Automatic search Manual search Advanced manual search CNN CNN Radio MTV ARD ......
Nokia is a registered trademark of Nokia Corporation www.nokia.com 00000365.