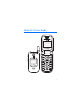
CAMERA PHONE ® Nokia 6215i GET IT NOW 6215i 9248917 Printed in Korea 9248917/Impreso en Korea User Guide 6215i Manual de Uso GET IT NOW ® CAMERA PHONE
Nokia 6215i User Guide 1
LEGAL INFORMATION PART NO. 9248917, ISSUE NO. 2a Copyright ©2007 Nokia. All rights reserved. Nokia, Nokia Connecting People, and the Nokia Original Enhancements logos are trademarks or registered trademarks of Nokia Corporation. Other company and product names mentioned herein may be trademarks or trade names of their respective owners. US Patent No. 5818437 and other pending patents. T9 text input software copyright ©1999-2007 Tegic Communications, Inc. All rights reserved.
Contents Contents For your safety..................................................................................... 4 Welcome ............................................................................................... 6 1. Phone at a glance.......................................................................... 8 2. Set up your phone....................................................................... 12 3. Text entry...............................................................................
For your safety For your safety Read these simple guidelines. Not following them may be dangerous or illegal. Read the complete user guide for further information. SWITCH ON SAFELY Do not switch the device on when wireless phone use is prohibited or when it may cause interference or danger. ROAD SAFETY COMES FIRST Obey all local laws. Always keep your hands free to operate the vehicle while driving. Your first consideration while driving should be road safety.
For your safety BACK-UP COPIES Remember to make back-up copies or keep a written record of all important information. CONNECTING TO OTHER DEVICES When connecting to any other device, read its user guide for detailed safety instructions. Do not connect incompatible products. EMERGENCY CALLS Ensure the device is switched on and in service. Press the end key as many times as needed to clear the display and return to the main screen. Enter the emergency number, then press the send key. Give your location.
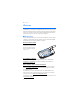
Welcome Welcome Congratulations on your purchase of this Nokia mobile phone. Your phone provides many functions that are practical for daily use, such as a hands-free speaker phone, alarm clock, calculator, calendar, camera, image and data downloads, and more. To personalize your phone you can set your favorite ringtones. ■ Getting help If you need help, the Nokia Care Contact Center is available for assistance.
Welcome Billing and customer service To reach Verizon’s billing and customer service support, dial 1-800-256-4646. ■ Get the most out of this guide The following sections illustrate the various components of your phone. Familiarize yourself with these sections to help you understand the instructions that follow. This guide uses certain terms for the steps that you are asked to perform. • Press means to press and release a key quickly.
Phone at a glance 1.
Phone at a glance ■ The standby mode The start screen is home base and indicates your phone is in the standby mode. Battery level (1)—Four bars indicate a fully charged battery. 6 1X Location (2)—Location information sharing mode. 1 2 Contacts (3)—Press the right selection key to select this option. Message (4)—Press the left selection key to select this option. Menu (5)—Press the center selection key to select this option.
Phone at a glance Location information sharing is set to E911 Only. See ”Security” on page 44 . Location information sharing is set to Location On. See ”Security” on page 44 . Voice privacy is activated. Sounds are set to off. Alarm only is on. Alarm is set to on. Standalone mode is on. Speaker phone is set to on. Vibrate mode is set to on. A data call is in progress. A schedule entry is set. There are new voice mails. There are new messages in your inbox. You have missed calls.
Phone at a glance ■ Scroll method 1. In the standby mode, use the left and right selection keys to select Message or Contacts. To access the main menus, select Menu with the center selection key, then scroll left or right. To provide a visual representation of your current position in the menu structure, a scroll bar may be displayed on the right side of the screen. 2.
Set up your phone 2. Set up your phone ■ Antenna Your phone has both an internal and external antenna. The wireless signal antenna is external and located toward the top of the phone. To improve the signal strength on your phone, extend the external antenna as far as possible while in use. An internal GPS antenna is activated when you place an emergency call or when you select Location On from the Location menu. See "Security," p. 44.
Set up your phone Remove the back cover 1. With the back of the phone facing you, slide the release button up (1). 2. Lift the back cover from the device (2). Replace the back cover 1. Set the back cover on the phone so that the metal tabs on the battery align with the tabs in the device. 2. Lower the base of the back cover onto the phone (1) and press the top down (2) until it snaps securely in place. Important: Do not remove the front cover of this phone.
Set up your phone 3. Insert the charger output plug into the charger slot (2). The charge LED on the front cover of your phone will glow red until charging is complete. The charge time varies depending on the battery level. The maximum charge time for a fully discharged, standard battery is approximately 2 hours, 50 minutes. ■ Turn your phone on or off To turn your phone on or off, press and hold the end/power key for at least 3 seconds.
Set up your phone 3. Position the headset on your ear. With the headset connected, you can make, answer, and end calls as usual. • Use the keypad to enter numbers. • Press the send key to place a call. See "Phone at a glance," p. 8. • Press the end key to end a call. ■ Make a call To make a call, make sure the phone is turned on. Enter the number you want to call, and press the send key. See "Contacts," p. 32, to use the contacts menu and to enter contact numbers. This is a network feature.
Set up your phone Speed dial numbers 97, 98, and 99 are pre-set numbers for Verizon Customer Service, and are free calls. These three speed dials are: • 97—#BAL: the billing balance is displayed or sent in a text message. • 98—#MIN: the minutes used are displayed or sent in a text message. • 99—#PMT: pay a bill with a one-time payment or other payment options. ■ Answer calls The following options are available to manage incoming calls. This is a network feature.
Set up your phone Vibrate mode To turn vibrate only mode on for your phone and silence all other sounds, press the volume down key to reduce the volume until Vibrate Only is displayed. To quickly turn vibrate mode on or off, press and hold the # key. To turn the vibrate mode on with the ringtone, select Menu > Settings & Tools > Sounds Settings > Call Sounds > Call Vibrate > On > OK.
Text entry 3. Text entry Your phone offers four methods for entering text and numbers: Abc, ABC or abc (sentence case, uppercase, and lowercase), Word (sentence case, uppercase, and lowercase), 123, and Symbols. The following rules apply when entering text: • Press CLR to backspace the cursor and delete a character. • Press and hold CLR to backspace continuously and delete up to the last space.
Text entry Activate word mode To activate word mode at any text entry screen, press the entry mode selection key, then select Word. Press * to switch among sentence case, uppercase (WORD), and lowercase (word). Word mode text entry The illustration below simulates your display each time a key is pressed in word mode.
Get It Now 4. Get It Now Get It Now allows you to download ringtones, news, information, and games. You can also find information such as the location of restaurants or ATMs. With Get It Now you can personalize your phone to your own lifestyle and tastes. This is a network feature. Download charges for Get It Now applications vary and airtime charges apply when browsing, downloading and using certain applications.
Get It Now ■ Get PIX Get PIX allows you to view, take, and send your digital pictures right from your wireless phone. This is a network feature. You can take photos with the built-in 310-k pixel camera and flash. The camera produces photos in JPEG format. After you take a picture, you can attach it to a PIX message, or set it as wallpaper, or picture ID for a contact. When you attach a picture to an entry in your list of contacts, the picture is displayed when the contact calls you.
Get It Now ■ Fun and games To open games from the games gallery or download a new game, select Menu > Get It Now > Get Fun & Games > Get New App and a game option. Select the game you want and a payment option, and download the title. You can start using the application as soon as the download is complete. Subscription and purchase pricing are available. This is a network feature.
Get It Now ■ Security and functionality Your phone supports a digital rights management system to protect content that you have acquired. Content such as ringtones may be protected and associated with certain usage rules. Usage rules are defined in the content activation key that can be delivered with the content or delivered separately. You may be able to update the activation key. Always check the delivery terms of any content and activation key before acquiring them, as they may be subject to a fee.
Messaging 5. Messaging If you have subscribed to a message network service, you can send and receive messages to and from compatible phones that also subscribe to a message service. You can also send and receive multimedia messages and e-mail. Messaging features are network services. Important: Exercise caution opening messages. Messages may contain malicious software or otherwise be harmful to your phone or PC. Note: When sending messages, your phone may display MESSAGE SENT.
Messaging Images are scaled to fit the display area of the phone. Your phone has a PIX message viewer for playing messages. Incoming messages reside in the inbox until you delete or save them. Once you save the PIX message, you can use the image as wallpaper or use the sound as a ringtone. See "Get PIX," p. 21. Only compatible devices that offer picture message features can receive and display PIX messages. The appearance of PIX messages may vary depending on the receiving device.
Messaging 2. To open the text entry field, select OK. 3. Compose a message using the keypad. See "Text entry," p. 18. 4. To send the message, select SEND. 5. To save the message as a draft, press the end key, and select Yes > OK. Your message is saved in the Drafts folder. TXT message options To customize a new TXT message, select Options when the cursor is in the text entry field, and select one of the following options: Save As Draft—Save your message into the Drafts folder.
Messaging 4. To add a picture, scroll to PIX:, select My PIX, the desired picture, and OK. To add a new picture using the built-in camera, select Camera > TAKE > OK. 5. To add a sound file, scroll to Sound:, select Sounds, a recorded sound, and OK. To record a new sound, select Sounds > Record New. The new sound is added to the top of the gallery list. Select Play to preview a recorded sound. 6. To add a message title, scroll to Subject:. Enter text (up to 100 characters) using the keypad. 7.
Messaging View the inbox The number of messages in the inbox is shown in parentheses. When you open the inbox, the list of messages is displayed. The newest messages are displayed first. Select a message and Erase > OK to delete the selected message, or select Options and from the following options: Reply—Send a TXT Msg or PIX Msg reply. Reply w. Copy—Send a reply which includes the original message text (TXT messages only).
Messaging • Erase—Delete the message (messages without sound files attached only). • Mute or Unmute—Turn on or off the sound of a sound object (messages with sound files attached only). • RESEND—Resend the message. • Options—Select from the available options. ■ Draft messages The drafts folder is used to store drafts of TXT and PIX messages. The number of messages stored in Drafts is shown in parentheses. To open the drafts folder, select Message > Drafts. The list of draft messages is displayed.
Messaging Signature—Create or edit text that will automatically append to each outgoing TXT and PIX message. Select Custom, enter the signature text, and select OK. Select None > OK to turn off the Signature function. TXT message settings To view the content of a received TXT message, select Auto View > On. The content of incoming TXT messages is displayed when the phone is in the standby mode. To create or edit text that automatically appends to each outgoing TXT message, select Signature.
Messaging The clear voice mail icon option does not delete voice mail from your voice mailbox. To delete messages, you must access your voice mailbox and use the voice mail system commands. If you exceed the storage limit for your voice mailbox, old messages may be overwritten. ■ E-mail messages To launch the Internet browser and access the e-mail messaging screen, select Message > E-mail. This is a network service. Important: Exercise caution when opening messages.
Contacts 6. Contacts You can keep track of contact information in Contacts. Contact names are saved in Contacts memory and each contact entry can contain multiple phone numbers and e-mail addresses. Contact entries can be assigned to speed dials, picture IDs, ringtones, and caller groups. ■ Create new contacts To add a contact to your contact list, do the following: 1. Select Menu > Contacts > New Contact. 2.
Contacts 1. Select Contacts, the contact you wish to modify, and Edit. 2. Highlight the Mobile 1, Home, Work, Mobile 2, or Fax number you wish to set as the default number, and select Options > Set As Default OK >Yes > OK > SAVE. Set up phone numbers with pauses Pause codes instruct the receiving system to pause or wait before entering the numbers that follow them in the dialing string. To add pause codes to a new phone number, do the following: 1.
Contacts Add a ringtone You can add a distinctive ringtone to distinguish which contact is calling your phone. To assign a ringtone to a contact: 1. Select Contacts, the contact you wish to modify, and Edit. 2. Scroll to the Ringtone: field, and select Set. 3. Highlight an existing ringtone from your MY RINGTONES gallery and select OK to use the ringtone for the contact. Select Play to preview the ringtone. 4. To download and use a new ringtone from the Internet, select Get New App.
Contacts Contact list options The following Options are available from the CONTACT LIST screen: New Contact—Create a new contact list entry. Erase—Delete the contact list entry. Send TXT Msg—Send the contact a text message. This is a network service. Send PIX Msg—Send the contact a picture message. This is a network service. Call—Dial the contact. This is a network service. Erase All—Delete all contact list entries.
Contacts 4. To create a new group, select New, enter the new group name, and select SAVE. To add the contact to the group, highlight the new group from the list of group names, and select OK. A contact can only be associated with one caller group at a time. Rename a group When a caller group is created, it can be quickly and easily renamed. From the GROUPS screen, highlight the group you wish to rename, and select Options > Rename. Edit the caller group name, and select SAVE.
Contacts To assign speed dial numbers, edit contact information. Select Contacts, the contact you wish to modify, and Edit. Highlight the mobile, home, or work number you want to assign to a speed dial slot, and select Options > Set Speed Dial. Scroll to an Unassigned speed dial slot, and select SET. Edit speed dial numbers 1. Select Menu > Contacts > Speed Dials. 2. Scroll to an assigned speed dial slot, and select SET. 3. Select Yes > OK to overwrite the existing speed dial number.
Recent calls 7. Recent calls Information about calls missed, received, or dialed is stored in the Recent Calls menu. When the number of calls exceeds the maximum, the most recent call replaces the oldest. ■ View calls To view calls, select Menu > Recent Calls > Missed, Received, or Dialed. Select All to view all missed, received, and dialed calls. The calls are listed by most recent first. Missed calls are calls that are not answered.
Settings and tools 8. Settings and tools Use the Settings & Tools menu to customize your phone and to use your phone as an organizer and personal digital assistant. ■ My account The Verizon My Account Web portal allows you to access your account information. Select Menu > Settings & Tools > My Account. This is a network service. ■ Tools To access the calculator, calendar, alarm and world clocks, notepad, and stopwatch, select Menu > Settings & Tools > Tools.
Settings and tools Select Options > Add (create a new event), Go To Date (enter a specific date using the keypad), Erase Passed (delete past events), or Erase All (delete all events on your calendar). Schedule a new event To enter a new event in your calendar, do the following: 1. Select Menu > Settings & Tools > Tools > Calendar, the event date, and Add. 2. Highlight and edit the event entry fields you wish to complete, and select SAVE.
Settings and tools Notepad To create a note, select Menu > Settings & Tools > Tools > Notepad > New, enter your note text (see "Text entry," p. 18), and select SAVE. To view or edit a note, highlight the note, and select VIEW > Edit. To delete one note or all notes, select Notepad > Options > Erase or Erase All. Stop watch The stop watch can be used for elapsed time measurement, such as for a sporting event. Up to six events or records can be timed simultaneously.
Settings and tools • ERI—Enhanced roaming indicator (ERI) alerts you to the status of cellular service. The ERI banner text displays “Verizon Network,” “Extended Network,” or “Roaming.” See "Banner," p. 42. This is a network service. • Minute Beep—to sound an alert every minute while in a call • Call Connect—to alert you when a call is successfully connected Power On/Off—Enable or disable tones when your phone is turned on or off. Alarm Sounds—To set a tone for alarms, select Alarm Tone.
Settings and tools Highlight the image you wish to set as wallpaper, and select OK. Select View to preview an image as wallpaper and Thumbs to return to thumbnail view. Wallpaper images can be used from your My PIX folder, or you can select Get New to browse for a new wallpaper image. Display themes To choose the color of the background screen, select Menu > Settings & Tools > Display Settings > Display Themes > Default, Business, Tropical, or Blue.
Settings and tools Security To secure the phone electronically, select Menu > Settings & Tools > Phone Settings > Security. This feature protects your phone from unauthorized outgoing calls or unauthorized access to information stored in the phone.
Settings and tools Number assignment modules If your phone is registered with two phone numbers using number assignment modules (NAM) (for example, work and personal numbers), you can choose which number to use as your origination number. Select Menu > Settings & Tools > Phone Settings > NAM Selection. To have your phone automatically switch to the proper NAM, select Auto NAM > On. To manually choose the origination number, select Change NAM.
Settings and tools TTY + TALK—Turn on TTY in voice carry-over (VCO) mode. TTY + HEAR—Turn on TTY in hearing carry-over (HCO) mode. TTY Off—Turn off TTY mode. One-touch dial To initiate a speed dial call by entering the speed dial digits, select Menu > Settings & Tools > Call Settings > One Touch Dial > On or Off. If set to Off, speed dial numbers designated in your contact list do not function. See "Speed Dials," p. 36.
Settings and tools In the voice dial list, highlight a voice dial entry, and select PLAY to hear the voice dial recording, or select from the available options. Voice Setting To activate the voice dial function, and set the voice dial activation mode, select Voice Setting.
Settings and tools ■ Phone information To view information about your phone, select Menu > Settings & Tools > Phone Info to display the following information: My Number—The active MDN and MIN phone numbers, and the network carrier name. The MDN phone number is the number used to receive calls. SW Version—The current version of your phone’s software components. Icon Glossary—The library of screen icons shown while in a call or when using features.
Enhancements 9. Enhancements Check the model number of any charger before use with this phone. This phone is intended for use when supplied with power from charger AC-1005U for the BL-5002C battery. Warning: Use only batteries, chargers and enhancements approved by Nokia for use with this particular model. The use of any other types may invalidate any approval or warranty, and may be dangerous. For availability of approved enhancements, please check with your dealer.
Reference information 10. Reference information This chapter contains safety and maintenance information and specifications for your product. ■ Battery information For battery installation and replacement information, see "Replace the battery," p. 12. Your phone is powered by a rechargeable battery. The full performance of a new battery is achieved only after two or three complete charge and discharge cycles. The battery can be charged and discharged hundreds of times but it will eventually wear out.
Care and maintenance Care and maintenance Your phone is a product of superior design and craftsmanship and should be treated with care. The suggestions below will help you protect your warranty coverage and enjoy your phone for many years. • Keep the phone and all of its parts and accessories out of the reach of small children. • Keep the phone dry. Precipitation, humidity and all types of liquids or moisture can contain minerals that will corrode electronic circuits.
Additional safety information Additional safety information ■ Operating environment Your phone and its enhancements may contain small parts. Keep them out of the reach of small children. Remember to follow any special regulations in force in any area and always switch off your phone when its use is prohibited or when it may cause interference or danger. Use the phone only in its normal operating positions.
Additional safety information • Hold the phone to the ear opposite the pacemaker to minimize the potential for interference. If you suspect interference, switch off your phone and move the phone away. Hearing aids Some digital wireless devices may interfere with some hearing aids. If interference occurs, consult your service provider.
Additional safety information Failure to observe these instructions may lead to suspension or denial of telephone services to the offender, legal action, or both. ■ Emergency calls Important: Wireless phones, including this phone, operate using radio signals, wireless networks, landline networks, and user-programmed functions. Because of this, connections in all conditions cannot be guaranteed. You should never rely solely on any wireless phone for essential communications like medical emergencies.
Additional safety information ■ Certification information (SAR) THIS MOBILE DEVICE MEETS GUIDELINES FOR EXPOSURE TO RADIO WAVES. Your mobile device is a radio transmitter and receiver. It is designed not to exceed the limits for exposure to radio waves recommended by international guidelines. These guidelines were developed by the independent scientific organization ICNIRP and include safety margins designed to assure the protection of all persons, regardless of age and health.
Additional safety information ■ Technical information Type designation—RM-214 Dimensions—Width, 45 mm; length, 86 mm; depth, 19.8 mm Weight—94 g with 1100 mAh Li-Ion Battery (BL-5002C) Main Display—1.5-in., 128x128 pixels, 262,000 colors Mini Display—1.0-in., 96x64 pixels, 65,000 colors Camera—Integrated 330 Kpixels with 4X digital zoom and flash Wireless networks—CDMA 800 and 1900 MHz, and CDMA2000 1xRTT Frequency range (Tx)—PCS: 1851.25–1908.75 MHz; cellular: 824.70-848.
Index Index A Abc mode 18 about your phone 5 accessibility 6 account information 39 alarm clock 40 sounds 42 alerts 27 answer options 45 antenna 12 B back cover, removing 13 backlight 42 banner 42 battery changing 12 chargers 50 charging 13 charging time 56 information 56 removing 13 talk and standby times 56 billing 7, 38 C calculator 39 calendar 39 call log 38 call settings answer options 45 auto retry 45 DTMF tones 47 one-touch dial 46 TTY mode 45 voice privacy 46 voice services 46 call timers 38 cal
Index D G default number callback 29 contacts 32 device information 48 dimensions 56 display backlight 42 banner 42 contrast 42 themes 43 wallpaper 42 downloading extras 22 games 22 information 22 pictures 21 videos 21 drafts 29, 30 DTMF tones 47 duration of calls 38 games 22 Get Extras 22 Get Fun & Games 22 Get Going 22 Get It Now 20 Get News & Info 22 Get PIX 21 Get Tunes & Tones 20 groups 35 E edit message 26 e-mail 31 emergency calls 54 location sharing 44 while using wireless Internet 22 EMS 27 en
Index segments 24 settings 29 size 24 messages characters in 26 chat 31 composing 25, 26 draft 29 e-mail 31 EMS 24, 27 erasing 30 inbox 27 MMS 24, 27 mobile IM 31 options for 28 Quick Text 29 sent 28 SMS 27 text 24 voice mail 30 MMS 27 mobile IM 31 multi-tap mode 18 mute function 17, 29 my account 39 inbox 28 message 30 PIX message 21 sent message 28 TXT message 26 P pacemakers 52 pauses 33 phone lock 44 settings 43 setup 12 picture gallery 21 ID 33 taking 21 pictures 21 PIX & FLIX messages 24 PIX messag
Index security 23, 44 selection keys 10 sent messages 28, 30 settings 29 phone 43 sounds 41 settings & tools 39 shortcut key 43 shortcuts 11 signature 30 silent mode 16 SMS 27 software version 48 sound settings 41 sounds alert 41 PIX message 27 supported formats 25 speaker phone 15 speed dials 15, 36 standalone mode 43 standard mode 18 standby mode 9 stop watch 41 system device information 48 language 43 NAM selection 45 security 44 select 44 standalone mode 43 T talk and standby times 56 technical inform