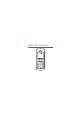
Nokia 1325 User Guide
© 2007 Nokia. All rights reserved. Nokia, Nokia 1325, and Nokia Connecting People, are trademarks or registered trademarks of Nokia Corporation. Nokia tune is a sound mark of Nokia Corporation. Other product and company names mentioned herein may be trademarks or tradenames of their respective owners. US Patent No 5818437 and other pending patents. Includes RSA BSAFE cryptographic or security protocol software from RSA Security.
RELIABILITY OR CONTENTS OF THIS DOCUMENT. NOKIA RESERVES THE RIGHT TO REVISE THIS DOCUMENT OR WITHDRAW IT AT ANY TIME WITHOUT PRIOR NOTICE. The availability of particular products and applications for these products may vary by region. Please check with your Nokia dealer for details, and availability of language options. Export controls This device may contain commodities, technology, or software subject to export laws and regulations from the US and other countries. Diversion contrary to law is prohibited.
Contents Contents For your safety.............. 6 About your device.................... 9 Network services ...................... 9 Shared memory....................... 10 General information ... 12 Access codes............................ 12 Nokia support on the Web .. 13 1. Get started .............. 14 Install the UIM card and Battery....................................... 14 Charge the battery................. 17 Switch your phone on or off.......................................... 18 2. Your phone.
Contents Network ................................ Restore factory settings ... Mobile World........................... Voice recorder ......................... Organiser .................................. Alarm clock .......................... Calendar................................ Calculator ............................. Countdown timer ............... Stopwatch ............................ Games........................................ Gallery ....................................... Images ..............
For your safety For your safety Read these simple guidelines. Not following them may be dangerous or illegal. Read the complete user guide for further information. SWITCH ON SAFELY Do not switch the device on when wireless phone use is prohibited or when it may cause interference or danger. ROAD SAFETY COMES FIRST Obey all local laws. Always keep your hands free to operate the vehicle while driving. Your first consideration while driving should be road safety.
For your safety SWITCH OFF IN HOSPITALS Follow any restrictions. Switch the device off near medical equipment. SWITCH OFF IN AIRCRAFT Follow any restrictions. Wireless devices can cause interference in aircraft. SWITCH OFF WHEN REFUELING Do not use the device at a refueling point. Do not use near fuel or chemicals. SWITCH OFF NEAR BLASTING Follow any restrictions. Do not use the device where blasting is in progress. USE SENSIBLY Use only in the normal position as explained in the product documentation.
For your safety ENHANCEMENTS AND BATTERIES Use only approved enhancements and batteries. Do not connect incompatible products. WATER-RESISTANCE Your device is not water-resistant. Keep it dry. BACK-UP COPIES Remember to make back-up copies or keep a written record of all important information stored in your device. CONNECTING TO OTHER DEVICES When connecting to any other device, read its user guide for detailed safety instructions. Do not connect incompatible products.
For your safety ■ About your device The wireless device described in this guide is approved for use on the CDMA 800 network. Contact your service provider for more information about networks. When using the features in this device, obey all laws and respect local customs, privacy and legitimate rights of others, including copyrights. Copyright protections may prevent some images, music (including ringing tones), and other content from being copied, modified, transferred, or forwarded.
For your safety networks; other networks may require that you make specific arrangements with your service provider before you can use the network services. Your service provider can give you instructions and explain what charges will apply. Some networks may have limitations that affect how you can use network services. For instance, some networks may not support all language-dependent characters and services.
For your safety memory is full when you try to use a shared memory feature. In this case, delete some of the information or entries stored in the shared memory features before continuing. Copyright © 2007 Nokia. All rights reserved.
General information General information ■ Access codes The security code supplied with the phone helps to protect your phone against unauthorized use. The preset code is 12345. The PIN code supplied with the UIM card helps to protect the card against unauthorized use. If you enter the PIN code incorrectly three times in succession, you are asked for the PUK code. If you do not have them, contact your service provider.
General information ■ Nokia support on the Web Check www.nokia-asia.com/1325/support or your local Nokia Web site for the latest version of this guide, additional information, downloads, and services related to your Nokia product. Copyright © 2007 Nokia. All rights reserved.
Get started 1. Get started ■ Install the UIM card and Battery Keep all UIM cards out of the reach of small children. For availability and information on using UIM card services, contact your UIM card vendor. This may be the service provider or other vendor. Note: Always switch off the power and disconnect the charger and any other device before removing the cover. Avoid touching electronic components while changing the cover. Always store and use the device with the cover attached. 1.
Get started 2. Insert your finger into the finger grip and lift the battery from its compartment. 3. Keep the beveled corner of the UIM card facing up and matching along the corresponding beveled corner of the card holder. Copyright © 2007 Nokia. All rights reserved.
Get started 4. Insert the UIM card into the holder with the gold-colored contacts facing down, matching up with the goldcolored contacts on the phone. 5. Position the battery so the gold-colored contacts match up with those on the phone, and insert the battery into the battery slot. 6. Push down on the other end of the battery to snap the battery into place. 7. Align the back cover with the back of the phone, and slide it toward the top of the phone until you hear a click to lock it into place.
Get started ■ Charge the battery Always switch the device off and disconnect the charger before removing the battery. Warning: Use only batteries, chargers, and enhancements approved by Nokia for use with this particular model. The use of any other types may invalidate any approval or warranty, and may be dangerous. Check the model number of any charger before use with this device. This device is intended for use when supplied with power from an AC-3 or AC-4 charger.
Get started 1. Plug the charger transformer into a standard wall outlet. 2. Insert the charger output plug into the round jack at the bottom end of the phone. If the battery is completely discharged, it may take a few minutes before the charging indicator appears on the display or before any calls can be made. ■ Switch your phone on or off To switch your phone on or off, press and hold the end key on the keypad for a few seconds. 18 Copyright © 2007 Nokia. All rights reserved.
Get started Warning! Do not switch on the phone when wireless phone use is prohibited or when it may cause interference or danger. Note: As with any other radio transmitting device, do not touch the antenna unnecessarily when the device is switched on. Contact with the antenna affects call quality and may cause the device to operate at a higher power level than otherwise needed. To optimize antenna performance and battery life, avoid contact with the antenna area when operating the device.
Your phone 2. Your phone ■ Keys and parts • Earpiece (1) • Right selection key (2) • End/power key (3) • Keypad (4) • Microphone (5) • Charger port (6) • Headset port (7) • Call key (8) • Left selection key (9) • 4-way scroll key (10) 20 Copyright © 2007 Nokia. All rights reserved.
Your phone • Display screen (11) ■ Standby mode and shortcuts The start screen is home base and indicates your phone is in the standby mode. Signal strength (1)—A higher bar indicates stronger signal. Battery level (2)—A higher bar indicates more charge in the battery. Menu (3)—Press the left selection key to select this option. Contacts (4)—Press the right selection key to select this option.
Your phone Scroll down: Go to contacts Scroll right: View calendar Scroll left: Write message ■ Keyguard With the keyguard, you can lock the keypad to prevent keys from being pressed accidentally. Remember to lock your phone keypad to prevent accidental calls. If the keypad is locked, it unlocks when you receive a call. After the call, the lock automatically reactivates. To activate or deactivate keyguard, select Menu > Settings > Phone settings > Automatic keyguard > On or Off.
Your phone To unlock the keypad, select Unlock, and press * within 2 seconds. To lock the keypad, select Menu, and press * within 2 seconds. Copyright © 2007 Nokia. All rights reserved.
Call functions 3. Call functions ■ Make and answer a call To make a call, enter the phone number, including the country code and area code if necessary. Press the call key to call the number. Scroll right to increase or left to decrease the volume of the earpiece or headset during the phone call. Conference calling is a network service that allows you to take part in a conference call with two other participants. To make a call to a new participant, select Options > New call.
Call functions ■ Loudspeaker You can use your phone as a loudspeaker during a call. Warning: Do not hold the device near your ear when the loudspeaker is in use because the volume may be extremely loud. To activate the loudspeaker while in a call, select Loudsp. To deactivate the loudspeaker during a call, select Handset. The loudspeaker is deactivated automatically when a call (or a call attempt) ends or when certain enhancements are connected. Copyright © 2007 Nokia. All rights reserved.
Text entry 4. Text entry You can enter text in predictive text input and traditional text input. To use traditional text input, press the key repeatedly until the letter appears. To turn on predictive text input when the writing language is English, select Options > Dictionary on; to turn it off, select Dictionary off. When using predictive text input, press each key once for a single letter. If the displayed word is the one you want, press 0, and start writing the next word.
Text entry repeatedly, and check the indicator at the top of the display. To add a number, press and hold the desired number key. To get a list of special characters when using traditional text input, press *; when using predictive text input, press and hold *. Copyright © 2007 Nokia. All rights reserved.
Menu functions 5. Menu functions The phone functions are grouped into menus. Not all menu functions or option items are described here. In the standby mode, select Menu and the desired menu and submenu. Select Exit or Back to exit the current level of menu. Press the end key to return to the standby mode directly. ■ Contacts The contacts list can hold up to 400 contacts with multiple numbers and text notes for each contact.
Menu functions Details > Options and the action you want to apply to the contact. Settings Settings allows you to determine which memory is in use, how your phone numbers are viewed, and the memory status for contacts in phone and UIM card. 1. Select Contacts > Settings. 2. To determine which memory is in use, the phone, the UIM card, or both, select Memory in use. 3. To select how names and numbers are viewed in the contacts list, select Scrolling view. 4.
Menu functions ■ Messages The message services can only be used when they are supported by your network or service provider. Message settings To edit your message settings, select Menu > Messages > Text messages > Message settings > Send options and the setting you wish to change: Message priority—Select the priority of the message as Normal or Urgent. Delivery reports—A note is sent to you confirming delivery of the message. Select On or Off.
Menu functions Message font size—You can change the font size for message reading, writing and message list viewing. Select Small font or Large font. Message overwriting—You can determine how and whether messages will be automatically overwritten when the message memory is full. Select Sent items only, Inbox only, S. items & Inbox or Off. When the message memory is full, your phone cannot receive any new messages.
Menu functions Queue msgs. when digital u...—You can store in Outbox messages that can be sent later when digital service is available. Select On, On prompt or Off. Create message 1. Select Menu > Messages > Text messages > Create message. To go quickly to Create message, scroll left in the standby mode. 2. Compose a message using the keypad. 3. In the message editor screen, select Options > Send to. 4.
Menu functions recipient’s phone number, or select Search to retrieve a number from your contacts list; and select Options > Send. 6. To send to a distribution list, select Send to list, and choose a distribution list that had been created in your phone by selecting Menu > Messages > Text messages > Create message > Distribution lists; and select OK. Note: Your device may indicate that your message was sent to the message center number programmed into your device.
Menu functions Voice messages You can send voice message with voice mail. Voice mail is a network service. If you subscribe to voice mail, your wireless provider will furnish you with a voice mailbox number. You need to save this number to your phone to use voice mail. The voice mailbox service must first be activated by your service provider. For more details about voice messages, contact your service provider. Picture messages Picture messages is a network service.
Menu functions Note: Picture message function can be used only if it is supported by your network operator or service provider. Only compatible devices that offer picture message features can receive and display picture messages. Copyright protections may prevent some images, music (including ringing tones) and other content from being copied, modified, transferred, or forwarded. To send a picture message, do the following: 1. Select Menu > Messages > Text messages > Create message. 2.
Menu functions 5. Select Insert to insert the picture into your message; otherwise select Back, scroll to another picture, and select View again. 6. To send the picture message, select Options > Send to > Send to number. 7. Enter the phone number for your recipient, or select Search to retrieve a number from the contacts list. 8. Select Send. Picture images can only be received via text message. When you receive a picture message, the message icon ( ) appears in the display. 1.
Menu functions When you have unopened picture messages in your inbox, is shown in the upper left corner in the standby mode as a reminder. 3. Scroll to view the whole picture if necessary. When you are finished, select Back to return to the Inbox or Options for other choices such as Reply or Forward. To save the picture to your templates folder for later use, select Options > Save picture. You can enter a title for the picture, and select OK.
Menu functions When unopened messages are in your inbox, shown in the upper left corner in the standby mode as a reminder. is 2. Select Options > Reply > Empty screen, Original text, Template, or other preset reply. 3. Enter your reply, and select Options > Send. Inbox, Sent items, and Drafts folders Messages are automatically stored in the inbox after they have been read or if you select Back when a notification appears in the standby mode.
Menu functions sending is set to Off, sent messages are not stored in the Sent items folder. To change the settings, select Menu > Messages > Text messages > Message settings > Other settings. You can store draft messages in the Drafts folder to edit and send later. Delete messages If your message memory is full and you have more messages waiting at the network, blinks in the standby mode. You can do the following: • Read some of the unread messages, and delete them.
Menu functions Select Options > Delete and OK to delete the message or Back to exit. To delete all messages in a folder, select Menu > Messages > Text messages > Delete messages and one of the following: • All—Mark Inbox, Outbox, Sent items, Drafts, or Archive as the desired folder from which you want to delete all messages, select Done, and confirm the deletion by pressing OK at the confirmation note.
Menu functions ■ Call register Call register stores information about the last 20 missed, 20 received, or 20 dialed calls. It also adds the total duration of all calls. When the number of calls exceed the maximum, the most recent call replaces the oldest. The network must support these functions, and the phone must be switched on and inside the network service area.
Menu functions Select Menu > Call register > Call duration to view the approximate duration of the last call, all received calls, all dialled calls, or all calls. To reset the timers, select Menu > Call register > Call duration > Clear timers, enter your security code, and select OK. Note: The actual time invoiced for calls by your service provider may vary, depending on network features, rounding off for billing, and so forth.
Menu functions or customized to suit your needs. The following profiles are available: General, Silent, Meeting, Outdoor, and Pager. Select one of the profiles in Menu > Profiles, and select Activate, Personalise, or Timed to activate, personalize a profile, and set timed expiration for it. You can also press end key and Select to activate a profile (or Switch off! to switch off the phone). ■ Settings In this menu, you can adjust various phone settings.
Menu functions Anykey answer—to answer an incoming call by briefly pressing any key except the end key or right selection key Automatic redial—to set your phone to redial the number after an unsuccessful call attempt Speed dialling—to select whether number keys (2-9) can be used for one-touch dialling (calling a number by pressing and holding a key) Calling card—to save up to four calling card numbers in your phone to use for long distance calls International prefix—to make international calls using the +
Menu functions Network services—to use and set some network services, such as Call divert, Call waiting and Network feature setting. Phone settings Select Menu > Settings > Phone settings and from the following options: Phone language—to select the language for the display text. Writing lang.—to set the writing language for text editing. Automatic keyguard—to set the keypad to lock automatically after a preset time delay. DTMF tones—to set the tones that sound when you press the keys on your phone keypad.
Menu functions Confirm UIM service actions—to request notification when your service provider makes changes to UIM-related services. Help text activation—to display brief descriptions for most menu items.
Menu functions Display brightness—to change the brightness of your phone display Backl. time-out—to control the backlight time-out of your phone display Time and date settings Select Menu > Settings > Time and date settings > Clock to hide or show the clock and change the time format; select Date to hide or show the date, change the date format and date separator.
Menu functions Ringing volume—to set the volume level for the ringing sound and message alert tones. If you set Ringing volume to level 2 or above, your phone rings with the volume ascending from level 1 to the level for incoming calls. If you select the highest ringing tone level, the ringing tone reaches its highest level after a few seconds.
Menu functions Enhancement settings The enhancement settings menu is shown only if the phone is or has been connected to a compatible enhancement. Select Menu > Settings > Enhancement settings > Headset or Charger. Security settings You can set security settings here for your phone, UIM card, memory and calls. Select Menu > Settings > Security settings > PIN code request, Call restrictions, Security level, Access codes, or Voice privacy.
Menu functions home system. Your phone is set to search for the effective network. If your phone cannot find a preferred network, it selects a network automatically based on the option you choose in the Network menu. The menu options you see in your phone are based on your service provider’s network. The network determines which options actually appear in the phone menu. Check with your service provider for more information. Select Menu > Settings > Network > Home only or Automatic.
Menu functions 1. Select Menu > Settings > Restore factory settings. 2. Enter the security code (the default security code is 12345), and select OK. ■ Mobile World The features and options under the Mobile World menu are network services. Their availability and operation depend entirely on your service provider. Always check with your service provider for detailed information about availability, subscription, and charging rates of the services.
Menu functions In the standby mode, select Menu > Mobile World or press the scroll up key to enter the main menu. You can use the following options: • R Menu—to connect to Mobile World • Reset RMenu—to refresh all the services in Mobile World. This is used when you encounter problems using Mobile World data services frequently.
Menu functions ■ Voice recorder This feature allows you to record speech or sound with your phone and listen to them later. The total available time is 90 seconds if no memos have been stored. The maximum length of a recording depends on how much memory remains available. Voice recorder shares memory with other applications. See "Shared memory," p. 10. To record speech or sound, select Menu > Voice recorder > Record. Select Stop when you are finished recording.
Menu functions ■ Organiser Your phone contains features to help organize your everyday life, including an alarm clock, calendar, calculator, countdown timer, and stopwatch. Alarm clock The alarm clock is based on the phone clock. It sounds an alert any time you specify. To set and turn on an alarm, select Menu > Organiser > Alarm clock. Enter the time for the alarm in hh:mm format, and select OK. Select am or pm if 12-hour clock format is on.
Menu functions To turn off an alarm, select Menu > Organiser > Alarm clock > Off. Calendar The calendar keeps track of reminders, calls you need to make, meetings, memos, and birthdays. It can also sound an alarm for any of these events. Monthly view provides an overview of the selected month and weeks. It also allows you to jump to a specific date. Any days or dates that appear in bold font contain calendar notes such as a meeting or reminder.
Menu functions Make a note, choose from five types of notes: Meeting, Call, Birthday, Memo, and Reminder. Your phone asks for further information depending on which note you select. Calculator The calculator in your phone adds, subtracts, multiplies, divides, calculates the square and the square root, changes the sign of the number entered, and converts currency values. Note: This calculator has a limited accuracy and is designed for simple calculations. 1. Select Menu > Organiser > Calculator. 2.
Menu functions 3. Enter the second number in your calculation. 4. Select Options > Equals to get the result. To perform a square or square root calculation, select Options > Square or Square root. Select Options > Change sign, or scroll to change the sign of your result. Currency converter You can convert foreign currency to domestic or vice versa. At the Calculator screen, enter a currency amount to convert. Select Options > In domestic or In foreign to convert currency as desired.
Menu functions Note: When you change base currency, you must key in the new rates because all previously set exchange rates are set to zero. Select Menu > Organiser > Calculator > Options > Exchange rate to set the exchange rate. Countdown timer You can enter a specified time (up to 99 hours and 59 minutes). When the time runs out, your phone sounds an alarm. The countdown timer only works when the phone is on. When you turn off your phone, the timer is no longer active.
Menu functions appears in the standby mode when the countdown timer is set. When the time runs out, your phone sounds an alarm, displays a timer note, and flashes its lights. Select Menu > Organiser > Countdown timer > Change time to change the time, and Stop timer to stop the timer before the alarm sounds. Stopwatch Your phone has a stopwatch that can be used to track time. The stopwatch displays time in hours, minutes, seconds, and fractions of a second in hh:mm:ss.ss format.
Menu functions To use the split time or lap time functions for activities where you need to pace yourself, select Menu > Organiser > Stopwatch > Split timing or Lap timing > Start. If you press the end key and return to the standby mode, the clock continues to run in the background, and appears in the upper left corner of the screen. To return to the stopwatch screens, select Menu > Organiser > Stopwatch > Continue. You can select Stop to stop it. ■ Games Some menus listed are network services.
Menu functions In the standby mode, select Menu > Games > Select game to display the games on your device: Blocks, Magic Puzzle, Haunted House. To adjust common game settings, select Menu > Games > Settings. You can set the sounds Game sounds, Game lights or Shakes for a game. ■ Gallery You can use Gallery to manage your image and audio files. Images In the standby mode, select Menu > Gallery > Images to use the image files in this folder to personalize your phone.
Menu functions Tones In the standby mode, select Menu > Gallery > Tones to use the tone files in this folder to personalize your phone. Select Open, highlight one file and then select Options to Open, Delete, view Details of selected tone, Set as ring tone or Set as msg tone. 62 Copyright © 2007 Nokia. All rights reserved.
Enhancements 6. Enhancements Check the model number of any charger before use with this device. This device is intended for use when supplied with power from Nokia AC-3 or AC-4 charger. Warning: Use only batteries, chargers and enhancements approved by Nokia for use with this particular model. The use of any other types may invalidate any approval or warranty, and may be dangerous.
Enhancements • When you disconnect the power cord of any accessory or enhancement, grasp and pull the plug, not the cord. • Check regularly that enhancements installed in a vehicle are mounted and are operating properly. • Installation of any complex car enhancements must be made by qualified personnel only. Power • Standard Li-Ion Battery (BL-4C) • Compact Charger (AC-3) • Travel Charger (AC-4) • Car Power Adapter (DC-4) Audio • Headset (HS-9) 64 Copyright © 2007 Nokia. All rights reserved.
Enhancements Warning: When using the headset your ability to hear outside sounds may be affected. Do not use the headset where it can endanger your safety. Copyright © 2007 Nokia. All rights reserved.
Reference information 7. Reference information This section provides information about your phone batteries, enhancements, chargers and safety guidelines. Be aware that the information in this section is subject to change as batteries, chargers, and enhancements change. ■ Batteries and chargers Your device is powered by a rechargeable battery. The battery can be charged and discharged hundreds of times, but it will eventually wear out.
Reference information If a replacement battery is being used for the first time or if the battery has not been used for a prolonged period, it may be necessary to connect the charger, then disconnect and reconnect it to begin charging the battery. Unplug the charger from the electrical plug and the device when not in use. Do not leave a fully charged battery connected to a charger, since overcharging may shorten its lifetime. If left unused, a fully charged battery will lose its charge over time.
Reference information terminals may damage the battery or the connecting object. Leaving the battery in hot or cold places, such as in a closed car in summer or winter conditions, will reduce the capacity and lifetime of the battery. Always try to keep the battery between 59°F and 77°F (15°C and 25°C). A device with a hot or cold battery may not work temporarily, even when the battery is fully charged. Battery performance is particularly limited in temperatures well below freezing point.
Reference information such a leak, flush your skin or eyes immediately with water, and seek medical help. ■ Nokia battery authentication guidelines Always use original Nokia batteries for your safety.
Reference information the battery for authenticity. If authenticity cannot be verified, return the battery to the place of purchase. Authenticate hologram 1. When looking at the hologram on the label, you should see the Nokia connecting hands symbol from one angle and the Nokia Original Enhancements logo when looking from another angle. 2. When you angle the hologram left, right, down, and up, you should see 1, 2, 3, and 4 dots on each side respectively. 70 Copyright © 2007 Nokia. All rights reserved.
Reference information 3. Scratch the side of the label to reveal a 20-digit code, for example, 12345678919876543210. Turn the battery so that the numbers are facing upwards. The 20-digit code reads starting from the number at the top row followed by the bottom row. 4. Confirm that the 20-digit code is valid by following the instructions at www.nokiaasia.com/batterycheck. To create a text message, enter the 20-digit code, for example, 12345678919876543210, and send to +44 7786 200276.
Reference information To create a text message, • For countries in Asia Pacific, excluding India: Enter the 20-digit code, for example, 12345678919876543210, and send to +61 427151515. • For India only: Enter Battery followed by the 20-digit battery code, for example, Battery 12345678919876543210, and send to 5555. National and international operator charges will apply. You should receive a message indicating whether the code can be authenticated.
Reference information by the manufacturer may be dangerous and may result in poor performance and damage to your device and its enhancements. It may also invalidate any approval or warranty applying to the device. To find out more about original Nokia batteries, visit www.nokia-asia.com/batterycheck. Copyright © 2007 Nokia. All rights reserved.
Care and maintenance Care and maintenance Your device is a product of superior design and craftsmanship and should be treated with care. The following suggestions will help you protect your warranty coverage. • Keep the device dry. Precipitation, humidity, and all types of liquids or moisture can contain minerals that will corrode electronic circuits. If your device does get wet, remove the battery, and allow the device to dry completely before replacing it.
Care and maintenance • Do not attempt to open the device other than as instructed in this guide. • Do not drop, knock, or shake the device. Rough handling can break internal circuit boards and fine mechanics. • Do not use harsh chemicals, cleaning solvents, or strong detergents to clean the device. • Do not paint the device. Paint can clog the moving parts and prevent proper operation. • Use only the supplied or an approved replacement antenna.
Care and maintenance properly, take it to the nearest authorized service facility for service. Note: Before sending your device to a service facility, create a backup of data you want to keep such as contacts and calendar notes. 76 Copyright © 2007 Nokia. All rights reserved.
Additional safety information Additional safety information ■ Small children Your device and its enhancements may contain small parts. Keep them out of the reach of small children. ■ Operating environment This device meets RF exposure guidelines when used either in the normal use position against the ear or when positioned at least 2.2 centimeters (7/8 inches) away from the body.
Additional safety information Parts of the device are magnetic. Metallic materials may be attracted to the device. Do not place credit cards or other magnetic storage media near the device, because information stored on them may be erased. ■ Medical devices Operation of any radio transmitting equipment, including wireless phones, may interfere with the functionality of inadequately protected medical devices.
Additional safety information potential interference with the pacemaker. These recommendations are consistent with the independent research by and recommendations of Wireless Technology Research. Persons with pacemakers should do the following: • Always keep the device more than 15.3 centimeters (6 inches) from the pacemaker. • Do not carry the device in a breast pocket. • Hold the device to the ear opposite the pacemaker to minimize the potential for interference.
Additional safety information ■ Vehicles RF signals may affect improperly installed or inadequately shielded electronic systems in motor vehicles such as electronic fuel injection systems, electronic antiskid (antilock) braking systems, electronic speed control systems, and air bag systems. For more information, check with the manufacturer, or its representative, of your vehicle or any equipment that has been added. Only qualified personnel should service the device or install the device in a vehicle.
Additional safety information improperly installed and the air bag inflates, serious injury could result. Using your device while flying in aircraft is prohibited. Switch off your device before boarding an aircraft. The use of wireless teledevices in an aircraft may be dangerous to the operation of the aircraft, disrupt the wireless telephone network, and may be illegal.
Additional safety information chemical transfer or storage facilities, vehicles using liquefied petroleum gas (such as propane or butane), and areas where the air contains chemicals or particles such as grain, dust, or metal powders. ■ Emergency calls Important: Wireless phones, including this device, operate using radio signals, wireless networks, landline networks, and user-programmed functions. Because of this, connections in all conditions cannot be guaranteed.
Additional safety information 2. Press the end key as many times as needed to clear the display and ready the device for calls. 3. Enter the official emergency number for your present location. Emergency numbers vary by location. 4. Press the call key. If certain features are in use, you may first need to turn those features off before you can make an emergency call.
Additional safety information ■ Certification information (SAR) THIS MOBILE DEVICE MEETS GUIDELINES FOR EXPOSURE TO RADIO WAVES. Your mobile device is a radio transmitter and receiver. It is designed not to exceed the limits for exposure to radio waves recommended by international guidelines. These guidelines were developed by the independent scientific organization ICNIRP and include safety margins designed to assure the protection of all persons, regardless of age and health.
Additional safety information close you are to a network base station. The highest SAR value under the ICNIRP guidelines for use of the device at the ear is 0.80 W/kg. Use of device accessories and enhancements may result in different SAR values. SAR values may vary depending on national reporting and testing requirements and the network band. Additional SAR information may be provided under product information at www.nokia-asia.com.
Additional safety information Important: Battery talk and standby times are estimates only and depend on signal strength, network conditions, features used, battery age and condition, temperatures to which battery is exposed, use in digital mode, and many other factors. The amount of time a device is used for calls will affect its standby time. Likewise, the amount of time that the device is turned on and in the standby mode will affect its talk time.
Additional safety information temperatures to which the battery is exposed, and many other factors. Function Digital Talk time Up to 3.5-4 hours Standby time Up to 8 days Copyright © 2007 Nokia. All rights reserved.
Nokia Care Online The Nokia Care web support provides you with more information on our online services. INTERACTIVE DEMONSTRATIONS Learn how to set up your phone for the first time, and find out more about its features. Interactive Demonstrations give step-by-step instructions on using your phone. USER’S GUIDE The online User’s Guide contains detailed information on your phone. Remember to check regularly for updates. SOFTWARE Make the most of your phone with software for your phone and PC.