
User guide


12-4 Needle Heater
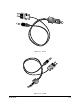
Temperature Controller, 4- or 8-Channel
The 4-channel Temperature Controller controls one Needle Heater, one Resistance Temperature Detector
(RTD) (for example, a DJ-2100 Series valve), and two part heaters. The 8-channel Temperature
Controller controls two needle heaters, an RTD, and three part heaters. (See Figure 2-3). Temperature
control is effected through the FmNT software
Needle Heater Setup
For changing or replacing of dispensing needles, refer to the Installation and Operations manual for the
particular pump or valve installed on your system.
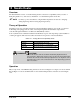
WARNING! Use care when reaching into the dispensing area. The needle heater may
still be hot.
To reinstall the heating element:
1. Loosen the thumbscrew on the front of the heating element.
2. Do one of the following, depending on your type of heating element:
> For the HT-04, slide the heating element onto the needle and onto the valve tip.
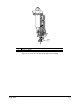
> For the HT-06, slide the heating element onto the needle and onto the Luer lock fitting Call
Asymtek and ask for the Luer Lock adapter (Figure 12-5).
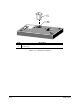
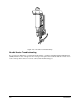
> For the HT-10N, insert the needle into the side slot of the heating element. The heating
element attaches directly to the needle (Figure 12-6).
3. Using fingers, tighten the thumbscrew (see Figure 12-1) on the front of the heating element.
CAUTION! Do not over-tighten or under-tighten the thumbscrew. Over-tightening could
damage the needle. An under-tightened needle can fall off, potentially
damaging the part. Periodically check the thumbscrew to ensure that it is
properly tightened.