Downflow, Direct Vent (Sealed Combustion) Forced Air Gas and Oil Furnaces Owners Manual/Installation Instructions Series M1B, M1G, M1M and M1S For installation in: 1. Manufactured Homes 2. Recreational Vehicles, Park Models, Manufactured Buildings 3. Modular Homes/Buildings ! WARNING: If the information in this manual is not followed exactly, a fire or explosion may result causing property damage, personal injury or loss of life.
TABLE OF CONTENTS 1. SPECIFICATIONS ................................................................................... 3 2. OWNERS INFORMATION ....................................................................... 3 3. MANUFACTURER WARRANTY, OWNER RESPONSIBILITY ................. 3 4. INSTALLATION STANDARDS ................................................................. 5 5. UNIT LOCATION ..................................................................................... 6 6. MINIMUM CLEARANCES ......
! WARNING: Do not use this appliance if any part has been submerged under water. Immediately call a qualified service technician to inspect the appliance and to replace any part of the control system and any gas control that has been submerged underwater. NOTICE TO INSTALLER Installer is advised to follow carefully all instructions and warnings in this manual to insure maximum performance, safety, and operating efficiency of these appliances.
necessary to correct problems due to improper setup, improper installation, furnace adjustments, improper operating procedure on the part of the user, etc. Some specific examples of service calls which cannot be included in warranty payments are: 1. Converting the furnace to use another type of gas. 2. Repairing duct work in the home found to be faulty. 3. Correcting wiring problems in the electrical circuit supplying the furnace. 4. Resetting circuit breakers, blown fuses or other switches.
Part No. 903773 903413 903414 Blower / Motor Assembly Blower Wheel Motor-Hp 10 x 8 1/4 11 x 8 1/2 11 x 8 3/4 A/C Capacity Ton 2, 2½ & 3 2, 2½, 3 & 4 2, 2½, 3, 4 & 5 Table 3. Field Installation Blower Assemblies Carefully review these responsibilities with your manufactured housing dealer, service company or gas supplier so there will be no misunderstanding at a later time. ! CAUTION: • Never attempt to alter or modify this furnace or any of its components.
a. Federal Manufactured Home Constructions & Safety Standard (H.U.D. Title 24, Part 3280.707[a][2]) b. American National Standard (ANSI-119.2/ NFPA-501C) for all recreational vehicle installations. c. American National Standard (ANSI-Z223.1/ NFPA-54) and/or CAN/CGA B149 for all gasfired furnace models. d. American National Standard (ANSI-Z95.1/ NFPA-31) and/or CSA B139 for all oil-fired furnace models. e. American National Standard (ANSI-C1/ NFPA-70) and/or CSA 22.
a. Regardless of the location, the return air opening into the closet shall not be less than specified in the appliance’s listing. b. Means shall be provided to prevent inadvertent closure by a flat object placed over the return air opening when it is located in the floor of the closet (versus the vertical front or side wall). c.
h. Gas piping is not run in or through the return duct system. i. Test the negative pressure in the closet with the air-circulating fan operating at high speed and the closet closed. The negative pressure is to be no more negative than minus 0.05 inch water column. j. Air conditioning systems may require more duct register and open louver area to obtain necessary airflow. Use NORDYNE’s certiduct program to determine proper duct size for A/C. 8.
10. DUCT CONNECTOR SELECTION PLATINUM SERIES a. For Platinum ready construction use the 14” round duct connector, p/n: 903896. NON-PLATINUM SERIES b. Select appropriate model from Table 7 which matches X-dimension of the floor cavity. To maximize air delivery, remove reducer “C” (see Figure 11) to obtain the largest open area that will fit the duct/floor construction. Screw down duct connector opening to duct without reducer is 13” x 13”. With reducer it is 13” x 10-1/8”. a.
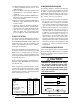
CL CEILING AND ROOF OPENINGS 13-1/2" CL RE AR L WAL SIDE WA L L ALT. FUEL LINE HOLES 10" CL FLOOR OPENING FUEL LINE HOLE CL 23 -1/4" Figure 12. Closet or Alcove 20" 14-1/2" CL 2-3/4" CL FLOOR CUT-OUT FOR OPTIONAL COOLING COIL FOR NON-PLATINUM CL SERIES UNITS FUEL-LINE 3/4" 2" 10" 12-7/8" 14-3/4" 15-1/2" Figure 13. Cut-Out Locations 10 13-1/2" C C U E FL T-O ILIN R U U G (S OO E A T F ee F N OR Fi JAC D g 12 K ) CL 1-1/4" D.
. INSTALLATION Required floor, ceiling, and roof cut-out openings must be carefully located to avoid misalignment of the furnace and Roof Jack (see Figures 12 & 13). Installation procedures are suggested for typical furnace installations and need not be followed in the exact listed sequence. CUT OUT FLOOR OPENING & FUEL LINE HOLE a. Determine center of closet or alcove (Figure 13). b.
b. Cut ceiling and roof holes as follows: Ceiling Hole = 8-3/4" (222 mm) diameter Roof Hole = 9-3/8" (238 mm) diameter c. DO NOT ALLOW DEBRIS TO FALL INTO THE FURNACE. THIS COULD CAUSE UNSAFE OPERATION AND VOIDS THE FURNACE WARRANTY. Use the top cap that comes with the furnace packaging (or alternate protector) to prevent debris from falling into the furnace before the final roof jack connection is made. CUT DUCT OPENING (FINGER TABBED ONLY) a.
bending of the duct connector tabs at the side(s) of the duct. (See Figure 18). 1. Score and cut the top of the metal duct as indicated in Step 1 or Step 2. With Step 1 choice, also cut out the metal from the shaded area “A”. 2. Fold the duct flap “B” up, (See Step 3). 3. At the front-to-back of duct run (Area “A”), bend the duct tabs and secure them directly to the duct. 4. At Area “B”, bend the duct tabs up and back over, around the duct connector, (See Step 3). 5.
added protection against leaks, coat the flashing plate and fasteners with approved roofing compound. SLIDE FURNACE ALL THE WAY BACK ONTO MTG. PLATE MTG. PLATE TABS SECURE FURNACE WITH 2 FASTENERS AT FRONT CORNER HOLES 12. INSTALLATION OF TRANSITMODE VENTING SYSTEM Knockout Over Holes SUPPLY AIR DUCT Figure 19. “A”, “B”, & Platinum Cabinet Furnaces SLIDE FURNACE ALL THE WAY BACK ONTO MTG. PLATE MTG.
c. Venting system warning tags to be removed and discarded. ! WARNING: Failure to properly secure the flue pipe to the furnace may result in fire, explosion or asphyxiation when operating the furnace. 13. ELECTRICAL WIRING Refer to the wiring diagram in these instructions or affixed to the inside of the control box cover for the wiring of your particular unit. ELECTRICAL BRANCH SUPPLY CIRCUITS. Route all electrical wiring to the left side of the furnace.
cold drafts. The nominal anticipator setting is 0.4. (Refer to the thermostat literature for additional information.) If the heat anticipator is set too low, the furnace may cycle frequently and not provide comfort to the homeowner. Five-conductor thermostat wire is recommended for 24 volt low-voltage circuit (2-wire is required for furnace only; 5-wire for heating and optional cooling systems). 14. FUEL PIPING For Platinum-ready Construction: a. Use a heat/cool thermostat. b.
For natural gas operation, the furnace is designed for 7" W.C. inlet pressure. Pressure is reduced to 3-1/2" W.C. by the pressure regulator in the gas valve. The maximum inlet pressure for the valve is 13” W.C. For L.P. gas, pressure to the gas valve must be more than 11" W.C. but not more than 13" W.C. Pressure is reduced to 10" W.C. by the pressure regulator in the gas valve. ! CAUTION: The furnace must be converted by a qualified technician.
2" Fill 2" Duplex Bushing Optional Fuel Filter Shut-off Valve Top of Tank Optional Inlet Nozzle Port Pressure Gauge Port R Air-Bleed Valve Inlet Port Return Port & Internal By-Pass Optional Return If fuel pump fails to lift oil, check for air leaks and tighten all fuel fittings. Reprime fuel pump by injecting fuel oil into optional (top) return port. Replace return port plug and repeat priming procedure.
ground. Fuel tanks may also be buried if properly coated to resist corrosion. For below ground fuel tank installations, the vertical dimension from the bottom of the fuel tank to the fuel pump must not exceed ten feet. Keep the tank filled, especially in the summer to reduce the accumulation of condensation. Fuel Line Hook-Up: One Line System The one line system is highly recommended where vertical lift, from bottom of tank to pump, is not more than eight feet.
15. FLUE GAS SAMPLING It may be necessary to take flue gas sampling from oil and gas gun furnaces (M1S and M1B Series Models) in order to check the performance after furnace installation. A flue gas sample may be taken from the heat exchanger, which is located behind the hole of the top-front of blower compartment. 1. STOP! Read the SAFETY INFORMATION. 2. Turn off all electric power to the appliance. 3. Remove the black plastic cap located above the blower and save. 4.
! WARNING: Close hinged fire door. If fire door is open or spring is broken it may allow products of combustion into the living space by the furnace blower resulting in possible asphyxiation. In the event of any flashback or explosion, immediately shut off the furnace and call your service technician. TO TURN OFF GAS TO APPLIANCE: a. Set the thermostat to the lowest setting. b. Turn off all electric power to the appliance at breaker or fuse box, before servicing. c. Remove the furnace door. d.
e. When the call for heat is satisfied the thermostat contacts open, the gas valve shuts off gas flow, and the induced draft blower stops. GENERAL-DIRECT IGNITION MODELS Read safety information on front page of these installation instructions before operating furnace. DO NOT ATTEMPT TO OPERATE FURNACE IF YOU SMELL GAS. Operating instructions for M1M — MODELS WITH DIRECT IGNITION: a. STOP! Read the SAFETY INFORMATION. b. Set the thermostat to the lowest setting. c.
remains open if flame is sensed, or closes if flame is not sensed. e. If flame is not sensed, the entire sequence is repeated four more times before “lockout” occurs. To reset, wait 30 seconds and then interrupt the 24 VAC power by turning the room thermostat below room temperature, then returning it to the original set point. f.
accomplished automatically by a silicon carbide hot surface ignitor. A control module takes care of all lighting and timing functions. There are no external relays or timing devices. Do not try to light this furnace manually. The control module is not field serviceable. 1. Before operation, smell all around the furnace for gas. Be sure to smell next to the floor because some gas is heavier than air and will settle on the floor. If you smell gas, STOP! and follow the safety instructions below.
2. Limit Control - This furnace is protected by two high temperature safety limit switches. The auxiliary (upper) limit switch and the high temperature (lower) limit switch are automatic reset types. If either limit trips, the burner will shut off. If either limit switch trips off again soon after resetting, set the furnace On-Off switch to the “OFF” position and call your authorized serviceman. 3.
air, to a larger number (clockwise) for more air. Tighten the lock nut after completing the adjustment. For best results, use instruments to measure between 8-9% CO2 after the combustion air has been adjusted. Oil Gun Only It is recommended that the CO2 and Smoke levels should be measured for maximum performance. CO2 readings should be 10-11% for 66,000 BTUH furnaces and 12-13% for 86,000 BTUH furnaces. The Smoke should be N0. 0 on the Bacharach Scale, and 0 to 0.02 negative draft over fire.
Robertshaw Valve NOTE: The pilot flame is adjustable by turning the adjustment screw located on the gas valve with a small screwdriver. (See Figure 29) TROUBLESHOOTING - STANDING PILOT MODELS Main Burner Does Not Come On a. Check the electrical supply to the furnace. b. Be sure the furnace On-Off switch is in the “ON” position. c. Check for proper thermostat operation. d. Check for broken or open thermostat wires. Figure 34. Convertible Pressure Regulator d.
Control Module Status Indicators - M1M Series Control Status The Red LED labeled “STATUS” is provided to indicate system faults.
humidity requires higher temperatures for the same level of comfort. Check for proper humidity level in the home. TROUBLESHOOTING DIRECT IGNITION FURNACES INCLUDING GAS GUN Burner Motor Does Not Run— Thermostat Calls For Heat a. Check the electrical supply to the furnace. b. Be sure the furnace On-Off switch is in the “ON” position. c. Defective thermostat circuit - white and red thermostat low voltage leads (M1M*, M1B* models).
c. If no power to combustion blower then check wiring and control module; replace if necessary. Circulation Air Blower Will Not Operate Even Though The Burner Does Operate a. Check thermostat “G” wiring. b. Check wiring to motor. c. Check for a defective motor. TROUBLESHOOTING - OIL GUN Honeywell R7184 oil gun control only. Burner does not start with a call for heat. 1. Check the electrical supply to the furnace. 2. Be sure the furnace door switch is in the on position.
Check for Ice Here a. Remove the air circulator and clean all dust and lint from the unit with a stiff bristle brush. b. Inspect the combustion chamber blower compartment, flue collar and Roof Jack. c. Check the gas valve (if applicable) and fuel line connections for leaks. d. Make any adjustments necessary for good operation. ! WARNING: Figure 36. Roof Jack ! WARNING: Do not obstruct any return air openings, including the grille on the furnace.
Figure 37. Coil Cavity Damper (Non-Platinum Series Only) Figure 38. Damper without Coil Cavity (Non-Platinum Series Only) M1* A/C Ready Furnace Thermostat Rc Red Red White White Green Green Yellow Grey RH W G Y M1* A/C Ready Furnace Thermostat Rc Red Red White White Green Green Yellow Grey RH ** Route Thermostat wire to intended Platinum Series AC/HP location. Coil and secure extra six feet of wire to home's undercarriage.
Blower Speed Selection Chart for M1*B Models and for use with Blower Kit No. 903773 1/4 Hp 3 Speed Heating Cooling Speed/ Evap Coil Furnace Input Speed Setting 086, 090 066, 070, 077 056 2 Ton 2-1/2 Ton 3 Ton L L L M M M H H H H M L Blower Speed Selection Chart for M1*C Models and for use with Blower Kit No.
L1 NEUTRAL ON/OFF SWITCH GAS VALVE R L1 FURNACE ELECTRICAL BOX GRAY WHITE ORANGE ORANGE TRANSFORMER GRAY WHITE COMMON FOR OPTIONAL ACCESSORY KITS C R W C FIELD 115V: FIELD 24V: 24V: FAN SWITCH AUX. LIMIT 115V: LEGENDS BLUE BLACK WHITE 115 V N 24 V HI-LIMIT BLUE Figure 40. Gas Atmospheric Furnace, M1GH 056, 070 Models FAN ON/AUTO SWITCH GROUND SCREW SUPPLIED BY INSTALLER BLACK BLACK CONNECTOR HOUSING CAP 2.
NEUTRAL L1 ON/OFF SWITCH 6 3 5 1 2 GAS VALVE BUSHING GRAY WHITE ORANGE ORANGE BLACK BLACK GRAY BLUE CONNECTOR HOUSING CAP BLACK 4 BLACK C R W WHITE GRAY N BLUE BLACK WHITE WHITE 115 V 24 V C BLACK HI-LIMIT BLUE FURNACE ELECTRICAL BOX L1 TRANSFORMER R 1 2 3 4 5 6 BLACK LEGENDS 115V: 24V: FAN SWITCH BLUE AUX. LIMIT FIELD 115V: FIELD 24V: PRESSURE SWITCH 1 2 COMBUSTION FAN Figure 41.
LEGENDS 115V: 24V: NEUTRAL L1 ON/OFF SWITCH WHITE A/C BLOWER RELAY 6 3 51 4 2 BLUE * WHITE 24 V N C BLUE BLUE BLUE BLACK WHITE BLACK GRAY L1 115 V R HI-LIMIT WHITE FAN SWITCH BLUE AUX. LIMIT BLOWER MOTOR 4 SPEED HEATING/COOLING MANUAL RESET VENT SWITCH 1 2 34 5 6 NOTE: To run at same speed in both heating and cooling mode, remove wire from either terminal 4 or 6 on the relay, then attach jumper to terminals 4 and 6.
L1 FIELD 115V: FIELD 24V: GROUND SCREW ON/OFF SWITCH A/C BLOWER RELAY 5 1 2 WHITE 6 3 4 BLACK RED* BLUE RED BLACK BLUE WHITE 1 2 3 4 5 6 WHITE HI-LIMIT N C BLUE BLUE FAN SWITCH BLUE A/C & Heating Speeds: Refer to Table 10, A/C Blower Selection in the manual BLACK BLACK WHITE WHITE 115 V 24 V FURNACE ELECTRICAL BOX L1 R GRAY TRANSFORMER BLACK * Jumper Wire - M1GB 090 Units Only Otherwise Hi-Speed Connected to Blower Relay (Black) GAS - M1GB 077 Heating: Orange wire VALV
FIELD 115V: FIELD 24V: 24V: GROUND SCREW 115V: LEGENDS NEUTRAL L1 BLACK SUPPLIED BY INSTALLER ON/OFF SWITCH IGNITOR YELLOW YELLOW 4 1 3 2 1 9 6 8 5 7 4 BLACK GAS VALVE GREEN A/C & Heating Speeds: Refer to Table 10, A/C Blower Selection in the manual ORANGE ORANGE HI-LIMIT BLUE BLUE BLACK BLACK AUX.
L1 GROUND SCREW RED (LO) BLUE (MEDHI) RED (LO) RED BLUE BLACK ORANGE GREEN BLACK C R W N C FAN SWITCH BLUE FIELD 115V: FIELD 24V: BUSHING WHITE 115 V 24 V LEGENDS 115V: 24V: L1 R HI-LIMIT BLUE AUX.
21. EQUIVALENT ORIFICE SIZES AT HIGH ALTITUDES (Includes 4% Input Reduction for Each 1,000 Feet) FURNACE MODEL ORIFICE SIZE AND OUTPUT CAPACITY ORIFICE SIZE - NAT. GAS M1M/G 056 ORIFICE SIZE - LP OUTPUT- MBTUH ORIFICE SIZE - NAT. GAS M1M/G 070 ORIFICE SIZE - LP OUTPUT- MBTUH ORIFICE SIZE - NAT. GAS M1M 077 ORIFICE SIZE - LP OUTPUT- MBTUH ORIFICE SIZE - NAT. GAS M1G 077 ORIFICE SIZE - LP OUTPUT- MBTUH ORIFICE SIZE - NAT. GAS M1M 090 ORIFICE SIZE - LP OUTPUT- MBTUH ORIFICE SIZE - NAT.