
Installation Guide


9
6.Installation
In the installation, some work will be done above the roof, extra care and fall protection may be
required. Take extra care and responsibility to do the installation as safely as possible.
2.Tools necessary for the installation
3.Installation Procedure
Follow the below motioned procedure and install correctly. Specially, be sure to check each【Point】carefully.
If not installed correctly, the water heater will not function properly.
WARNING
For your safety, do not attempt to work on a rooftop until safety precautions have been identified and
taken including without limitation fall protection measures, ladders or stairways, and personal protective
equipment(PPE).
Installation in windy or wet conditions require additional precautions. Follow local safety regulations.
Maximum Vent lengths
Max. Straight Vent Length: 35'(10.5m).
Max. allowable 45 degree elbows(B-Vent) are 2 elbows.
Not including "
⑧ C 45 degree PP elbow"
No 90
elbows(B-Vent)
Only when the all conditions of
"
4. Before Installation (Check the condition of installation)
"
are
satisfied, proceed with the installation, following the below mentioned installation procedure.
①
Screwdriver
②
Cutting tool
③
Tape Measure
④
Marker
Phillips head
Flat head
Box wrench(5/16")
For cutting the flexible vent.
PVC Cutter
Box Cutter
etc.
Hand saws are not approved
for cutting.
For [EZTR50] EZ98DV(GQ-C2859WX-FF US)
[EZTR75] EZ111DV(GQ-C3259WX-FF US)
Follow the instruction in the Flex Vent 2" Conversion Kit
Installation Manual to install the Flex Vent 2" Conversion Kit.
Note : This manual illustrates installation for the NRC663-FSV.
Installation for other models may vary slightly.
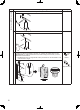
Only use the parts provided in the package for construction.
Using parts other than the ones provided may cause the product to be assembled incorrectly.
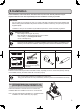
Be sure to do
Be sure to do
Be sure to do
or