Title page Nortel Mobile Communication 3100 Series Portfolio Mobile Communication Client 3100 for BlackBerry User Guide
Contents Contents New in this release . . . . . . . . . . . . . . . . . . . . . . . . . . . . . . . . . 7 Features . . . . . . . . . . . . . . . . . . . . . . . . . . . . . . . . . . . . . . . . . . 7 Other . . . . . . . . . . . . . . . . . . . . . . . . . . . . . . . . . . . . . . . . . . . . . 7 Revision history . . . . . . . . . . . . . . . . . . . . . . . . . . . . . . . . . 7 How to get help . . . . . . . . . . . . . . . . . . . . . . . . . . . . . . . . . . . .
Contents Installing or upgrading MCC 3100 for BlackBerry using the BlackBerry Enterprise Server . . . . . . . . . . . . . . . . . . . . . . . . . 22 Uninstalling MCC 3100 for BlackBerry . . . . . . . . . . . . . . . . . . 22 Uninstalling the database . . . . . . . . . . . . . . . . . . . . . . . . . 22 Uninstalling the MCC 3100 application using the Desktop Manager . . . . . . . . . . . . . . . . . . . . . . . 23 Uninstalling the MCC 3100 application using the BlackBerry . . . . . . . . . . . . . . . . . .
Contents Accessing Help . . . . . . . . . . . . . . . . . . . . . . . . . . . . . . . . . . . . 42 Advanced functions . . . . . . . . . . . . . . . . . . . . . . . . . . . . . . . 45 Friends . . . . . . . . . . . . . . . . . . . . . . . . . . . . . . . . . . . . . . . . . . 45 Adding a friend . . . . . . . . . . . . . . . . . . . . . . . . . . . . . . . . . 45 Importing a friend . . . . . . . . . . . . . . . . . . . . . . . . . . . . . . . 48 Editing a friend . . . . . . . . . . . . . . . . . . . . . . . .
Contents 6
New in this release New in this release The following sections detail what is new in Mobile Communication Client 3100 for BlackBerry in MC 3100 Release 2.1. Features Nortel Mobile Communication 3100 (MC 3100) Release 2.1 introduces two new installation and upgrade options: over the air and from the BlackBerry Enterprise Server. Installation or upgrade over the air requires a BlackBerry cellular data plan. You invoke the installation or upgrade yourself.
New in this release October 2007 Standard 01.02. This document is up-issued to contain fixes for configuring Mobile Communication Gateway 3100 addresses and revised Outgoing Call Service DN requirements. September 2007 Standard 01.01. This document is issued to support the Nortel Mobile Communications 3100 Series Portfolio on Nortel Communication Server 1000 Release 5.0.
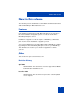
How to get help How to get help This chapter explains how to get help for Nortel products and services. Getting help from the Nortel Web site The best way to get technical support for Nortel products is from the Nortel Technical Support Web site: www.nortel.com/support This site provides quick access to software, documentation, bulletins, and tools to address issues with Nortel products.
How to get help Getting help from a specialist by using an Express Routing Code To access some Nortel Technical Solutions Centers, you can use an Express Routing Code (ERC) to quickly route your call to a specialist in your Nortel product or service. To locate the ERC for your product or service, go to: www.nortel.
Introduction Introduction This section contains the following topics: • “MCC 3100 for BlackBerry features” on page 11 • “Before you begin” on page 12 • "System and network requirements" on page 13 • “Installation” on page 14 • "About this guide" on page 14 MCC 3100 for BlackBerry features The Nortel Mobile Communication Client 3100 (MCC 3100) for BlackBerry application allows you to achieve real-time communication with the Nortel Mobile Communication Gateway 3100 (MCG 3100) and Nortel Communicati
Introduction • Redirect your incoming calls to alternative contact locations (for example, office, home, other). • Associate a single number with all of your outbound calls. Use the following call modes: — Direct Outbound—This is the basic mode. You can initiate calls directly from your BlackBerry to other parties by dialing or selecting friends to call. This direct mode uses an Outgoing Call Service DN to access the MCG 3100 in the enterprise.
Introduction System and network requirements The MCC 3100 for BlackBerry has the following system requirements. Important Notice: Users are advised to select and use headsets which are designed to reduce excessive sound pressure levels or acoustic shocks. Users should check that their headsets do meet their respective National or International Acoustic and Safety requirements. Table 1: System requirements Hardware and software Type Operating system Research in Motion BlackBerry operating system, V4.
Introduction trackball does not work. In these models, when a Choice Group is highlighted, the trackball is used to change the selection; the menu button causes the display of the menu. When a Choice Group is not highlighted, the trackball causes the display of the menu. This document covers the user interface of the rest of the BlackBerry devices, where the trackball causes the menu to display.
Introduction Related publications The following publications relate to the MCC 3100 for BlackBerry: • Nortel Mobile Communication Client 3100 for BlackBerry Quick Reference Card (NN42030-105) • Nortel Mobile Communication 3100 Series Planning and Engineering Guide (NN42030-200) • Nortel Mobile Communication Gateway 3100 Installation Guide (NN42030-300) • Nortel Mobile Communication Gateway 3100 Release Notes (NN42030-403) • Nortel Mobile Communication Gateway 3100 Administration Guide (NN42030-600
Introduction 16
Software installation Software installation This section contains the following: • “Installing MCC 3100 for BlackBerry from a computer” on page 18 • “Installing MCC 3100 for BlackBerry over the air” on page 20 • “Upgrading MCC 3100 for BlackBerry from a computer” on page 20 • “Upgrading MCC 3100 for BlackBerry over the air” on page 22 • “Installing or upgrading MCC 3100 for BlackBerry using the BlackBerry Enterprise Server” on page 22 • “Uninstalling MCC 3100 for BlackBerry” on page 22 This sec
Software installation Installing MCC 3100 for BlackBerry from a computer Prior to installation, obtain the MCC 3100 for BlackBerry software from your system administrator. 1. Connect the BlackBerry to a PC using a Universal Serial Bus (USB) cable. 2. Extract the MCC 3100 files to any folder on your computer. 3. Locate the folder where you extracted the MCC 3100 files. You require the following files to install the application: — MCC3100-BB.alx — MCC3100-BB.cod — .properties — xxx.Eula.
Software installation Figure 1: Application loader wizard file selection 8. Select any applications that are listed and click Delete. Each item must be deleted individually. 9. Click Add. 10. Browse to the folder with the extracted MCC 3100 files. 11. Select MCC3100-BB.alx and click Open. The applications appears in the Device Application Selection dialog box. 12. Confirm that the applications are checked. 13. Click Next. 14.
Software installation Installing MCC 3100 for BlackBerry over the air 1. On the BlackBerry, select Start > BlackBerry Explorer. 2. Use the following address format to access the software web site: http://:8080/m 3. Highlight the software load that you will install. 4. From the menu, select Get Link. 5. Click Download. 6. Acknowledge other licensing and security prompts that may appear during the process of installing the application on the mobile device. 7.
Software installation 4. Launch the BlackBerry Desktop Manager by selecting Start > Programs > BlackBerry > Desktop Manager. 5. Click Application Loader. The Application Loader Wizard appears. 6. Click Next. If the Desktop Manager detects the communication port, the Device Application Selection dialog box appears and you can skip to step. Otherwise, the Communication Port Selection dialog box appears. 7. Select a communication port (typically USB), and click Next.
Software installation Upgrading MCC 3100 for BlackBerry over the air 1. On the BlackBerry, select Start > BlackBerry Explorer. 2. Use the following address format to access the software web site: http://:8080/m 3. Highlight the software load that you will install. 4. From the menu, select Get Link. 5. Click Download. 6. Click Yes, when prompted if you are upgrading the software. 7.
Software installation 1. Start the MCC 3100 application and log off the network. See “Starting and exiting the MCC 3100 application” on page 35 and “Logging on and logging off” on page 36. 2. Go to the MCC 3100 Main screen. 3. From the menu, select System Settings. 4. From the menu, select Clear Database. 5. Select Yes at the prompt “Clear database and quit?”. 6. From the menu, choose Select. 7.
Software installation 6. Click the box to remove the check mark beside the MCC 3100 application. The action column now indicates this application will be removed. 7. Click Delete. 8. Click Next. 9. Click Finish to remove the MCC 3100 applications. 10. After the Application Loader Wizard removes the MCC 3100 applications from the handheld, click Close. Uninstalling the MCC 3100 application using the BlackBerry 1. Exit the MCC 3100 application if it is running.
MCC 3100 configuration MCC 3100 configuration This section contains the following topics: • “Initial configuration” on page 25 • "System settings" on page 27 • "Personal preferences" on page 30 • "Call settings" on page 32 • “Database backup and restore” on page 33 Initial configuration The first time you start the Mobile Communication Client 3100 (MCC 3100) after you install it on your BlackBerry, you must configure the following parameters provided by your system administrator: • your account
MCC 3100 configuration Figure 2: System Settings Note: If the Main screen appears, then your basic settings are already configured, and you can start using the application. 3. In the Username field, enter the user name provided by your system administrator. 4. In the Password field, enter the password provided by your system administrator. 5.
MCC 3100 configuration Figure 3: Preferences 9. In the Mobile Contact field, enter the cell telephone number for your BlackBerry. 10. From the menu, select Save. If you correctly configured the fields, you log on to the system and the Main screen appears. See “Overview of the Main screen” on page 36. If you made an error, you are prompted to re-enter the fields. Note: If the application requests an HTTP connection, use the trackwheel to select Allow this connection for all HTTP connections.
MCC 3100 configuration Figure 4: Outgoing Call Service DN structure Consult your system administrator to obtain your Outgoing Call Service DN and other system settings. Configuring your system settings 1. Go to the Main or Preferences screen. 2. From the menu, select System Settings. The System Settings screen appears. See “System Settings” on page 26. 3. Complete the fields on the System Settings screen using the information provided by your system administrator.
MCC 3100 configuration Table 2: System Settings screen fields Field Settings Secondary MCG3100 Address If present, enter the IP address or domain name and port of the secondary MCG 3100 in the form :: For example, http:47.11.210.11:8080 or http:mcg3100.nortel.com:8080. If the system uses the default port (8080 for HTTP or 8443 for HTTPS), then the port number does not need to configured here.
MCC 3100 configuration Personal preferences Use the Preferences screen to enter personal information, such as your name, contact, and call prefix settings. As a minimum, you must enter your mobile telephone number on this screen after you perform the steps in “Initial configuration” on page 25. Configuring your personal preferences 1. Go to the Main or System Settings screen. 2. From the menu, select Preferences. The Preferences screen appears. See “Preferences” on page 27. 3.
MCC 3100 configuration Table 3: Preferences screen fields Field Mobile Contact Default Prefix Settings Select the mobile telephone default call prefix. Options include: • Use No Prefix • Local Prefix • Long Distance Prefix • International Prefix • Corporate Prefix When you execute a basic call, the system automatically inserts this prefix ahead of your mobile telephone number. Home Contact Enter your home number. Other1 Contact Enter an additional number.
MCC 3100 configuration Only the MCC 3100 uses the information you enter on the Preferences screen. No information is uploaded to any other BlackBerry application. 4. From the menu, select Save. Call settings Use the Call Settings screen to select a call screening mode and configure the group call notification period. Configuring your call settings 1. Go to the Main or System Settings screen. 2. From the menu, select Call Settings. The Call Settings menu screen appears. See “Call Settings” on page 32.
MCC 3100 configuration route” (voice mail by default). You do not receive a missed call indication for forwarded calls. Configure your contact locations on the Preferences screen. See “Personal preferences” on page 30. 4. Configure the Group-Call Notify Period for a time period between 1 and 30 minutes (default is 5 minutes). This parameter controls how often the MCC 3100 prompts you to join a group call after you have received the initial invitation and selected Join Later. 5. From the menu, select Save.
MCC 3100 configuration 7. Select Save As from the File menu. The Save As dialog box appears. 8. Navigate to the folder where you want to save the backup file, then click Save. The MCC 3100 database is saved. Restoring the database 1. Connect your BlackBerry to your computer with a USB cable. 2. Launch the BlackBerry Desktop Manager by selecting Start > Programs > BlackBerry > Desktop Manager. 3. Click Backup and Restore. The Backup and Restore dialog box appears. 4. Click Restore.
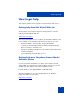
Basic functions Basic functions This section contains the following topics: • “Starting and exiting the MCC 3100 application” on page 35 • “Logging on and logging off” on page 36 • “Hiding the MCC 3100 application” on page 36 • “Overview of the Main screen” on page 36 • “Navigating screens” on page 39 • “Accessing Help” on page 42 Starting and exiting the MCC 3100 application To start the Mobile Communication Client 3100 (MCC 3100) for BlackBerry application, select Nortel MCC 3100 from the Bla
Basic functions Logging on and logging off To log on or log off the MCC 3100, perform the following steps: 1. Go to the main MCC 3100 screen. 2. Press the trackwheel or trackball to display the menu. 3. To log on the MCC 3100, select Login. The status indicator changes to the status of the device before you last logged off. 4. To log off the MCC 3100, select Logout. The MCC 3100 application remains active when you are logged off.
Basic functions Figure 6: Main screen Status panel The Status panel indicates your current status on the network. For example, if Connected appears, then you are logged on and available to take calls. The text color visually indicates your availability: • Connected (green text)—You are logged on. • Logged Out (grey text)—You are logged off. • Logged Out by Admin (grey text)—The MCG 3100 administrator has logged you off.
Basic functions The status panel also displays the following information: • (VM) if you have new voice mail messages • an asterisk (*) if you registered with the secondary Mobile Communication Gateway 3100 (MCG 3100) Recent link and preview panel Select the Recent link to go to the Logs screen, which provides a history of incoming and outgoing calls, voice mail messages, and system events. The Logs screen can contain up to 50 entries.
Basic functions Navigating screens Use the trackwheel or trackball to scroll in screens, menus, and to highlight, select, or click items. Use the escape button to exit screens and close menus. Hold the escape button to end a call. Use the keypad to enter numbers and characters. Use the Send key to initiate calls and the End key to terminate calls. Accessing screens The Main screen contains links that you use to access other screens. See “Selecting links” on page 39.
Basic functions Figure 8: Preview panels You can scroll through the preview panel, highlight an entry, and then run a menu command. To exit the preview panel, press the escape key or select Step out from the menu. Shortcut Keys In addition to standard navigational aids, MCC 3100 provides shortcut keys to speed your workflow. See “Shortcut keys” on page 41.
Basic functions Note: Some devices may not offer full range of shortcut keys. Table 4: Shortcut keys Screen Key Action Logs t Go to top of list. b Go to bottom of list. d Go to Corporate Directory screen. a Go to Device Address Book. x Go to Home screen. c Call selected entry. n Go to the next entry. p Go to the previous entry. d Go to Corporate Directory screen. a Go to Device Address Book. c Call the selected entry. n Go to the next entry. p Go to the previous entry.
Basic functions Table 4: Shortcut keys Screen Key Action Home a-z When focus is on the Main screen or the Friends preview panel, press a key to search for friends with names that start with that letter. space Go to the Place Call screen. If focus is on the Friend preview panel when you press space, the highlighted friend’s contact location is preconfigured.
Basic functions Figure 9: Help screen 43
Basic functions 44
Advanced functions Advanced functions This section contains the following topics: • “Friends” on page 45 • “Searching the corporate directory” on page 52 • “Placing Calls” on page 53 • “Groups” on page 60 • “Notification profiles” on page 67 • “Logging Events” on page 68 • “Managing voice mail” on page 72 Friends Friends are people that you call frequently. Each friend has a name and at least one contact location (extension or telephone number).
Advanced functions The New Friend screen appears. See “New friend screen” on page 46. Figure 10: New friend screen 3. Complete the fields on the Edit Contact screen using the information in “Adding a friend” on page 46 as a guide. Table 5: Adding a friend Field Settings Display Name Enter a display name for your friend. This name appears on the Friends screen if you add to the MCC 3100 local address book or on the Find screen if you add the friend to the BlackBerry device address book.
Advanced functions Table 5: Adding a friend Field Settings Mobile contact Enter the mobile telephone number of your friend. When you call this friend, you can choose this number from a list. Home contact Enter the home telephone number of your friend. When you call this friend, you can choose this number from a list. Other1 contact Enter an additional telephone number of your friend. When you call this friend, you can choose this number form a list.
Advanced functions Table 5: Adding a friend Field Settings Default Prefix Select the friend’s default prefix: • Use No Prefix • Local Prefix • Long Distance Prefix • International Prefix • Corporate Prefix When you initiate a basic call or group call, the system automatically inserts this prefix before the contact number. Note: Provide at least one contact location: Extension, Office number, Mobile number, Home number, or Other number. 4.
Advanced functions 2. Highlight a call record. 3. From the menu, select Add to Friends. 4. Make changes if needed, and then select Save from the menu. Your new friend is added to the MCC 3100 local address book. Note: After you add a friend from the logs screen, check that the contact information is complete. You may need to add a prefix or special character that was removed from the original call record. To add a friend from the Search Results screen 1.
Advanced functions The Confirmation dialog appears and the friend is added to the MCC 3100 local address book. 4. Select Back to return to the BlackBerry device address book; or, View/Edit to access the MCC 3100 Edit Friend screen. Note: After you add a friend from the logs screen, check that the contact information is complete. You may need to enter a prefix, or special character that was removed during the call.
Advanced functions Figure 11: Edit friend screen 4. Edit the friend information as required. 5. After you edit a friend, select Save or Save to Device AddressBook from the menu. The screen displays the friend’s updated information. Deleting a friend You can delete a friend from the MCC 3100 local address book or from the BlackBerry device address book. To delete a friend from the MCC 3100 local address book 1. From the main screen, select the Friends link. The Friends screen appears. 2.
Advanced functions To delete a friend from the BlackBerry device address book 1. Go to the Main screen. 2. From the menu, select Device AddressBook. The Device Address Book appears. 3. Highlight the friend you want to delete. 4. From the menu, select Delete. 5. Click Delete to confirm the deletion. The friend is deleted from the device address book. Searching the corporate directory You can search for people in the Corporate Directory on the server.
Advanced functions 4. From the menu, select Search Now. Your search results appear on the Search Results screen. If you search in both the local and corporate directories, your search results appear in two panels: local and corporate. See “Search results screen” on page 53. Figure 13: Search results screen 5. A maximum of 10 entries appear at one time. If additional results are available, scroll to the bottom of the list, and select More available. 6.
Advanced functions MCC 3100 to initiate calls from your desktop telephone, mobile telephone, or home telephone, but the people you call always see the same number. Important Notice: Users are advised to select and use headsets which are designed to reduce excessive sound pressure levels or acoustic shocks. Users should check that their headsets do meet their respective National or International Acoustic and Safety requirements.
Advanced functions When the MCC 3100 is configured for Direct Outbound mode, you can switch from Direct Outbound mode to Call-me-First mode for advanced calls. See “Advanced calls” on page 57. Call-me-First mode In Call-me-First mode, your calls are completed in two steps. First the enterprise telephony system calls you. After you answer, the system calls the other party. See “Call-me-First mode” on page 55.
Advanced functions 1. Go to the Main, Logs, Friends or Search Results screen. 2. Scroll to a log entry, or click a shortcut key to select a friend. 3. From the menu, select Call from Extension. The enterprise telephony system calls your desktop extension. After you answer, the enterprise telephony system calls your friend at their default contact location. Note: Call from Extension always calls your desktop extension.
Advanced functions Advanced calls You can use Advanced call to: • Use Call-me-First mode to use one device to start the call and another to hold the conversation. For example, you can initiate the call on your BlackBerry, and have the conversation on your desktop telephone. • Select the other friend’s current contact location from a list. • Dial the other party’s extension or telephone number when the other party’s contact location is unknown.
Advanced functions Figure 16: Place call prefix 6. In the Using list, select your contact location, or enter a number. 7. If required, select your call prefix in the Using Prefix list. 8. From the menu, select Call. The enterprise telephony system calls you at the contact location you specified. 9. Answer the call. 10. The enterprise telephony system calls your friend at the contact location you specified. 11. After your friend answers, you connect and the conversation can commence.
Advanced functions the MCC 3100 has screening disabled, the call can only be accepted from your BlackBerry. If the MCC 3100 has Mobile Do-Not-Disturb enabled, the call is forwarded to voice mail. Before you receive calls, configure your contact locations and your call settings. For more information, see “Personal preferences” on page 30 and “Call settings” on page 32. 1. When you receive an incoming call, the MCC 3100 Incoming Call Confirmation dialog box appears. See “Incoming call” on page 59.
Advanced functions Groups You can add and manage a group that contain multiple friends, and then initiate conference calls to the group. Adding a group 1. From the Main screen menu, select Group Mgmt. The Group Management screen appears. 2. From the menu, select New Group. The New Group screen appears. See “New group screen” on page 60. Figure 18: New group screen 3. Enter the name of the group in the Group Name box. 4. From the menu, select Save.
Advanced functions Figure 19: Add to group screen 3. Select the group you wish to add the friend to. 4. From the menu, select Add Now. The friend is added to the group you selected. 5. Repeat steps 1 to 4 for all friends in the group. You can select one or more friends in one group and add them to another group. For more information, see “Managing friends in a group” on page 61. You can also add friends to a group after you search in the Corporate Directory.
Advanced functions Figure 20: Group management screen 2. From the Group List, select a group. 3. From the menu, select Group Details. The Group Details screen appears. See “Group details screen” on page 62. Figure 21: Group details screen 4. Select the friends to manage. 5. From the menu, select one of the following options: — Call to initiate a group call to the friends. — Edit to view or edit the selected friend on the Edit Friend screen. Only one friend at a time can be edited.
Advanced functions — Clear All to remove all selected friends in a group. — Delete Selected Users to delete the selected friends from the group. — Save Selections to save the current friend selections. The next time you enter the Group Details screen, the same friends are selected. Managing a group You can manage groups by deleting groups and changing group names. 1. From the Main screen, select the Groups link; or, from the Main screen menu, select Group Mgmt. The Group Management screen appears.
Advanced functions Initiating a group call With a group call, you can select a nonmobile contact location for yourself. You can set up the call on your BlackBerry and then engage in the conversation on another device, such as your desktop telephone. 1. From the Main screen, select the Groups link; or, from the Main screen menu, select Group Mgmt. The Group Management screen appears. See “Group management screen” on page 62. 2. Select a group on the list. 3. From the menu, select Group Details.
Advanced functions 8. From the menu, select Call. The Group-Call Session screen appears. 9. The enterprise telephony system calls you at the contact location you specified. 10. Accept the call, and then follow the prompts. As the group call initiator, you perform the following steps: a. Record the conference greeting, and then press pound (#) on your telephone dialpad. b.
Advanced functions • press *9 to stop the help Joining a group call that is in progress You can join a group call that is in progress if you selected Join Later when you were initially invited to participate. If you are the group call initiator, you cannot join a group call that is already in progress. Group call participants can join a group call that is in progress. 1. Go to the Logs screen. See “Logging Events” on page 68. 2. Select the group call entry that you want to join. 3.
Advanced functions Notification profiles Notification profiles alert you of incoming calls, messages, and other events. Five preset notification profiles (Default, Quiet, Loud, Vibrate, and Phone Only), are available that you can edit. You can also create custom notification profiles. By default, the BlackBerry can vibrate (but not ring) when it receives an application-based call, an instant message, or a presence notification. You can update the default behavior for the individual events.
Advanced functions Logging Events The MCC 3100 retains a record of your recent communication sessions. The following events are logged: • Incoming calls (answered, missed) • Outgoing calls (successful, unsuccessful, in progress) • System event notifications You can view an abbreviated list of log events on the Main screen. For a complete list and for details concerning individual events, you must access the Logs screen.
Advanced functions The Recent preview panel displays up to 10 friends that you recently communicated with. 2. Optionally, select an entry and select a menu command such as Call. Viewing entries on the Logs screen The Logs screen provides a history of your most recent incoming and outgoing calls, voice mail messages, and system event notifications. The Logs screen can contain a maximum of 50 entries. By default, the entries are organized by time and date, but you can reorganized them by name.
Advanced functions Figure 25: Call icons For group call icon explanations, see "Group call icons" on page 70. Figure 26: Group call icons For system notification icon explanations, see "System notification icons" on page 70. Figure 27: System notification icons 2. To view the details concerning an individual entry, select the entry, and select Log Details from the menu. The Details screen appears. See “Logs details screen” on page 71.
Advanced functions Figure 28: Logs details screen Sorting entries on the Logs screen You can sort items in the Logs screen by the name of the individual associated with the log or by the time and date. You can also re-sort the list to only display missed calls or voice mail notifications. 1. Go to the Logs screen. 2. From the menu, select Sort by Name or Sort by Time. The entries are sorted according to your selection. 3. From the menu, select All Logs (default) or Missed Call Logs.
Advanced functions 1. Go to the Logs screen. 2. From the menu, select Delete All. 3. Select Yes or Cancel in response to the prompt. If you selected Yes, all entries are deleted. Managing voice mail In addition to checking whether you have any messages, you can quickly and easily call the voice mail system to access your mailbox. Voice mail message waiting indication When you receive a new voice mail message, the voice mail indicator (VM) appears on the Main screen.
Advanced functions Note: You must use the BlackBerry telephone application to generate DTMF tones. You can also call voice mail from the Recent preview panel by selecting the voice mail entry, and choose Call from the menu. The Recent preview panel can contain up to 10 voice mail and call entries.
Advanced functions 74
Acronyms Acronyms Table 6 lists the acronyms used in this guide.
Acronyms Table 6: Acronyms Acronym Full Name URL Uniform Resource Locator USB Universal Serial Bus VM Voice Mail VPN Virtual Private Network WiFi Wireless Fidelity 76
Nortel Mobile Communication 3100 Series Portfolio Mobile Communication Client 3100 for BlackBerry User Guide Copyright © 2007–2008 Nortel Networks. All Rights Reserved. LEGAL NOTICE While the information in this document is believed to be accurate and reliable, except as otherwise expressly agreed to in writing NORTEL PROVIDES THIS DOCUMENT "AS IS" WITHOUT WARRANTY OR CONDITION OF ANY KIND, EITHER EXPRESS OR IMPLIED.