
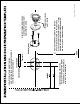
Installation Guide


Passage/Privacy
Installation Instructions
For Pre-Attached
Rosettes and Short Plates
Tools Required: #2 Phillips Screwdriver (Not power tools)
Fits doors
1-3/8” to 1-3/4” thick
Attach the strike plate to the door jamb
using 3/4” long wood screws.
Door
Jamb
Install Strike Plate
Door - Inside
Screw in the
Privacy Pin
(Privacy Only)
Install Privacy Pin
Door - Inside
Install interior half of lockset
with 1-1/2” machine screws
(1-3/8” thick doors), or 1-3/4”
machine screws (1-3/4” thick
doors)
Install Interior Half
of Lockset
Door - Inside
Install
Exterior
Half of
Lockset
Emergency
Release Hole
(Privacy Only)
Push spindle button
down and hold during
insertion
1
2
Insert
Spindle
Insert
Spindle
Door - Inside
Latch
Tongue
*
Latch Tongue Note
Bevel Side
Face Plate Curve
Strike Plate Curve
Threaded
privacy hub
goes on the
inside of the
door.
Bevel side of latch tongue should
contact curved end of face plate,
and curved end of strike plate.
Install latch and rotate
the latch tongue
to change handing.
(See page 1 for handing)
Install anti-
rotation block.
Be certain
the arrow is
pointing to
the edge of
the door.
Install faceplate with
3/4” wood screws.
(Anti-Rotation
Block)
Arrow
1
2
3
Door - Inside See Latch Tongue
Note in next panel
*
*
Install
Latch
For 2-3/8”
Backset:
For 2-3/4”
Backset:
Backset
Information
NOTE:
DRILLING
TEMPLATES
ON
SEPARATE
INCLUDED
SHEET
Page 3 - PK177 04202017