
User Manual

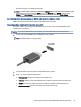


Table Of Contents
- Getting started
- Components
- Network connections
- Connecting to a wireless network
- Connecting to a wired network
- Using HP MAC Address Pass Through (select products only)
- Navigating the screen
- Using touchpad and touch screen gestures
- Tap
- Two-finger pinch zoom
- Two-finger slide (touchpad and precision touchpad)
- Two-finger tap (touchpad and precision touchpad)
- Three-finger tap (touchpad and precision touchpad)
- Four-finger tap (touchpad and precision touchpad)
- Three-finger swipe (touchpad and precision touchpad)
- Four-finger swipe (precision touchpad)
- One-finger slide (touch screen)
- Using an optional keyboard or mouse
- Using an on-screen keyboard (select products only)
- Using touchpad and touch screen gestures
- Entertainment features
- Using a camera (select products only)
- Using audio
- Using video
- Connecting a Thunderbolt device using a USB Type-C cable (select products only)
- Connecting video devices using an HDMI cable (select products only)
- Discovering and connecting wired displays using MultiStream Transport
- Discovering and connecting to Miracast-compatible wireless displays (select products only)
- Discovering and connecting to Intel WiDi certified displays (select Intel products only)
- Using data transfer
- Managing power
- Using Sleep and Hibernation
- Shutting down (turning off) the computer
- Using the Power icon
- Running on battery power
- Running on external power
- Security
- Protecting the computer
- Using passwords
- Setting passwords in Windows
- Setting passwords in Computer Setup
- Managing a BIOS administrator password
- Using DriveLock Security Options
- Windows Hello (select products only)
- Using antivirus software
- Using firewall software
- Installing software updates
- Using HP Client Security (select products only)
- Using HP TechPulse (select products only)
- Using an optional security cable (select products only)
- Using a fingerprint reader (select products only)
- Maintenance
- Backing up, restoring, and recovering
- Computer Setup (BIOS), TPM, and HP Sure Start
- Using HP PC Hardware Diagnostics
- Using HP PC Hardware Diagnostics Windows (select products only)
- Using HP PC Hardware Diagnostics UEFI
- Using Remote HP PC Hardware Diagnostics UEFI settings (select products only)
- Specifications
- Electrostatic discharge
- Accessibility
- Index

Each time you press f1 the display state changes.
NOTE: For best results, especially if you choose the Extend option, increase the screen resolution of the
external device, as follows. Select the Start button, select Settings, select System, and then select
Display. Under Scale & layout, select the appropriate resolution, and then select Keep changes.
Connecting video devices using an HDMI cable (select products only)
HDMI is the only video interface that supports high-denition video and audio.
Connecting a high-denition TV or monitor using HDMI
To see the computer screen image on a high-denition TV or monitor, connect the high-denition device
according to the instructions.
NOTE: To connect an HDMI device to your computer, you need an HDMI cable, purchased separately.
1. Connect one end of the HDMI cable to the HDMI port on the computer.
NOTE: HDMI port shape can vary by product.
2. Connect the other end of the cable to the high-denition TV or monitor.
3. Press f1 to cycle through four display states:
● PC screen only: View the screen image on the computer only.
● Duplicate: View the screen image simultaneously on both the computer and the external device.
● Extend: View the screen image extended across both the computer and the external device.
● Second screen only: View the screen image on the external device only.
Connecting video devices using an HDMI cable (select products only)
33