1.2 Fine Tuning / Feinabstimmung / Réglages / Fijn afstellen / Ajuste preciso / Ajuste exacto / Regulering af kameravinkel / Regulering av kameravinkel / Reglering av kameravinkel Fig./Abb./Afb. 5 1.3 Night light / Nachtlicht / Veilleuse / Nachtlamp / Luz nocturna / Natlys / Nattlys / Nattlampa Fig./Abb./Afb.
2 Monitor Setup / Einrichten des Monitors / Réglage du moniteur / Instelling monitor / Configuración del monitor / Instalar o monitor / Ibrugtagning af monitor / Oppsett monitor / Uppsatt monitor 2.
2.2 Brightness Setting / Helligkeitseinstellung / Réglage de la luminosité / Instelling Helderheid / Ajuste del brillo / Ajuste do brilho / Justering af lysstyrke / Justering av lysstyrke / Justering av ljusstyrka Fig./Abb./Afb. 9 2.
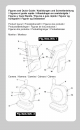
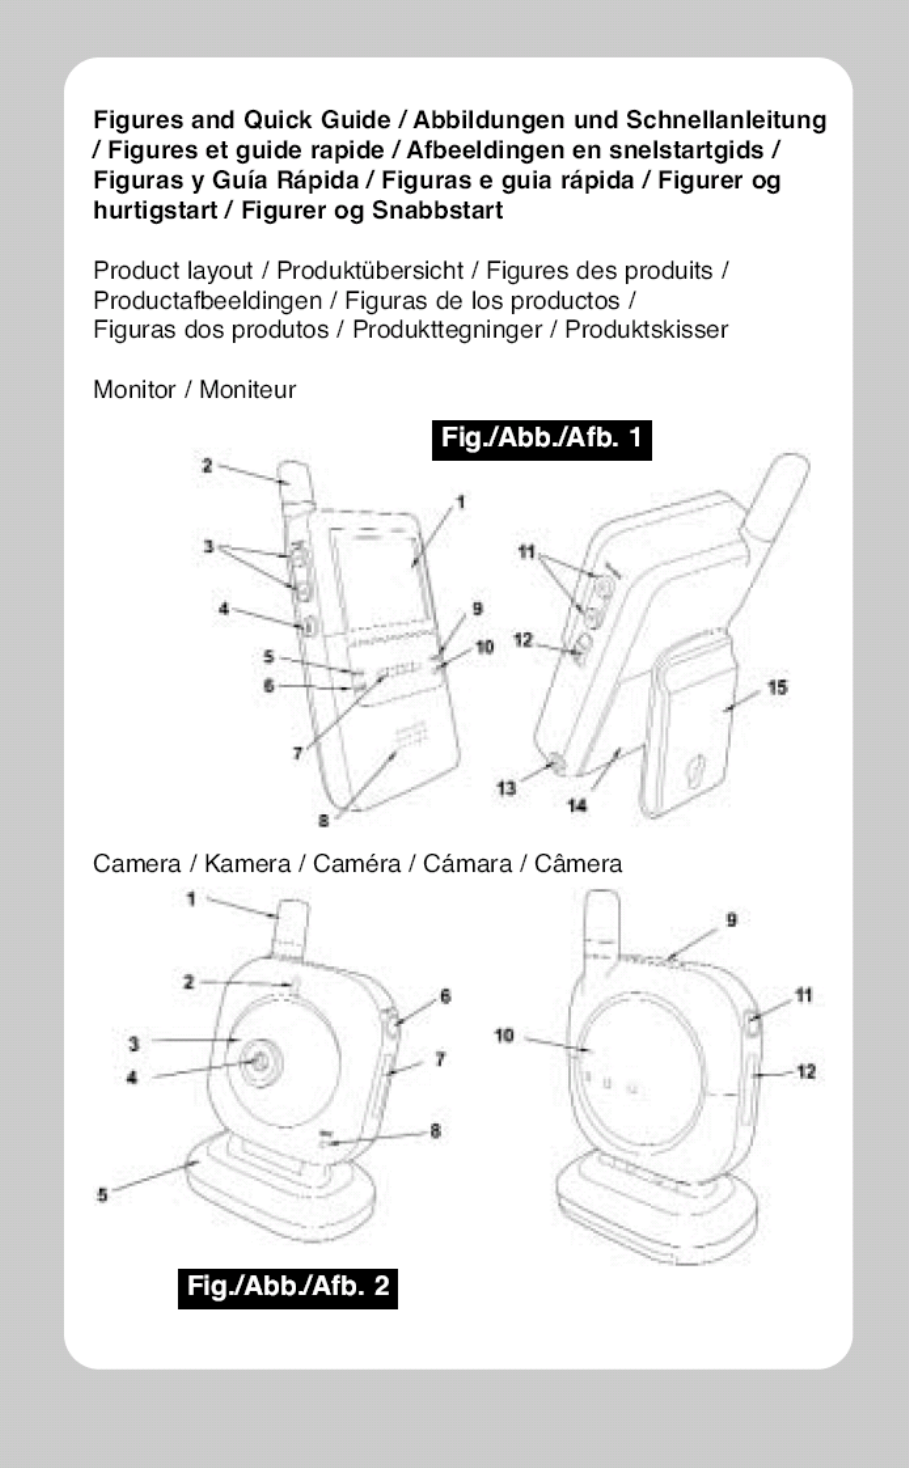
GB Package Content One Camera One Monitor Two Power Adapters Battery for Monitor ( 3.7V 1000mAH Li-ion ) One wall bracket This User's Manual Product Layout Monitor (Fig. 1) 1. LCD screen 2. Antenna 3. Music selection buttons 4. VOX:Voice Operated Transmission button 5. Power indicator LED 6. Link indicator LED 7. Volume indicator LEDs 8. Speaker 9. VOX (Voice Operated Transmission) indicator LEDs 10. Music indicator LEDs 11. Brightness adjustment buttons 12. Power / Volume control 13. Power adapter plug 14.
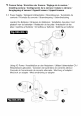
Setup 1 Camera Setup 1.1 Power Supply The camera uses either 4 AAA-Size batteries (alkaline battery recommended) or the household AC power current. Loading the Batteries 1. Loosen the screw on the bottom of the camera by using a screw driver. See Fig. 3. 2. Open the battery compartment cover . See Fig. 3. 3. Insert 4 AAA-size batteries (follow the plus (+) and minus (-) signs inside the battery compartment). See Fig. 3. 4. Close the battery compartment cover, and make sure it is locked securely.
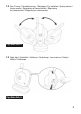
1.4 Night vision The camera has nine high-intensity LEDs for picking up clear images in the dark. When the built-in photo sensor detects low ambient light levels, the LEDs will automatically activate. Note: The image changes to black-and-white when Night Vision is active. 2 Monitor Setup 2.1 Power Supply The monitor uses 3.7V 1000mAH (Li-ion) battery or the household AC power current. The battery lasts for up to 3.
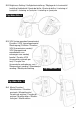
Note 2: When the camera and the monitor is linked , the "Link" LED will become green; otherwise, the "Link" LED will become red and blinking. Note 3: No image would be displayed on the LCD screen if the monitor is out of range (unlink). 2.2 Brightness Setting Adjust the Brightness selection button See Fig. 9. 2.3 / to adjust brightness. VOX ( voice-operated transmission) function 1. Press the "VOX" button on the side of the monitor. This will turn off the screen but the "VOX" LED will remain ON.
• Make sure the camera and the monitor are within range of each other (range of approximately 150 meters in a clear line of sight). • Keep all parts and accessories out of young children's reach. • Fingerprints or dirt on the lens surface can adversely affect camera performances. Avoid touching the lens surface with your fingers. • Should the lens become dirty, use a blower to blow off dirt and dust, or a soft, dry cloth to wipe off the lens. • Keep the camera dry.