www. .ch GS 927 i Silence Istruzioni per l’uso User manual Lavastoviglie Dishwasher 0848 559 111 www.fust.
INDICE Informazioni per la sicurezza Descrizione del prodotto Pannello dei comandi Uso dell'apparecchiatura Regolazione del decalcificatore dell’acqua Uso del sale per lavastoviglie Uso del brillantante Sistemazione di posate e stoviglie Uso del detersivo Uso di pastiglie combinate 2 3 4 7 7 8 8 9 13 14 Selezione e avvio di un programma di lavaggio Programmi di lavaggio Pulizia e cura Cosa fare se… Dati tecnici Installazione Collegamento dell’acqua Collegamento elettrico Considerazioni ambientali 15
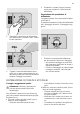
Installazione • Controllare che la lavastoviglie non presenti danni dovuti al trasporto. Non collegare l'apparecchio se è danneggiato. Se necessario, contattare il fornitore. • Rimuovere tutti i materiali di imballaggio prima dell'uso. • Gli interventi elettrici devono essere eseguiti da un tecnico qualificato e competente. • Gli interventi idraulici devono essere eseguiti da un tecnico qualificato e competente. • Non cambiare le specifiche tecniche né modificare questo prodotto.
PANNELLO DEI COMANDI 1 2 3 4 5 6 7 8 9 10 Tasto On/Off Tasto dei programmi (Programm) (Programme) Tasto Mezzo carico (1/2 Beladung) (1/2 Charge) Tasto Lavaggio igienizzante (Antibac) Tasto Extra risciacquo (Spülen+) (Rincer+) Tasto Funzione Multitab (Multitab) Tasto Partenza ritardata (Timer) Spie Display digitale Tasti funzione Spie Reinigen Nettoyage Lavaggio principale La spia si accende quando la fase di lavaggio o risciacquo è in funzione.
Spie 1) Salz Sel Sale La spia si accende quando è necessario riempire il contenitore del sale. Fare riferimento al capitolo 'Uso del sale per lavastoviglie'. Dopo avere riempito il contenitore, la spia del sale può rimanere ancora accesa per qualche ora. Ciò non compromette il buon funzionamento dell'apparecchio. 1) Le spie del sale e/o del brillantante non si accendono mai quando è in corso il programma di lavaggio anche se è richiesto il riempimento.
Display digitale Il display mostra: • Livello impostato del decalcificatore dell'acqua. • Numero del programma di lavaggio. • Tempo residuo al termine di un programma. • Attivazione/disattivazione del contenitore del brillantante (solo con la funzione MULTITAB attiva). • Termine del programma di lavaggio. Il display digitale mostra uno zero. • Numero di ore della partenza ritardata. • Codici di errore. • Attivazione/disattivazione dei segnali acustici.
1. Seguire la procedura precedente fino a quando nel visore digitale non sono indicate le impostazioni necessarie. USO DELL'APPARECCHIATURA Fare riferimento alle seguenti istruzioni per ciascun punto della procedura: 1. Verificare che il livello del decalcificatore sia corretto per la durezza locale dell'acqua. Se necessario, impostare il decalcificatore dell'acqua. 2. Riempire il contenitore del sale con sale per lavastoviglie. 3. Riempire l'erogatore del brillantante con brillantante. 4.
– La spia del tasto funzione A lampeggia. – Il visore digitale mostra il livello corrente. – Viene emesso un segnale acustico. / Esempio: il visore digitale mostra 5 segnali acustici intermittenti = livello 5. 6. Premere una volta il tasto funzione A per incrementare il livello del decalcificatore di un livello. 7. Premere il tasto On/Off per memorizzare l'operazione. USO DEL SALE PER LAVASTOVIGLIE Attenzione Utilizzare solo sale per lavastoviglie.
4. Rimettere e ruotare il tappo in senso orario per chiudere il contenitore del brillantante. Regolazione del quantitativo di brillantante L'apparecchiatura viene impostata in fabbrica a livello 3. È possibile impostare il livello del brillantante da 1 (dosaggio minore) a 4 (dosaggio maggiore). 2. Riempire il contenitore del brillantante con brillantante. Il simbolo 'max.' indica il livello massimo. AX + M 1 AX + M 1 2 3 4 3.
– Controllare che posate e stoviglie non coprano altri oggetti. – Verificare che i bicchieri non si tocchino l'un l'altro. – Mettere gli utensili di piccole dimensioni nel cestello delle posate. • Oggetti in plastica e padelle con fondo antiaderente tendono a trattenere maggiormente le gocce d'acqua. Gli oggetti in plastica non si asciugano altrettanto rapidamente quanto quelli in porcellana o acciaio. • Mettere gli utensili leggeri nel cestello superiore. Controllare che non si possano muovere.
Alternare i cucchiai con altre posate per evitare che si sovrappongano gli uni con gli altri. Abbassare la maniglia per inserire i coltelli nel cestello. Usare il separatore del cestello portaposate. Se le dimensioni delle posate impediscono l'uso dei separatori, è possibile toglierli. Il cestello portaposate è costituito da due parti. Per garantire una maggiore flessibilità di carico, è possibile utilizzare le due parti separatamente.
Griglie portatazze regolabili Per le stoviglie più alte è possibile sollevare le griglie portatazze. Le griglie portatazze possono essere fissate anche in una posizione intermedia. Appoggiare o appendere i bicchieri a calice nelle aperture delle griglie portatazze. Supporto per i bicchieri Per bicchieri a calice e per i bicchieri da bibita, ripiegare il supporto (fig. 1). Se non si utilizza il supporto, ripiegarlo verso destra (fig. 2). Mettere i bicchieri sui supporti.
Dimensione massima dei piatti con il cestello superiore nella posizione più alta. Disposizione di piatti di grandi dimensioni nel cestello inferiore 18 32 25 Dimensione massima dei piatti con il cestello superiore nella posizione più bassa. 20 30 25 USO DEL DETERSIVO Usare solo detersivi specifici per lavastoviglie (in polvere, liquidi o in pastiglie). Seguire le istruzioni riportate sulla confezione: • Dosaggio consigliato dal produttore. • Consigli per la conservazione.
4. Se si utilizzano detersivi in pastiglie, inserire la pastiglia nel contenitore ( A). 2. Riempire il contenitore (A) con il detersivo. L'indicatore mostra il dosaggio: 20 = circa 20 g di detersivo 30 = circa 30 g di detersivo. 3. Se il programma prevede una fase di prelavaggio, aggiungere detersivo anche nella vaschetta corrispondente ( B). B 5. Chiudere il coperchio del contenitore. Premere il coperchio fino a che non si blocca. Detersivi di marca diversa si sciolgono in tempi differenti.
• Premere il tasto Multitab. La spia corrispondente si accende. Per disattivare la funzione Multitab: • Premere il tasto Multitab. La spia corrispondente si spegne. Se i risultati di asciugatura non sono soddisfacenti, procedere nel modo seguente: 1. Riempire l'erogatore del brillantante con brillantante. 2. Attivare l'erogatore del brillantante. 3. Impostare il dosaggio del brillantante sulla posizione 2.
Attenzione Aprire la porta con attenzione. Può fuoriuscire vapore caldo. Interruzione di un programma di lavaggio Aprire la porta. • Il programma si ferma. Chiudere la porta. • Il programma riprende dal punto in cui era stato interrotto. Cancellazione di un programma di lavaggio 1. Tenere contemporaneamente premuti i due tasti funzione B e C fino a quando nel display digitale compaiono 2 trattini orizzontali. 2. Rilasciare i tasti funzione B e C per annullare il programma di lavaggio.
PROGRAMMI DI LAVAGGIO Programmi di lavaggio Tipo di carico Descrizione programma P1 Auto 1) Programma Qualsiasi Grado di sporco Stoviglie, posate, pentole e padelle Prelavaggio Lavaggio principale fino a 50 °C o 65 °C 1 o 2 risciacqui intermedi Risciacquo finale Asciugatura P2 Bicchieri Sporco normale o leggero Vasellame e bicchieri delicati Lavaggio principale fino a 45°C 1 risciacquo intermedio Risciacquo finale Asciugatura P3 Intenso Intensivo Stoviglie, posate, pentole e padelle Prela
Programma Mezzo carico Lavaggio igienizzante Extra risciacquo P4 Normale sì sì sì P5 ECO no no sì P6 Breve no sì sì P7 Prelavaggio no no no Valori di consumo Programma Durata (minuti) Consumo energetico (in kWh) Acqua (in litri) P1 Auto 85 - 105 1.1 - 1.5 12 - 22 P2 Bicchieri 65 - 75 0.8 - 0.9 13 - 14 P3 Intenso 105 - 115 1.8 - 2.0 22 - 24 P4 Normale 100 - 110 1.3 - 1.5 15 - 17 P5 ECO 165 - 175 1.0 - 1.1 14 - 15 P6 Breve 30 0.9 8 P7 Prelavaggio 7 0.
2. Togliere il cestello inferiore. 3. Estrarre il filtro a grana grossa e pulirlo attentamente sotto l'acqua corrente. 4. Ricollocare il filtro a grana grossa. Filtro a grana fine (2) 1. Aprire la porta ed estrarre il cestello inferiore. 2. Afferrare il filtro a grana fine per il manico. 3. Per estrarre il filtro a grana fine, ruotare il manico verso destra. 4. Pulire attentamente il filtro a grana fine con una spazzola sotto l'acqua corrente. metallico o un ago sotto l'acqua corrente.
Mulinello inferiore 1. Ruotare la vite di fissaggio (B) in senso antiorario. 2. Fare uscire il mulinello dall'albero. bido inumidito. Utilizzare solo detergenti neutri. Non usare prodotti abrasivi, spugnette abrasive o solventi (acetone, trielina, ecc.). Precauzioni antigelo Attenzione Non collocare l'apparecchio in un luogo in cui la temperatura possa scendere al di sotto di 0 °C. Il produttore non è responsabile di eventuali danni dovuti al gelo. 3. Pulire il mulinello e la vite di fissaggio. 4.
Codice guasto e malfunzionamento Il programma non si avvia Possibile causa e soluzione • La porta dell'apparecchio non è chiusa. Chiudere la porta. • La spina di alimentazione non è inserita nella presa di corrente. Inserire la spina di alimentazione elettrica. • Un fusibile domestico è bruciato. Sostituire il fusibile. • È stata impostata la Partenza ritardata. Annullare la partenza ritardata per avviare il programma immediatamente. Una volta effettuati questi controlli, accendere l'apparecchio.
Collegamento elettrico - TenI dati relativi al collegamento elettrico sono riportati sulla targhetta sione - Potenza generale - Fusi- informativa apposta sul lato interno della porta della lavastoviglie. bile Pressione di alimentazione dell'acqua Minima 0,5 bar (0,05 MPa) Massima Capacità 8 bar (0,8 MPa) Coperti 11 INSTALLAZIONE Avvertenza Verificare che la spina sia staccata dalla presa elettrica durante l'installazione.
COLLEGAMENTO DELL’ACQUA Collegamento dell'acqua Questo apparecchio può essere collegato all'alimentazione di acqua calda (max 60°) o acqua fredda. Se l'acqua calda proviene da fonti alternative di energia ecologiche (per esempio da pannelli solari o fotovoltaici e impianti eolici), utilizzare l'acqua calda per diminuire il consumo energetico. Collegare il tubo di carico a un rubinetto dell'acqua con filettatura esterna di 3/4".
Assicurarsi che la tensione e l'alimentazione elettrica corrispondano alla tensione e al tipo di alimentazione riportate nella targhetta della lavastoviglie. Utilizzare sempre una presa antishock elettrico correttamente installata. Non utilizzare prese multiple, connettori e prolunghe. Questi componenti possono determinare un rischio di incendio. Non cambiare mai il cavo elettrico da soli. Contattare il centro di assistenza locale. Controllare che la presa sia accessibile dopo l'installazione.
CONTENTS Safety information Product description Control panel Use of the appliance Setting the water softener Use of dishwasher salt Use of rinse aid Loading cutlery and dishes Use of detergent Multitab function 25 26 27 29 30 31 31 32 36 37 Setting and starting a washing programme 38 Washing programmes 39 Care and cleaning 41 What to do if… 42 Technical data 44 Installation 44 Water connection 45 Electrical connection 45 Environment concerns 46 Subject to change without notice SAFETY INFORMATION For
• • • • • nect a damaged appliance. If necessary, contact the supplier. Remove all packaging before first use. A qualified and competent person must do the electrical installation. A qualified and competent person must do the plumbing installation. Do not change the specifications or modify this product. Risk of injury and damage to the appliance.
CONTROL PANEL 1 2 3 4 5 6 7 8 9 10 On/off button Programme button (Programm) (Programme) Half-load button (1/2 Beladung) (1/2 Charge) Sanitize button (Antibac) Extra-rinse button (Spülen+) (Rincer+) Multitab button (Multitab) Delay start button (Timer) Indicator lights Digital display Function buttons Indicator lights Reinigen Nettoyage Wash The indicator light comes on when the washing phase or the rinsing phase operates.
Indicator lights aid1) Glänzer Rinçage Rinse The indicator light comes on when it is necessary to fill the rinse aid. Refer to the chapter 'Use of rinse aid'. Salz Sel Salt 1) The indicator light comes on when it is necessary to fill the salt container. Refer to the chapter 'Use of dishwasher salt'. After you fill the container, the salt indicator light can continue to stay on for some hours. This does not have an unwanted effect on the operation of the appliance.
• the set level of the water softener. • The number of the washing programme. • Remaining time to the end of the programme. • Activation/deactivation of the rinse aid dispenser (only with multitab function on). • End of the washing programme. The display shows a zero. • Number of hours in delay start. • Fault codes. • Activation/deactivation of the audible signals. Function buttons Use the function buttons for these operations: • To set the water softener.
2. 3. 4. 5. area. If necessary set the water softener. Fill the salt container with dishwasher salt. Fill the rinse aid dispenser with rinse aid. Load cutlery and dishes into the dishwasher. Set the correct washing programme for the type of load and soil. 6. Fill the detergent dispenser with the correct quantity of detergent. 7. Start the washing programme. If you use combi detergent tablets ('3 in 1', '4 in 1', '5 in 1', etc.), refer to the chapter 'Multitab function'.
USE OF DISHWASHER SALT Caution! Only use dishwashers salt. Types of salt that are not applicable for dishwashers cause damage to the water softener. Caution! Grains of salt and salty water on the bottom of the appliance can cause corrosion. Fill the appliance with salt before you start a washing programme to prevent corrosion. 4. Remove the salt around the opening of the salt container. 5. Turn the cap clockwise to close the salt container.
M + AX 2 3 4 + 1 M AX 1 2 3 4 3. Remove the spilled rinse aid with an absorbent cloth to prevent too much foam during the subsequent washing programme. 4. Replace and turn the cap clockwise to close the rinse aid dispenser. Adjusting the rinse aid dosage The rinse aid is set at the factory at position 3. You can set the rinse aid dosage between position 1 (lowest dosage) and position 4 (highest dosage). 1. Turn the rinse aid dial to increase or decrease the dosage.
The rows of prongs in the rear part of the basket can be flat to load pots, pans, bowls and deep dishes. 1. Hold the two rows of prongs on the right side at the rear part of the basket. 2. Lift the rows of prongs out of the guides. 3. Fold the rows of prongs in. You can adjust the width of the left row of prongs. 1. Hold the row of prongs at the rear part of the basket. 2. Pull the row of prongs until it disengages. 3. Push the row of prongs out of the guide. 4.
Lower the handle of the cutlery basket to put the cutlery in the basket. Use the cutlery grids. If the dimensions of the cutlery prevent use of the cutlery grids, you can easily hide them. The cutlery basket has two parts. You can use these parts separately for more loading flexibility. To disassemble the parts, move them horizontally in opposite directions and pull them apart. To assemble the parts, put them together and move horizontally to each other.
Glass holder For glasses with long stems and longer glasses, fold the glass holder up (fig. 1). If you do not use the glass holder, put it to the right side (fig. 2). Maximum dimensions for plates with upper basket in upper position. 18 Put the glasses on the prongs. Adjustment of the height of the upper basket If you put large plates in the lower basket, first move the upper basket to the upper position. Do these steps to move the upper basket to the upper or lower position: 1.
Arrangement of large plates in lower basket USE OF DETERGENT Only use detergents (powder, liquid or tablet) that are applicable for dishwashers. Follow the data on the packaging: • Dosage recommended by the manufacturer. • Storage recommendations. 30 = approximately 30 g of detergent. 3. If you use a washing programme with prewash phase, put more detergent in the prewash detergent compartment (B). Do not use more than the correct quantity of detergent to save an environment.
5. Close the lid of the detergent dispenser. Press the lid until it locks into position. Different brands of detergent dissolve in different times. Some detergent tablets do not have the best cleaning results during short washing programmes. Use long washing programmes when you use detergent tablets to fully remove the detergent. MULTITAB FUNCTION The multitab function is for combi detergent tablets. These tablets contain agents such as detergent, rinse aid and dishwasher salt.
To use normal detergent again: 1. Deactivate the multitab function. 2. Fill the salt container and rinse aid dispenser. 3. Adjust the water hardness setting to the highest level. 4. Do a washing programme without dishes. 5. Adjust the water softener to the water hardness in your area. 6. Adjust the rinse aid dosage. SETTING AND STARTING A WASHING PROGRAMME Set the washing programme with the door ajar. The washing programme only starts after you close the door.
Cancelling a delay start When you cancel a delay start, you also cancel the washing programme. 1. Press and hold function buttons B and C until 2 horizontal bars show in the digital display. 2. Release function buttons B and C to cancel the delay start. 3. Set a new washing programme . End of the washing programme Switch off the appliance in these conditions: • The appliance stops automatically. • The audible signal for the end of the programme operates. • The display shows 0.
Programme Degree of soil Type of load Programme description P5 ECO 2) Normal soil Crockery and cutlery Prewash Main wash up to 50°C 1 intermediate rinse Final rinse Drying P6 Quick 3) Normal or light soil Crockery and cutlery Main wash up to 65°C Final rinse P7 Prewash Any Partial load (to be completed later in the day). 1 cold rinse (to prevent food scraps to bond). Detergent is not necessary with this programme.
Programme P7 Prewash Duration (in minutes) 7 The pressure and temperature of the water, the variations of power supply Energy (in kWh) 0.1 Water (in litres) 4 and the quantity of dishes can change these values. CARE AND CLEANING Warning! Switch the appliance off before you clean the filters. Cleaning the filters 3. To remove the fine filter, turn the handle to the right. 4. Clean the fine filter fully with a brush under running water. Caution! Do not use the appliance without the filters.
Caution! To prevent damage to the nozzle openings, clean them carefully. 2. Clean the spray arm. 3. To attach again the spray arm, press upwards until it goes back into position. Lower spray arm 1. Turn the fixing screw B) counterclockwise. 2. Pull the spray arm off the shaft. Ceiling spray arm 1. Turn the fixing screw (A) counterclockwise. 2. Pull the spray arm off the shaft. 3. Clean the spray arm and the fixing screw. 4. Attach the spray arm with the fixing screw by turn it clockwise.
Caution! Switch off the appliance before you do the below suggested corrective actions. Fault code and malfunction Possible cause and solution • intermittent audible signal • digital display shows The dishwasher does not fill with water • The water tap is blocked or furred with limescale. Clean the water tap. • The water tap is closed. Open the water tap. • The filter in the water inlet hose is blocked. Clean the filter. • The connection of the water inlet hose is not correct.
The cleaning results are not satisfactory There are streaks, milky spots or a bluish coating on glasses and dishes • Decrease the rinse aid dosage. Dry water drop signs on glasses and dishes • Increase rinse aid dosage. • The detergent can be the cause. TECHNICAL DATA Dimensions Width 546 mm Height 759 mm Depth 571 mm Electrical connection - Voltage Overall power - Fuse Information on the electrical connection is given on the rating plate on the inner edge of the dishwasher door.
2. Additional bracket on the top. This is available as a special accessory. Contact the Service Force Centre. WATER CONNECTION Water inlet hose Connected the appliance to a hot (max. 60°) or cold water supply. If the hot water comes from alternative sources of energy that are more environmentally friendly (e.g. solar or photovoltaic panels and aeolian), use a hot water supply to decrease energy consumption. Connect the inlet hose to a water tap with an external thread of 3/4”.
Do not replace the mains cable yourself. Contact the Service Force Centre. Make sure that the mains plug is accessible after installation. Do not pull the mains cable to disconnect the appliance. Always pull the mains plug. ENVIRONMENT CONCERNS The symbol on the product or on its packaging indicates that this product may not be treated as household waste. Instead it should be taken to the appropriate collection point for the recycling of electrical and electronic equipment.
Warranty / customer service For each product we provide a two-year guarantee from the date of purchase or delivery to the consumer (with a guarantee certificate, invoice or sales receipt serving as proof). The guarantee covers the costs of materials, labour and travel.
Unsere Kundendienst-Telefonnummer: Le numéro de téléphone de notre service après-vente: Il nostro numero di telefono del servizio clientela: Our customer service telephone number: 0848 559 111 oder unter ou sur Internet oppure su Internet or in the internet www.fust.ch Dipl. Ing FUST AG Buchental 4 9245 Oberbüren Tel. (071) 955 50 50 Dipl. Ing. FUST AG Riedmoosstrasse 3172 Niederwangen-Bern Tel. (031) 980 11 11 Dipl. Ing. FUST AG An der Rheinstrasse 4414 Füllinsdorf Tel. (061) 906 95 00 Ing. dipl.
117943431-A-092011 www. .